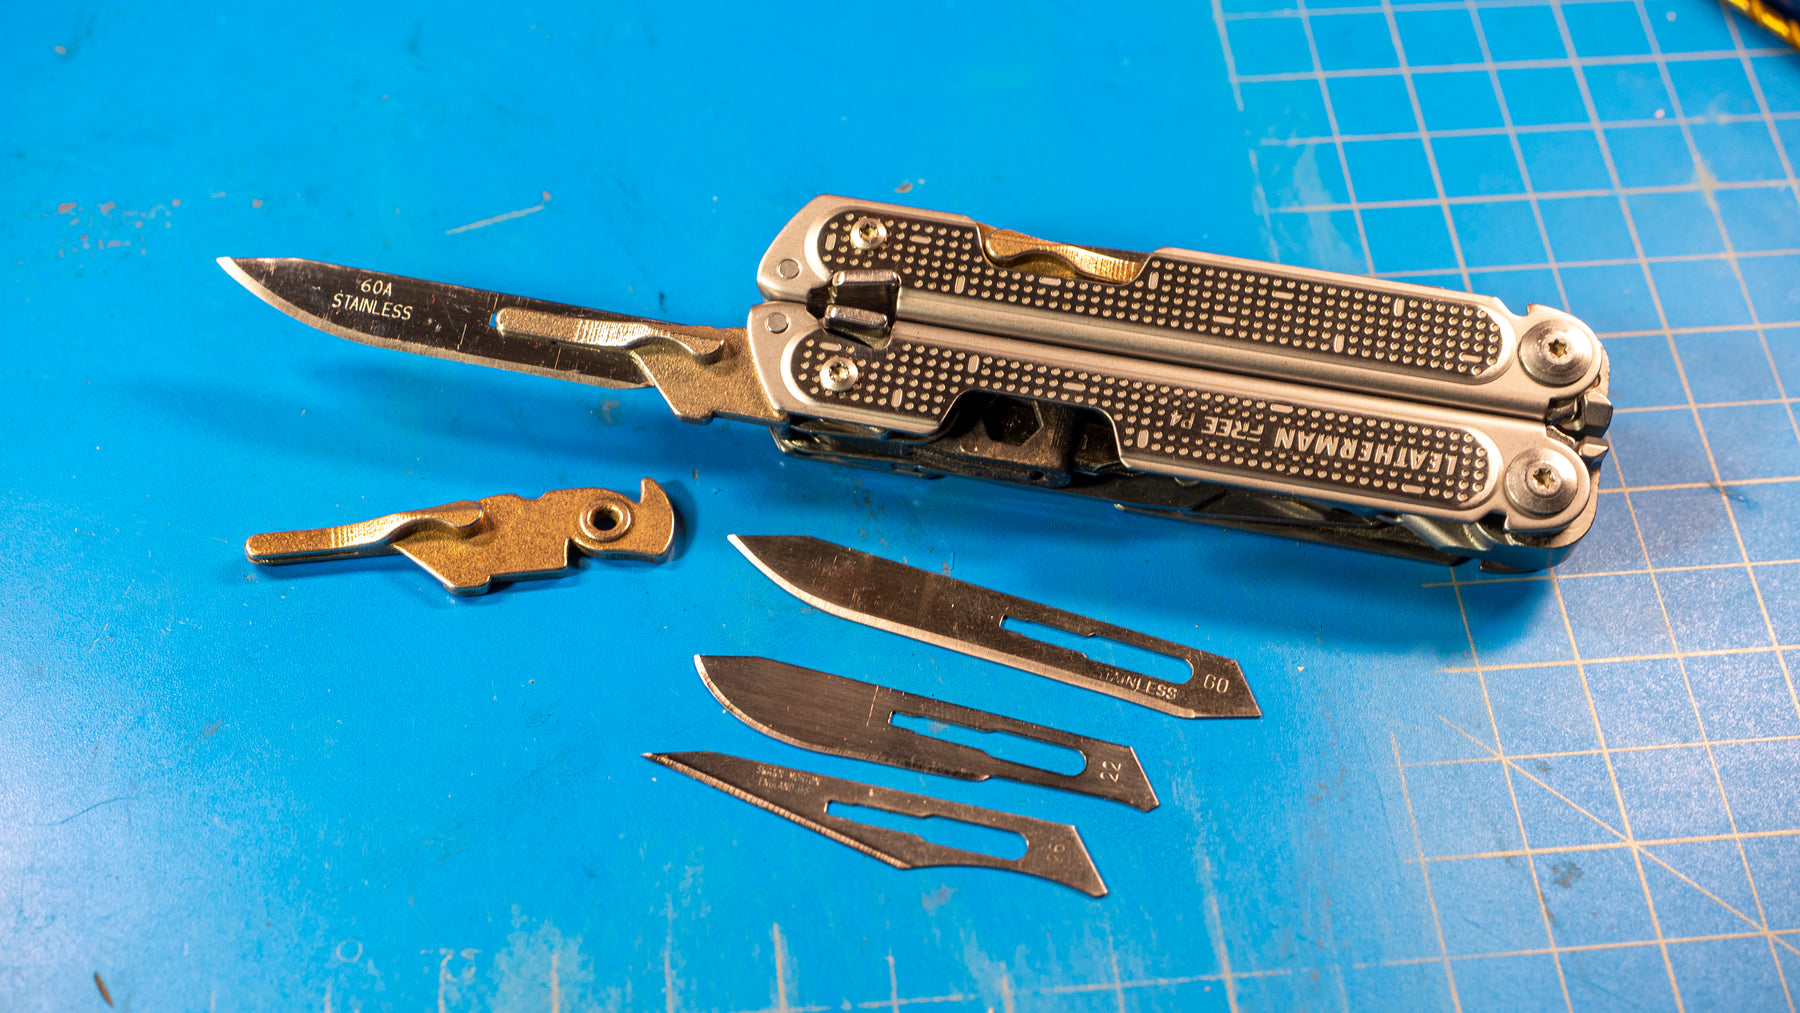


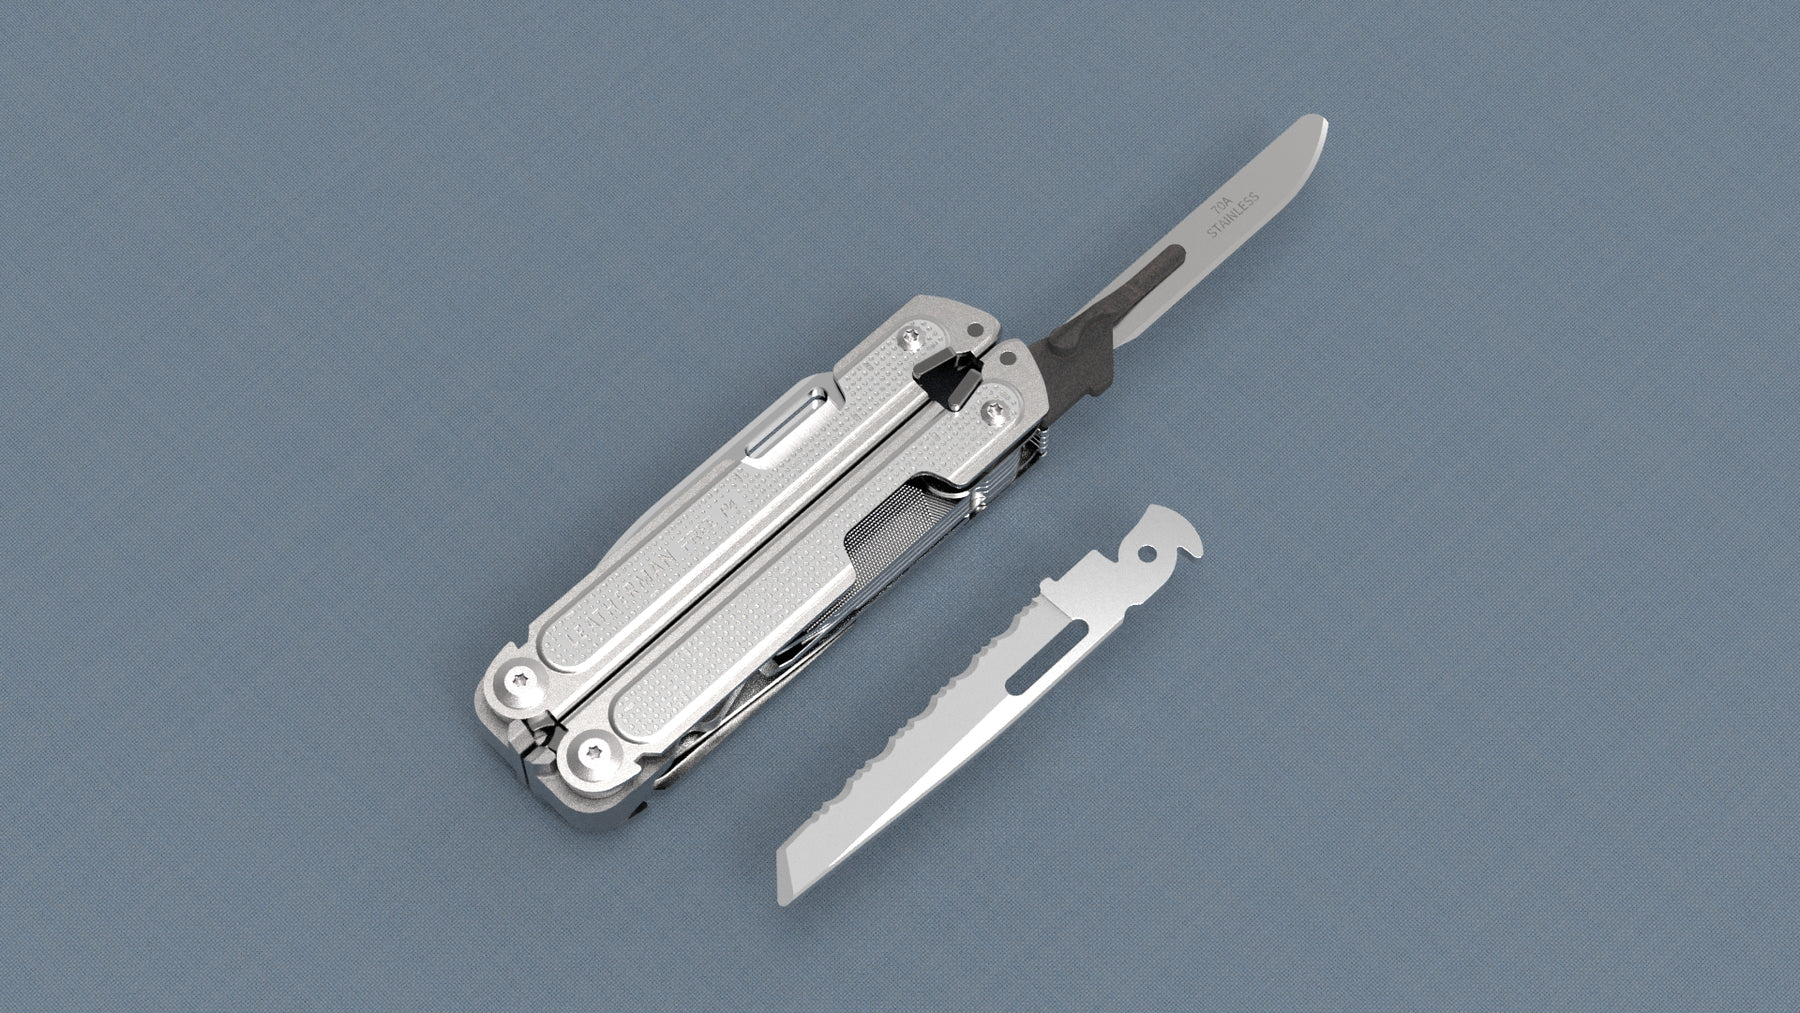
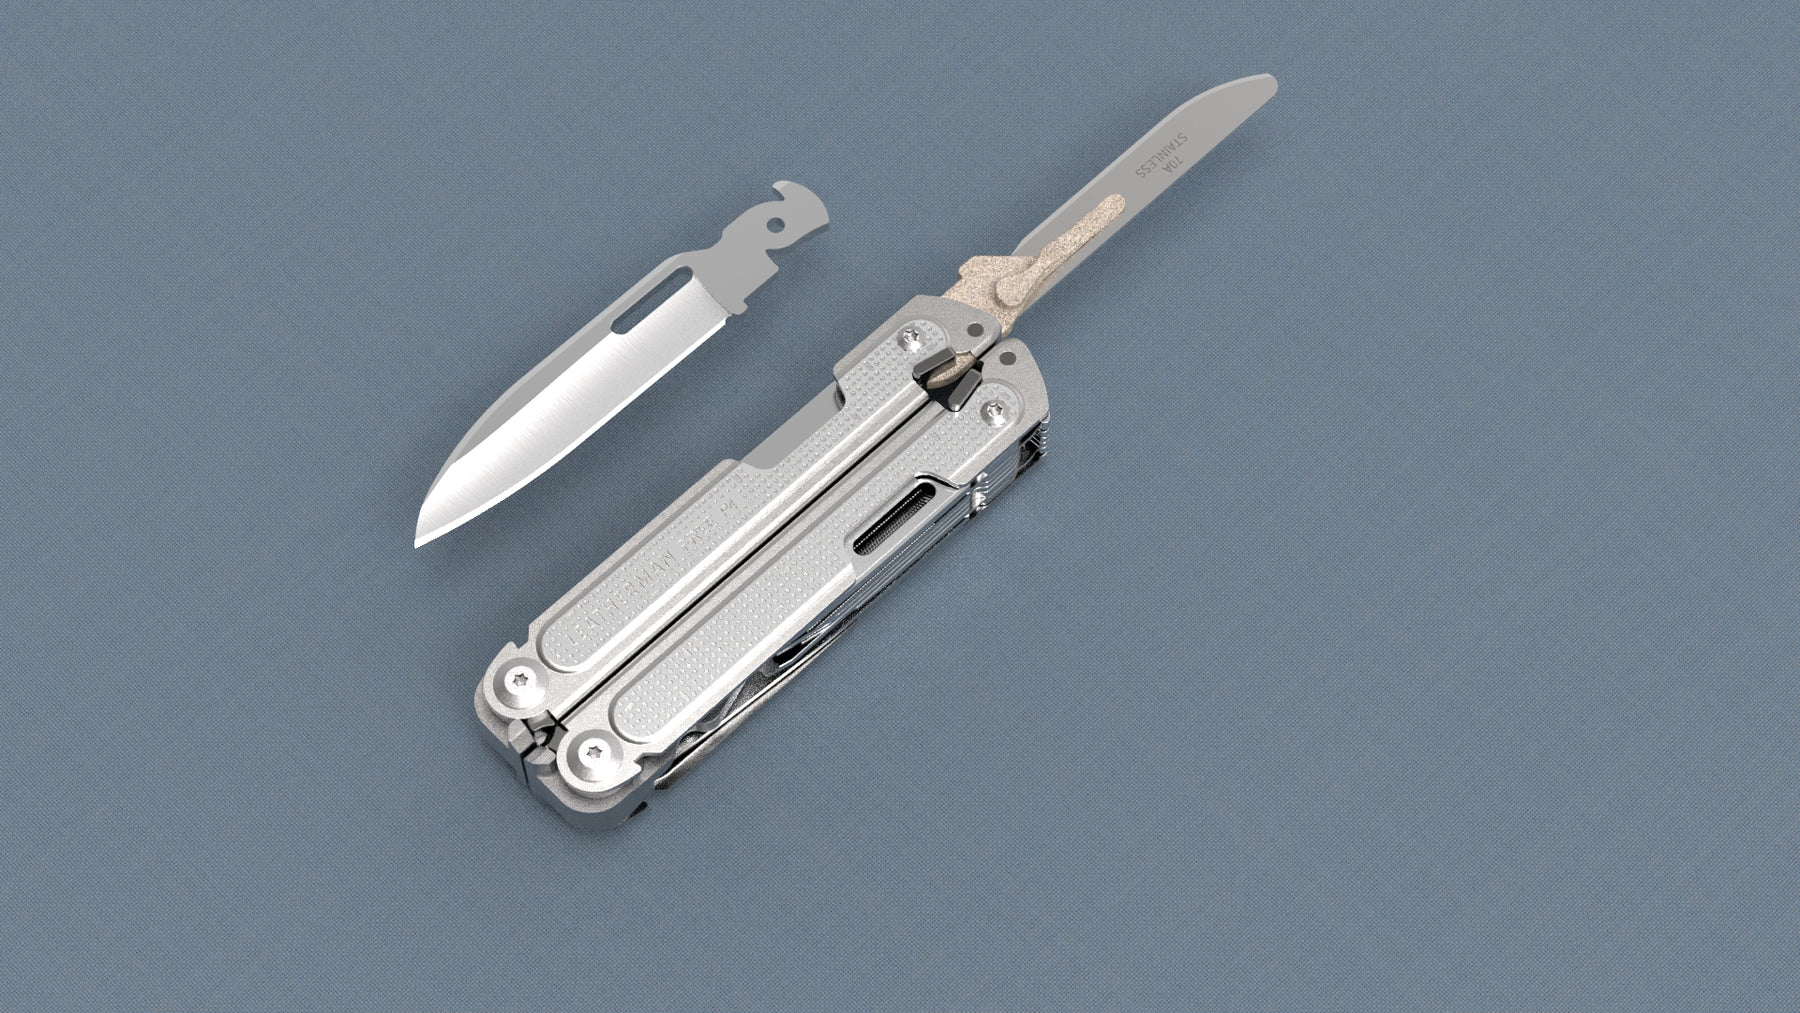
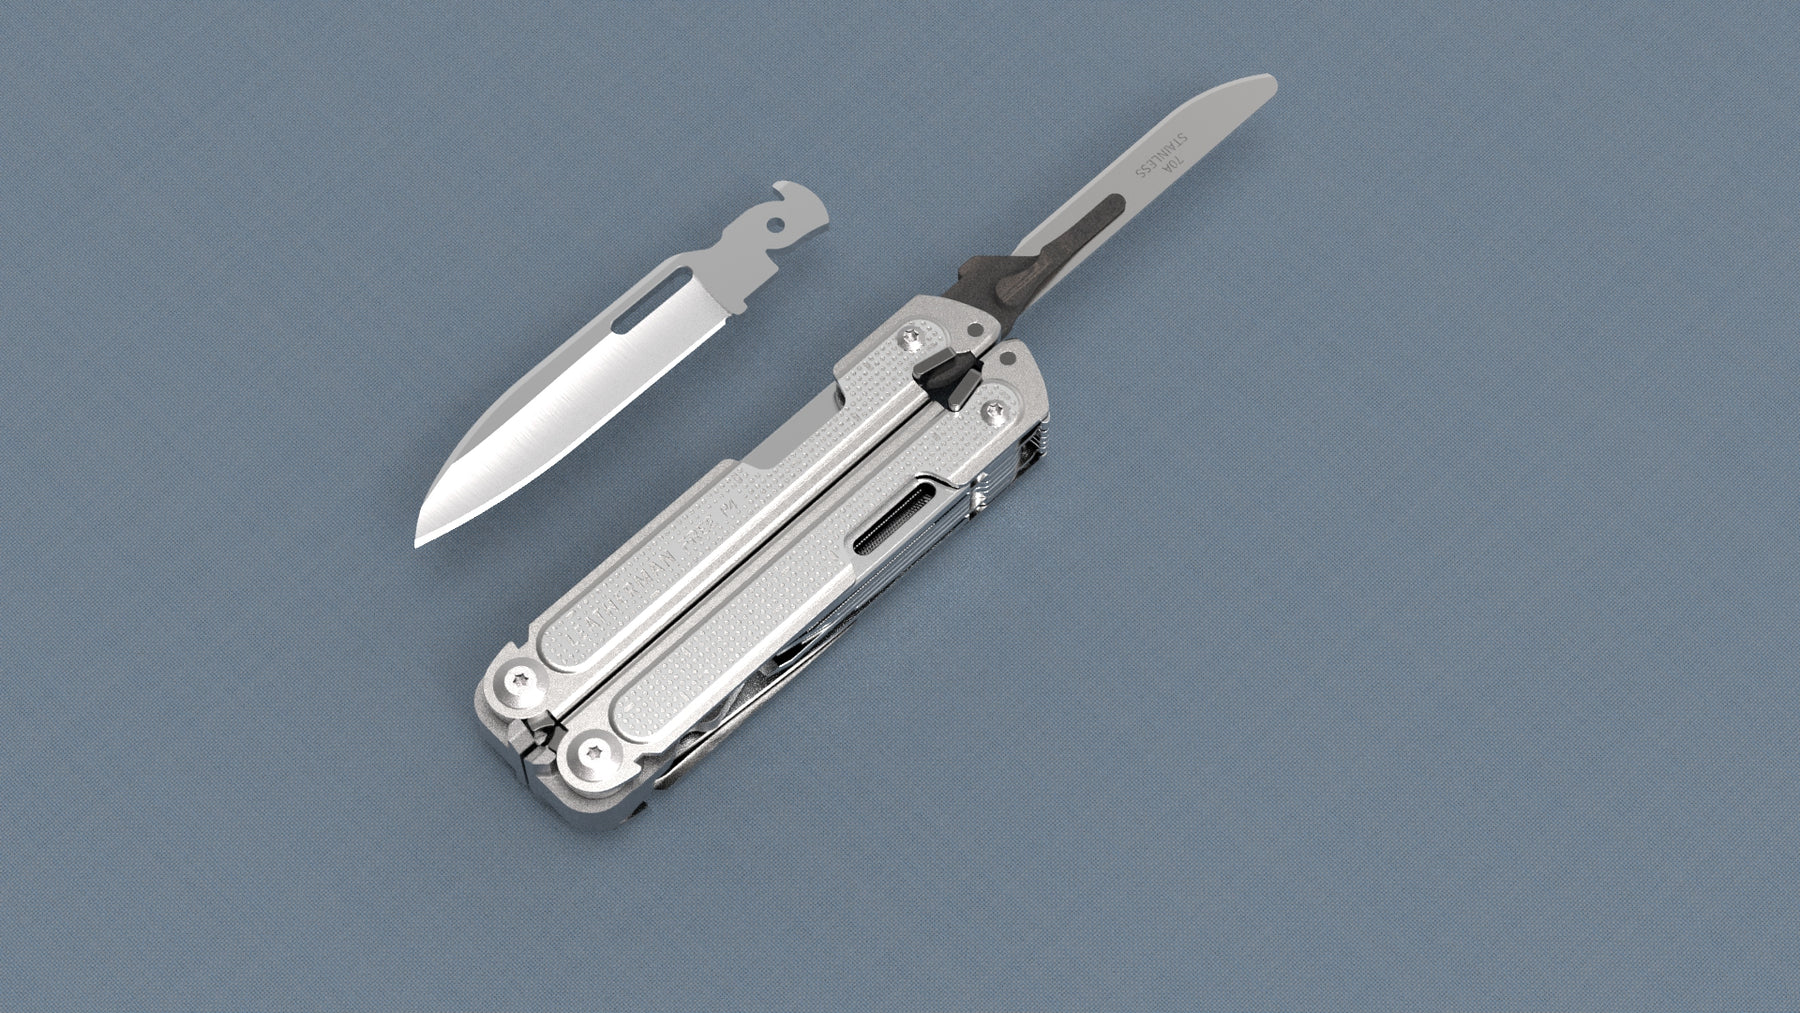
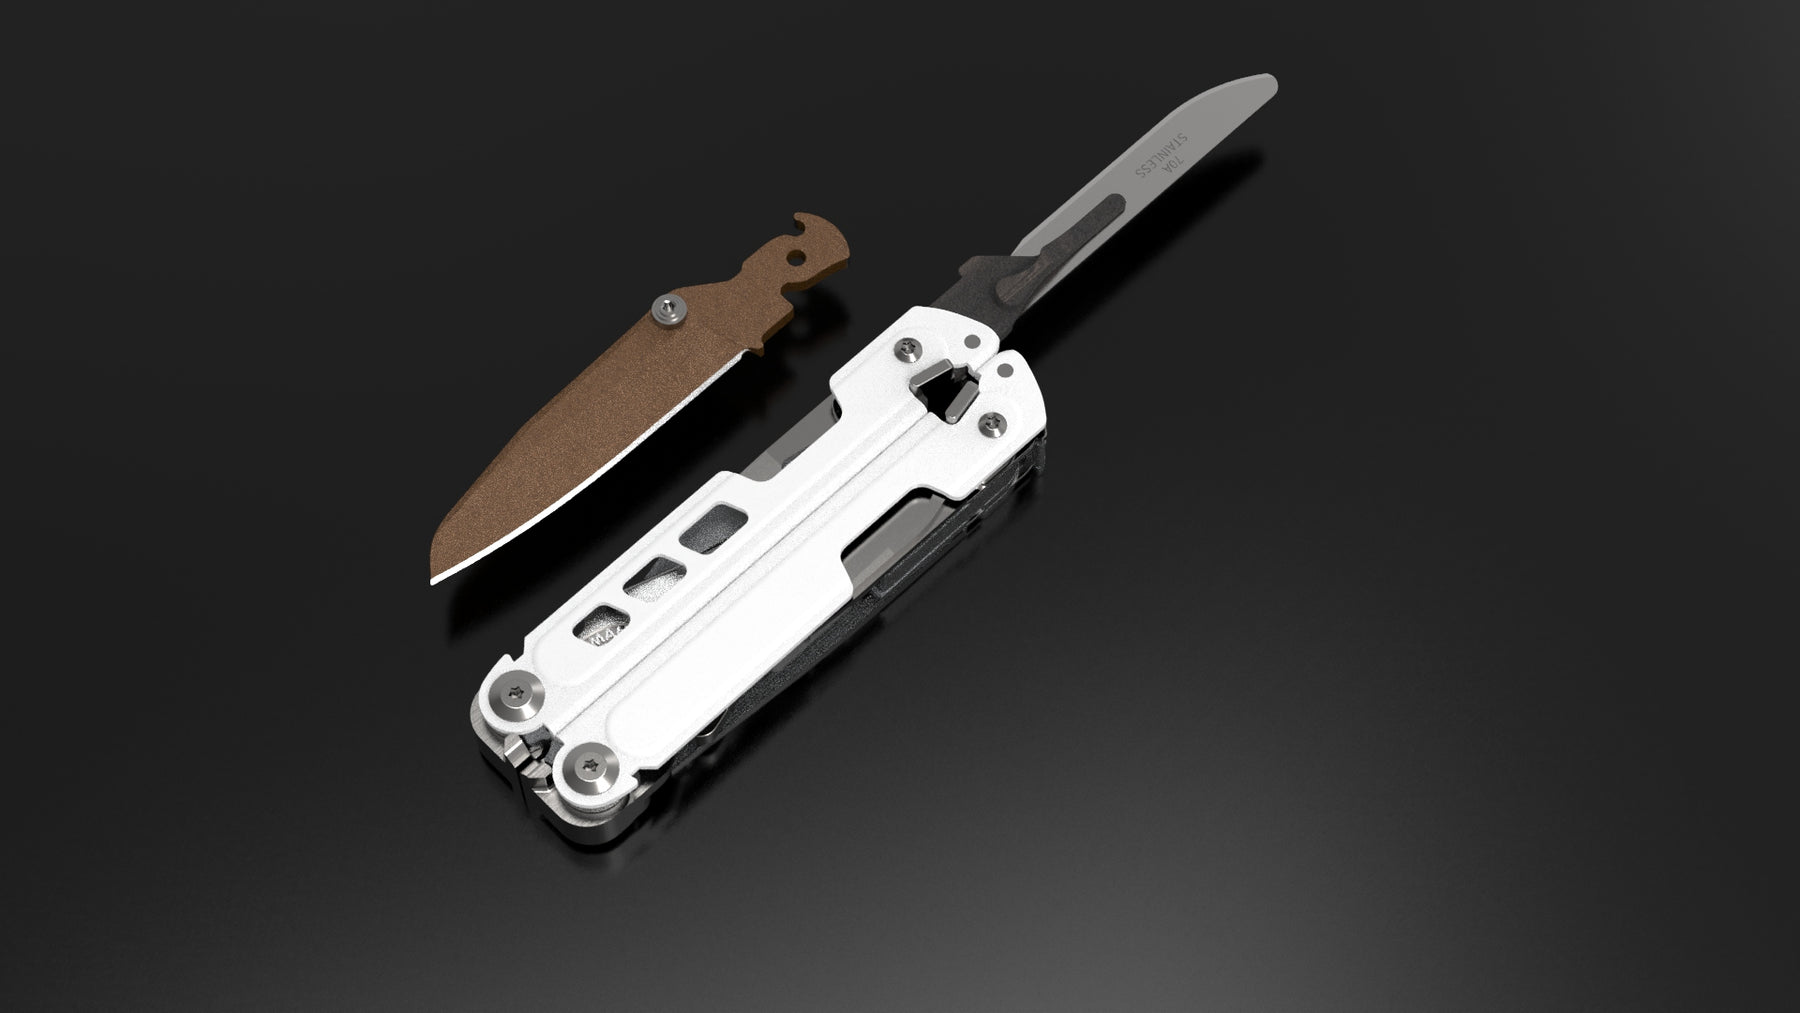

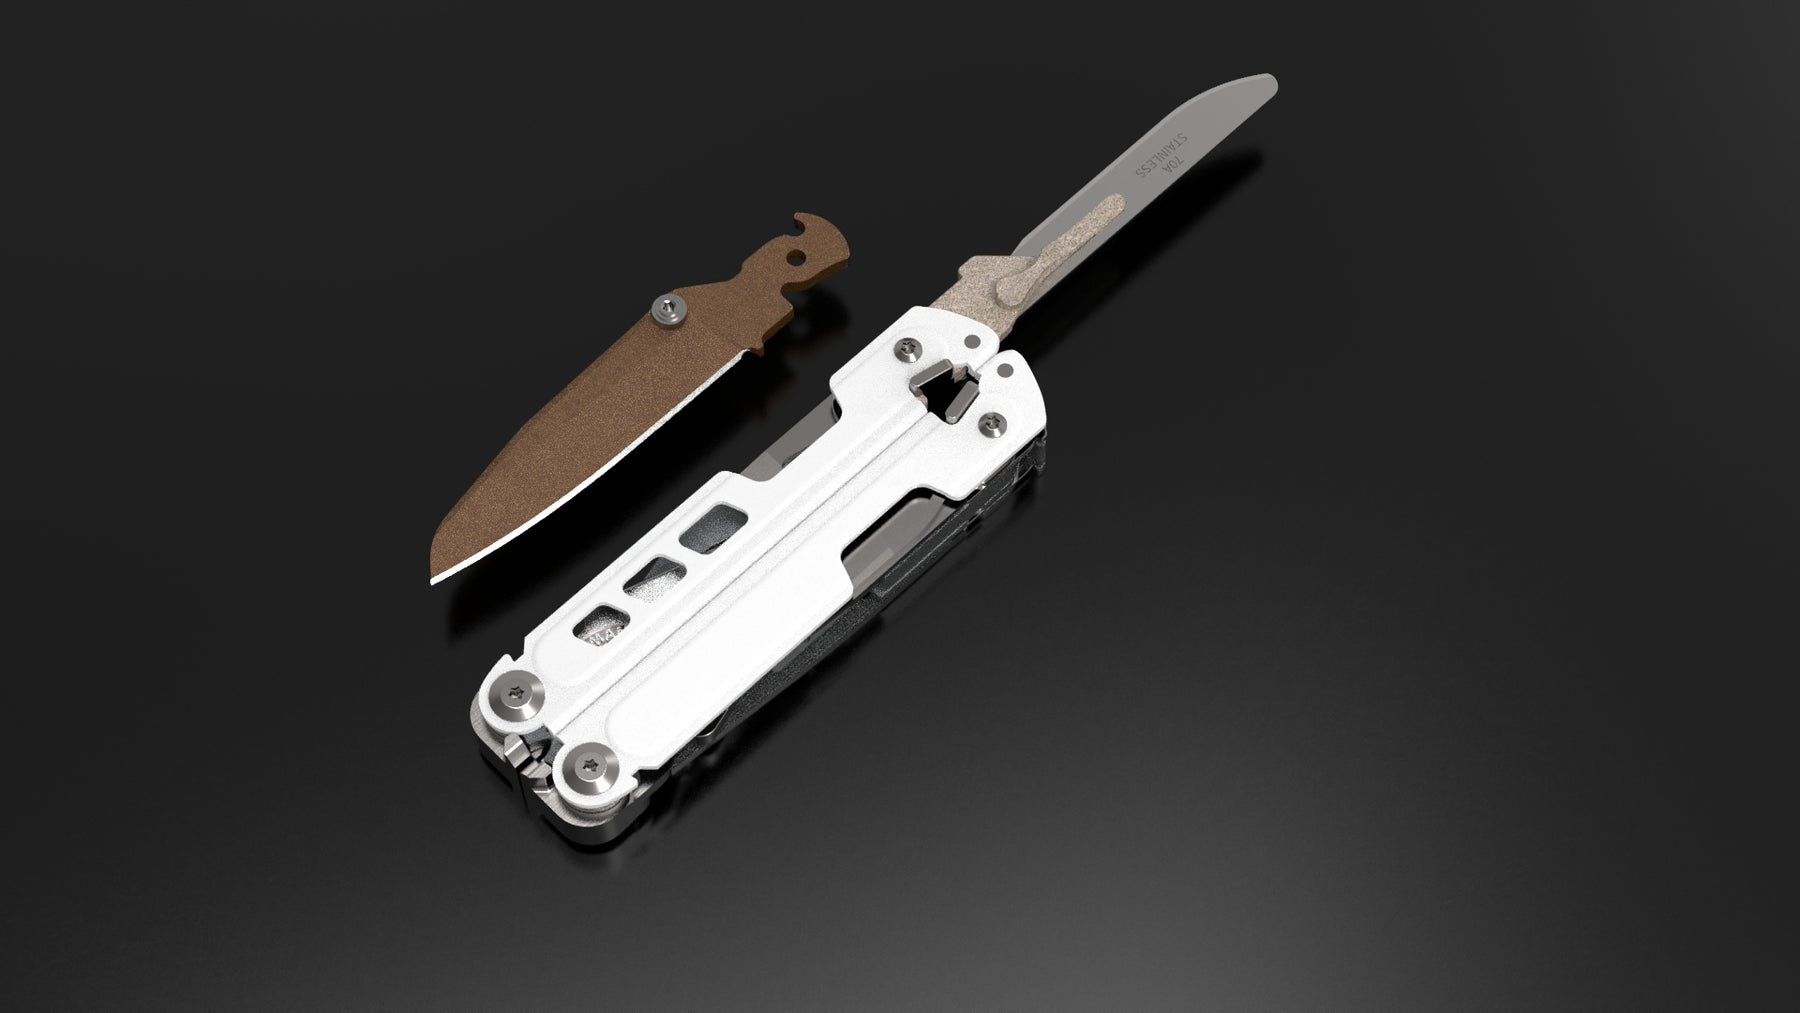
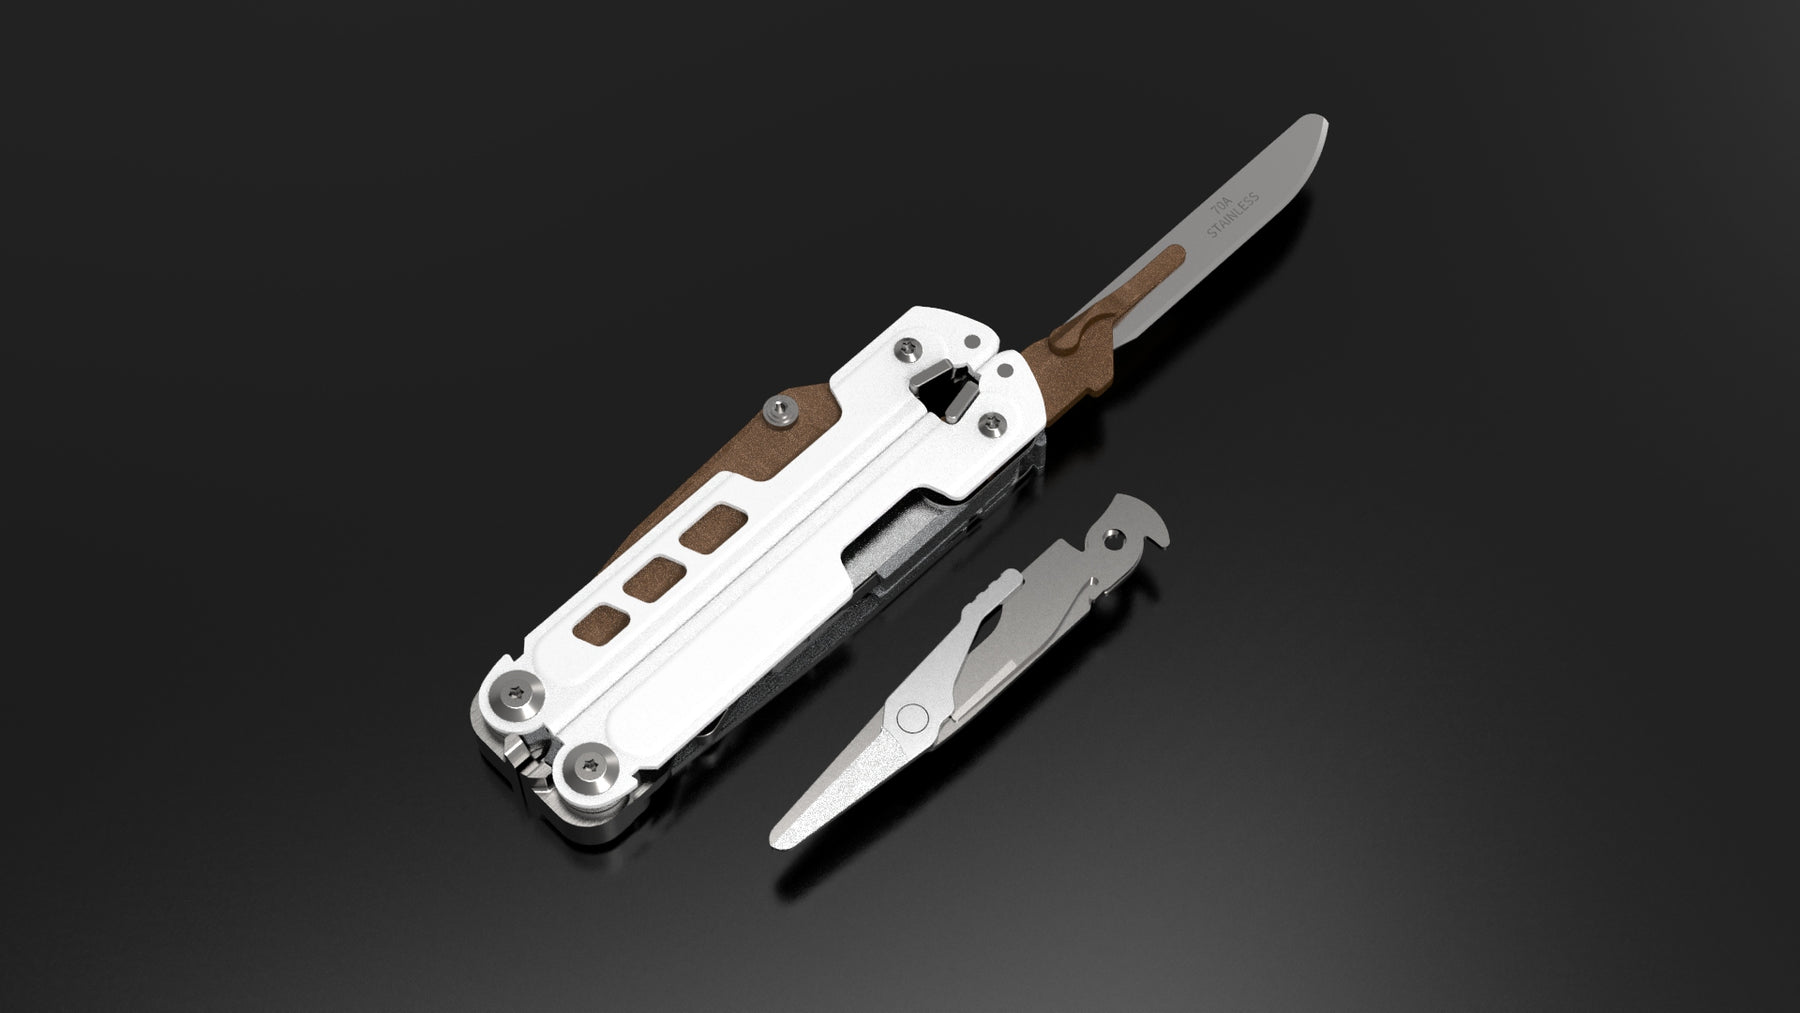
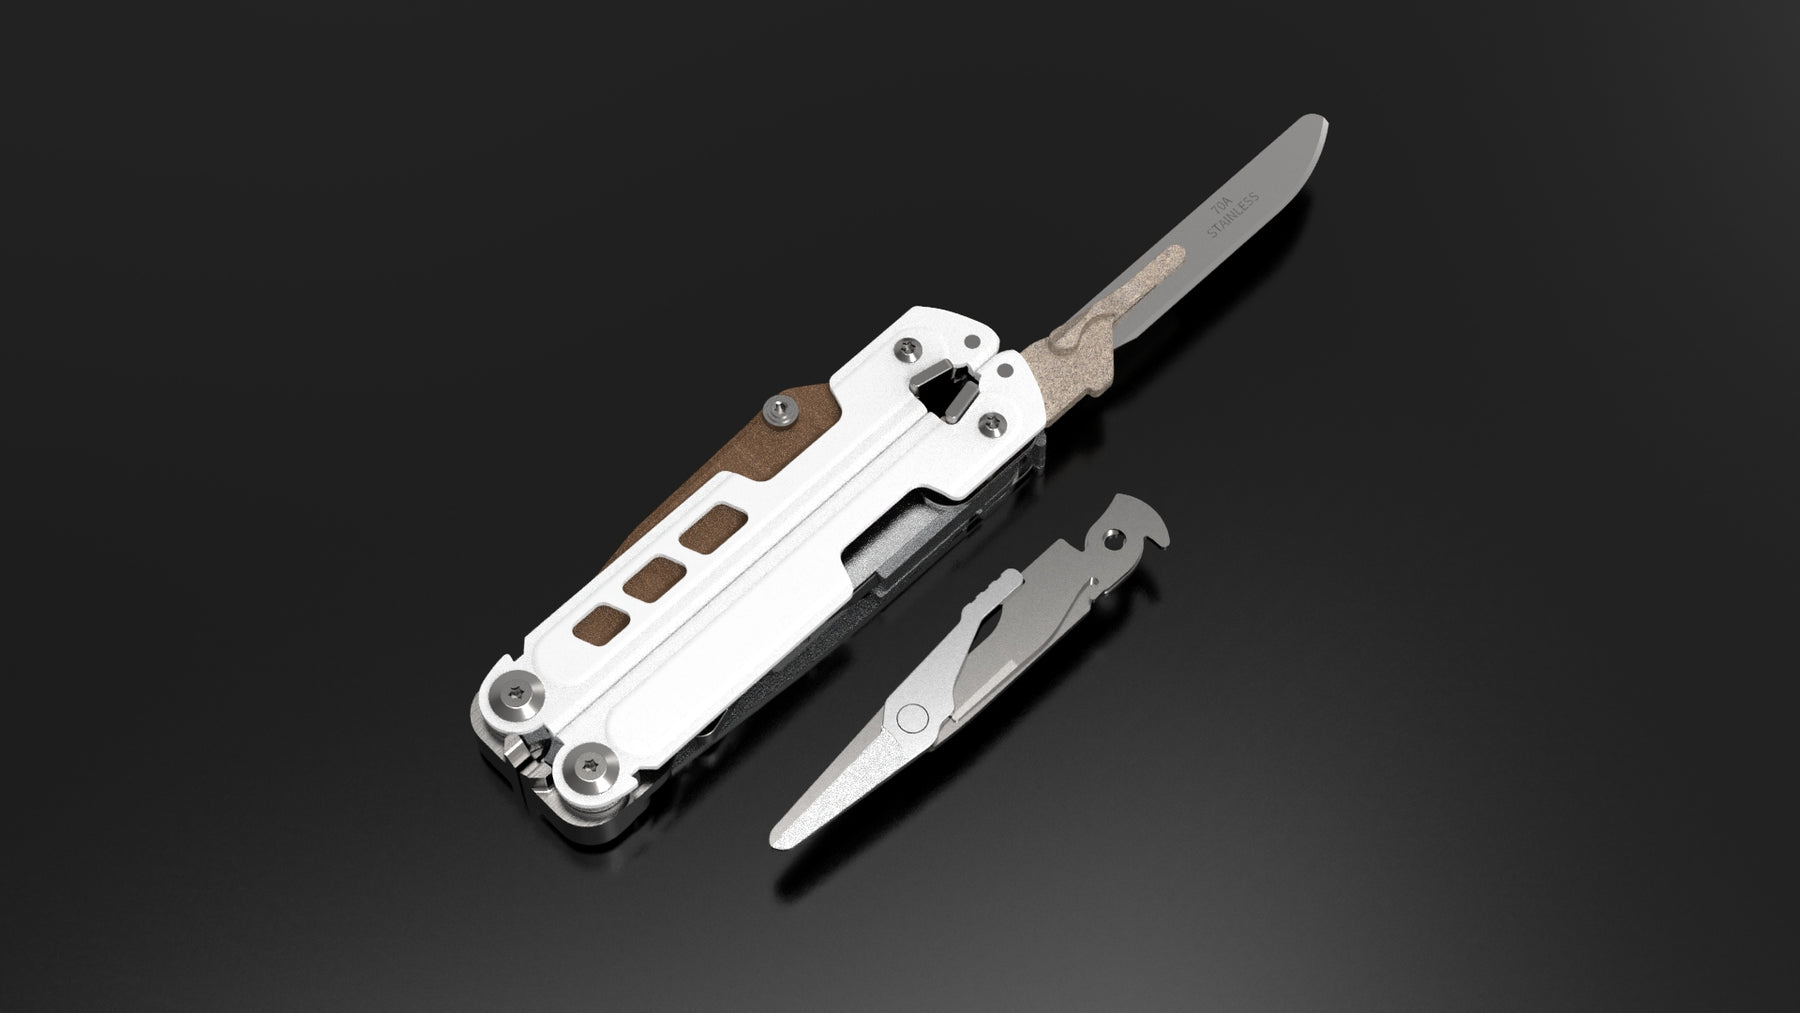
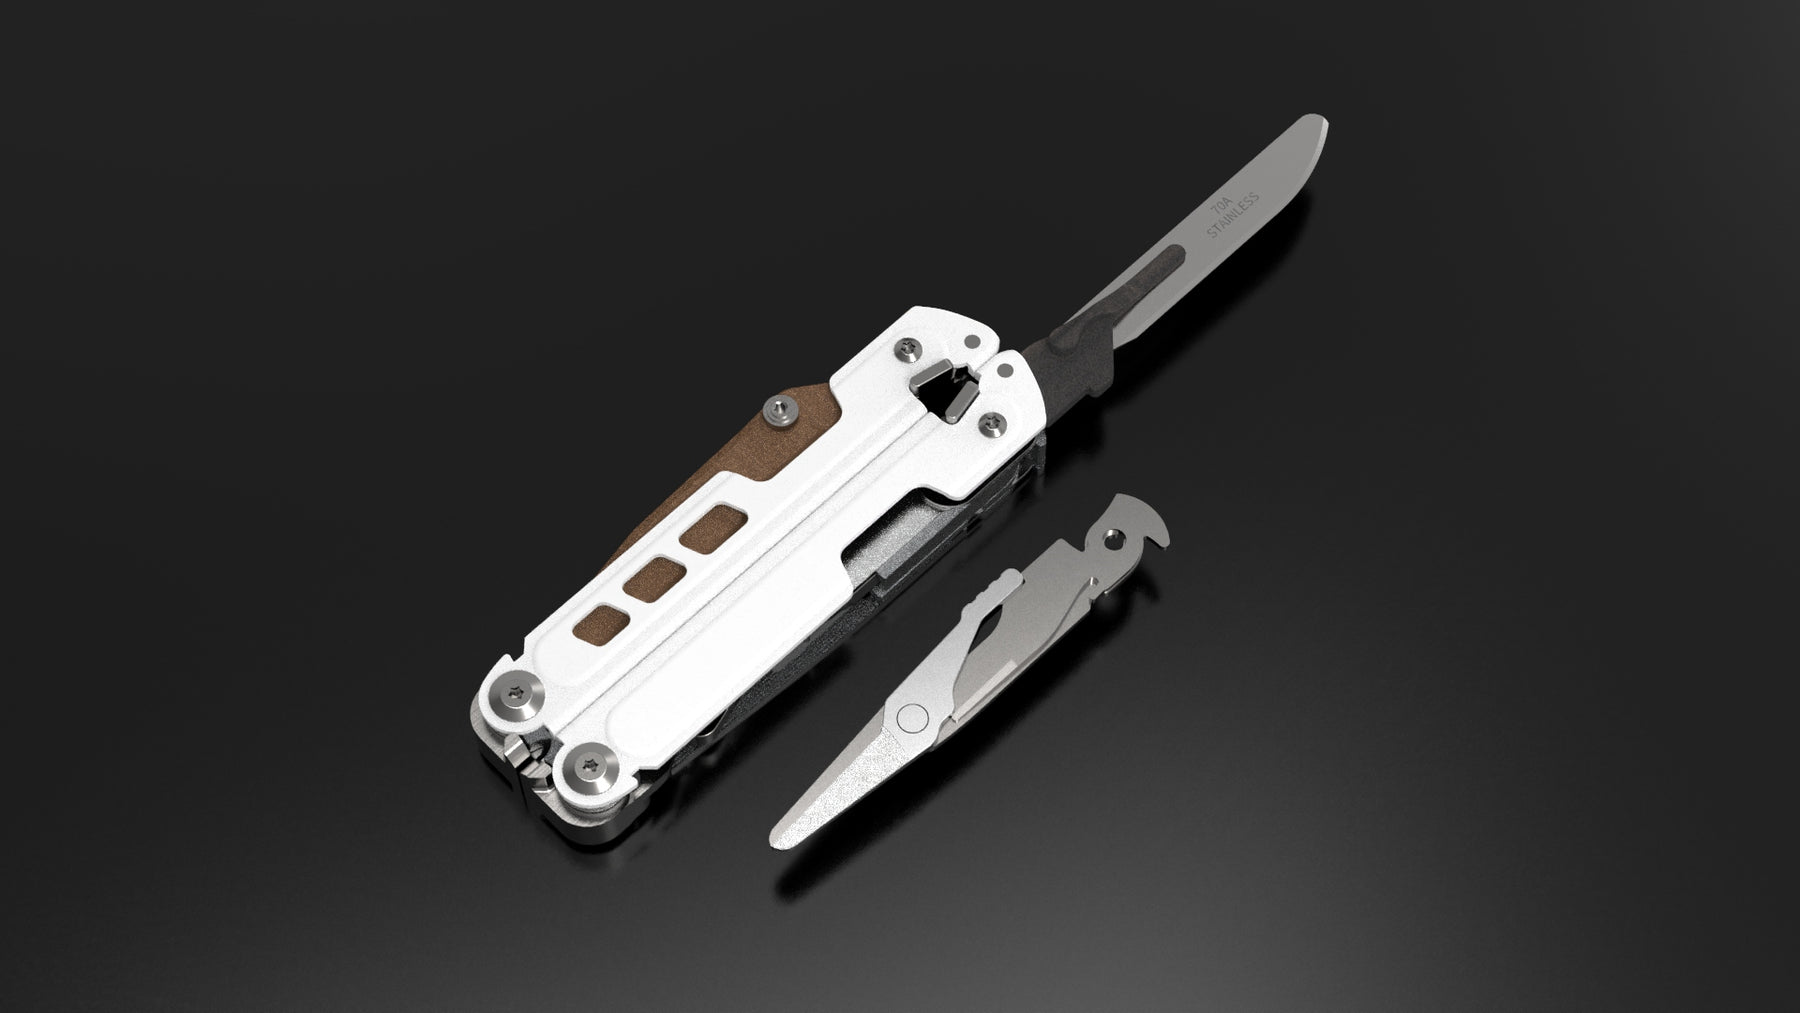


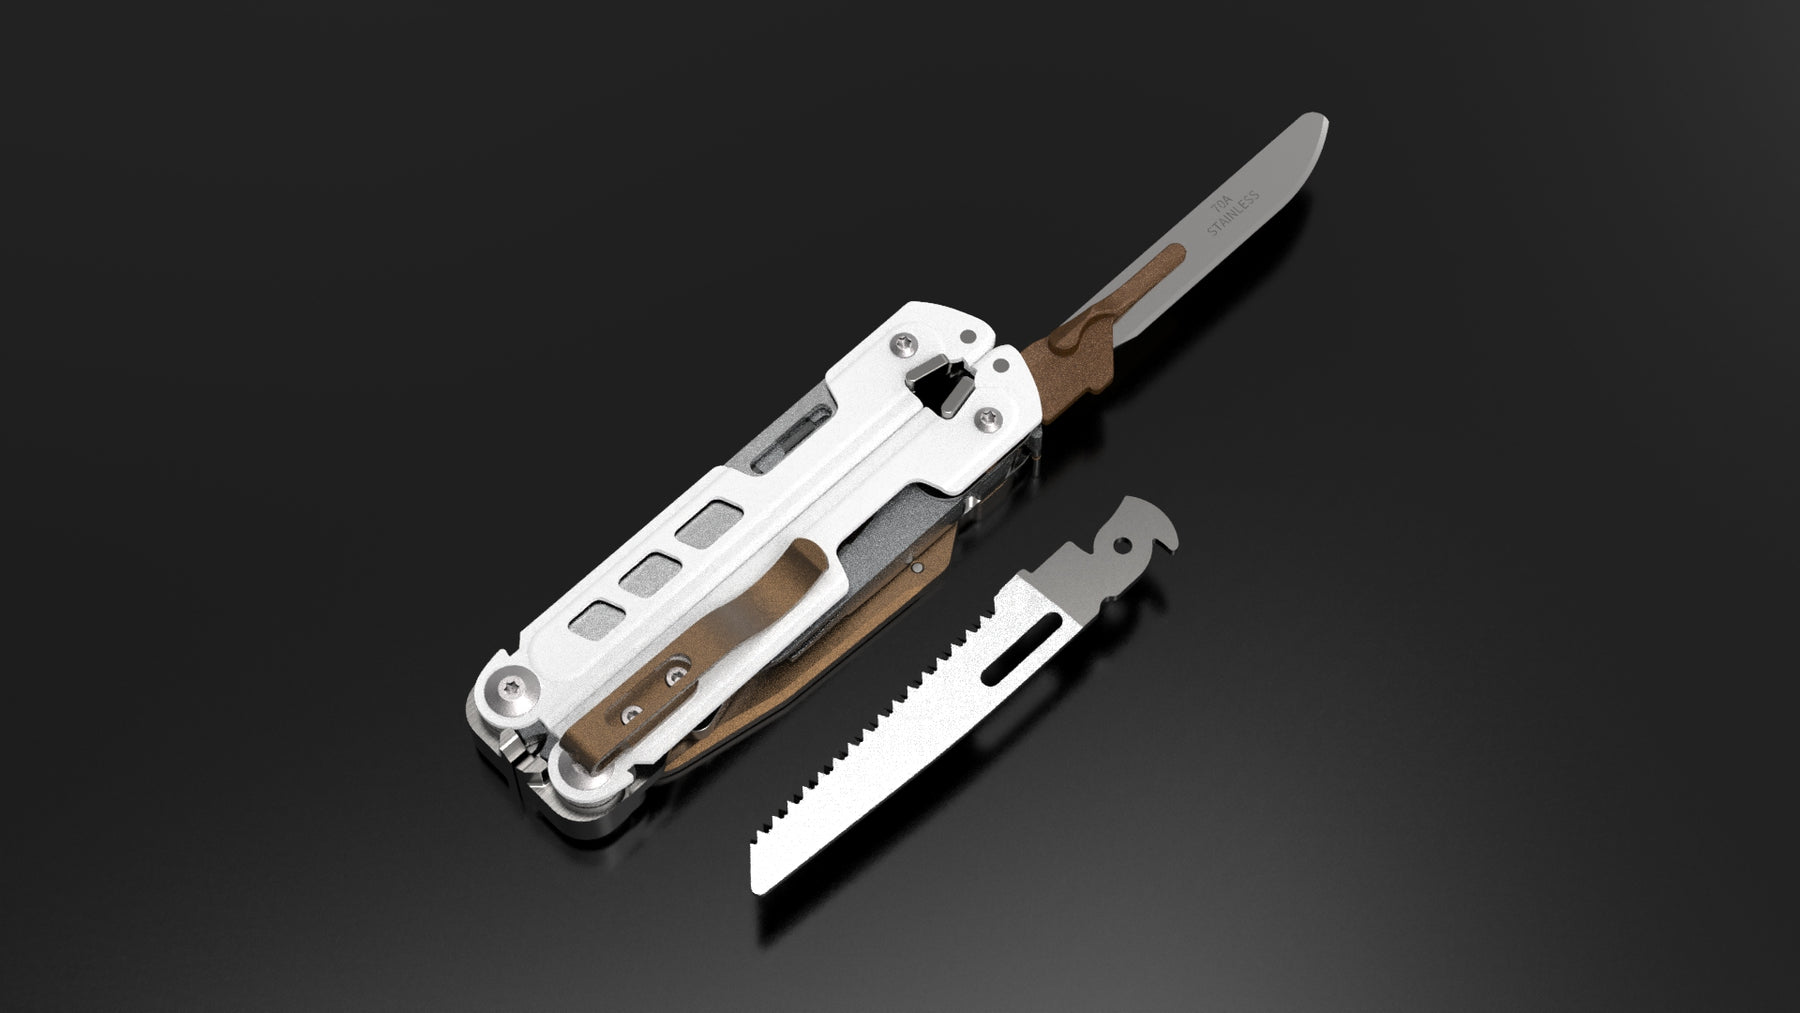
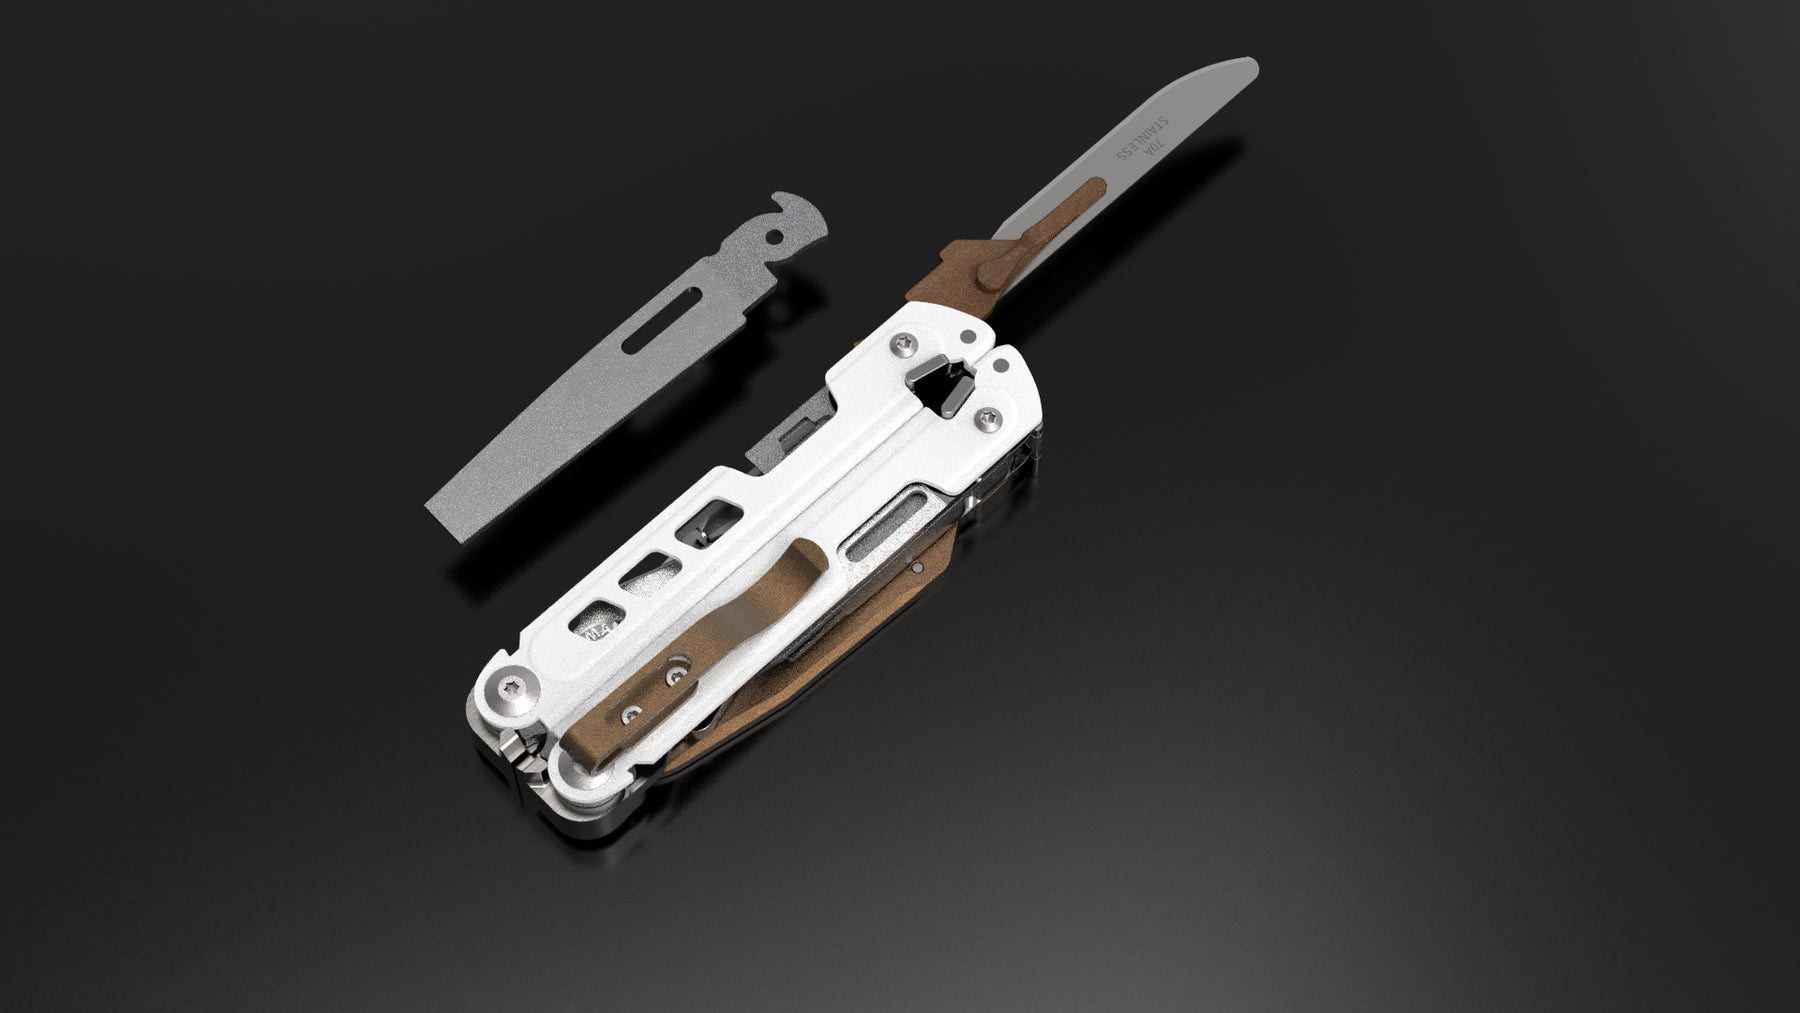
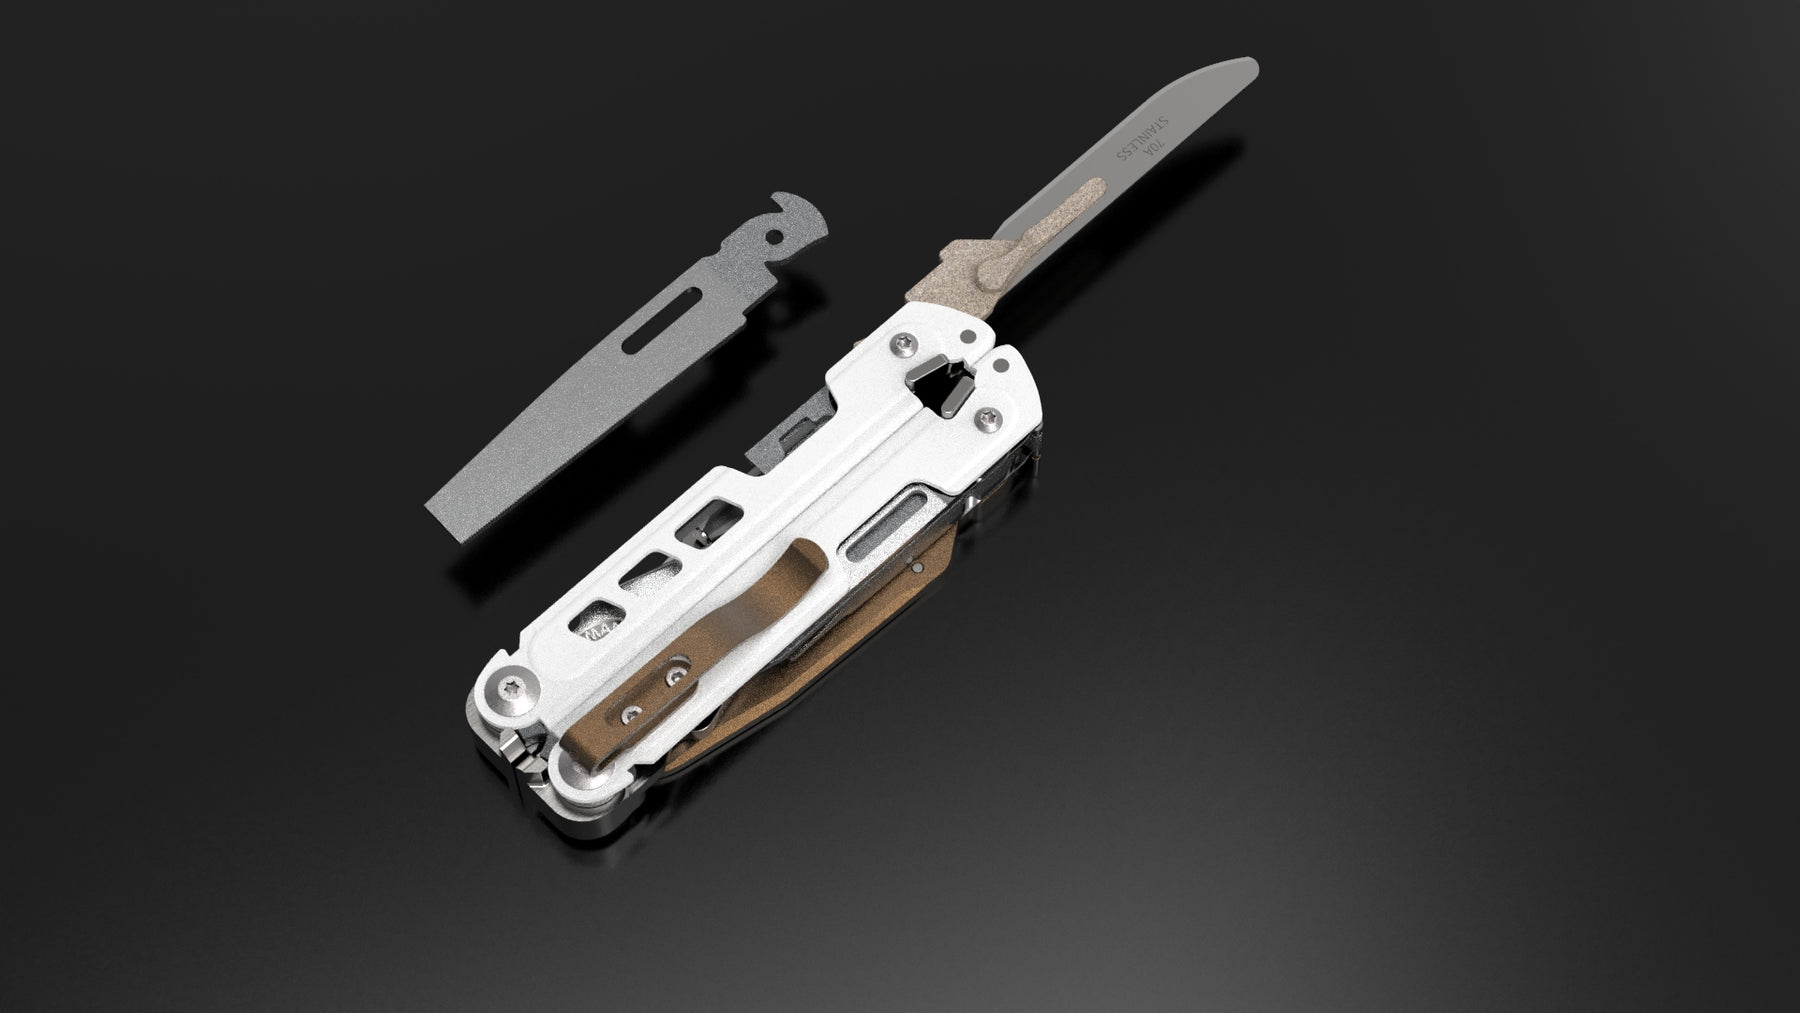

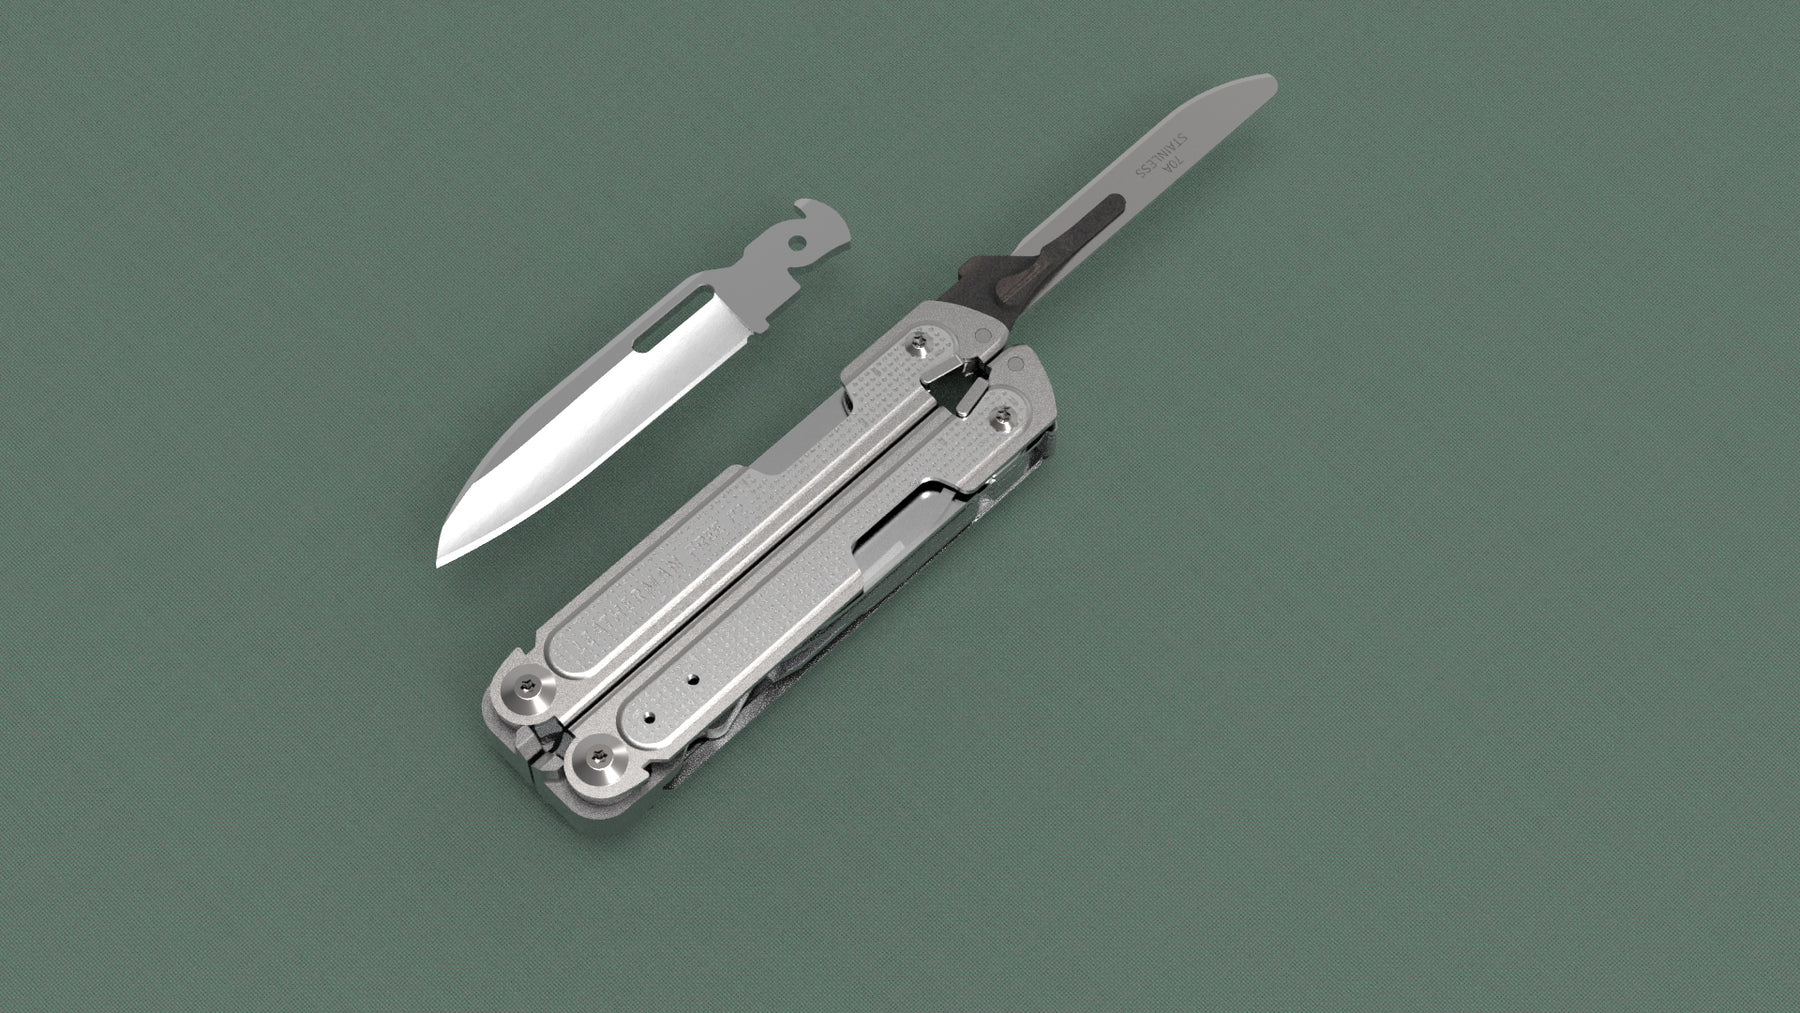
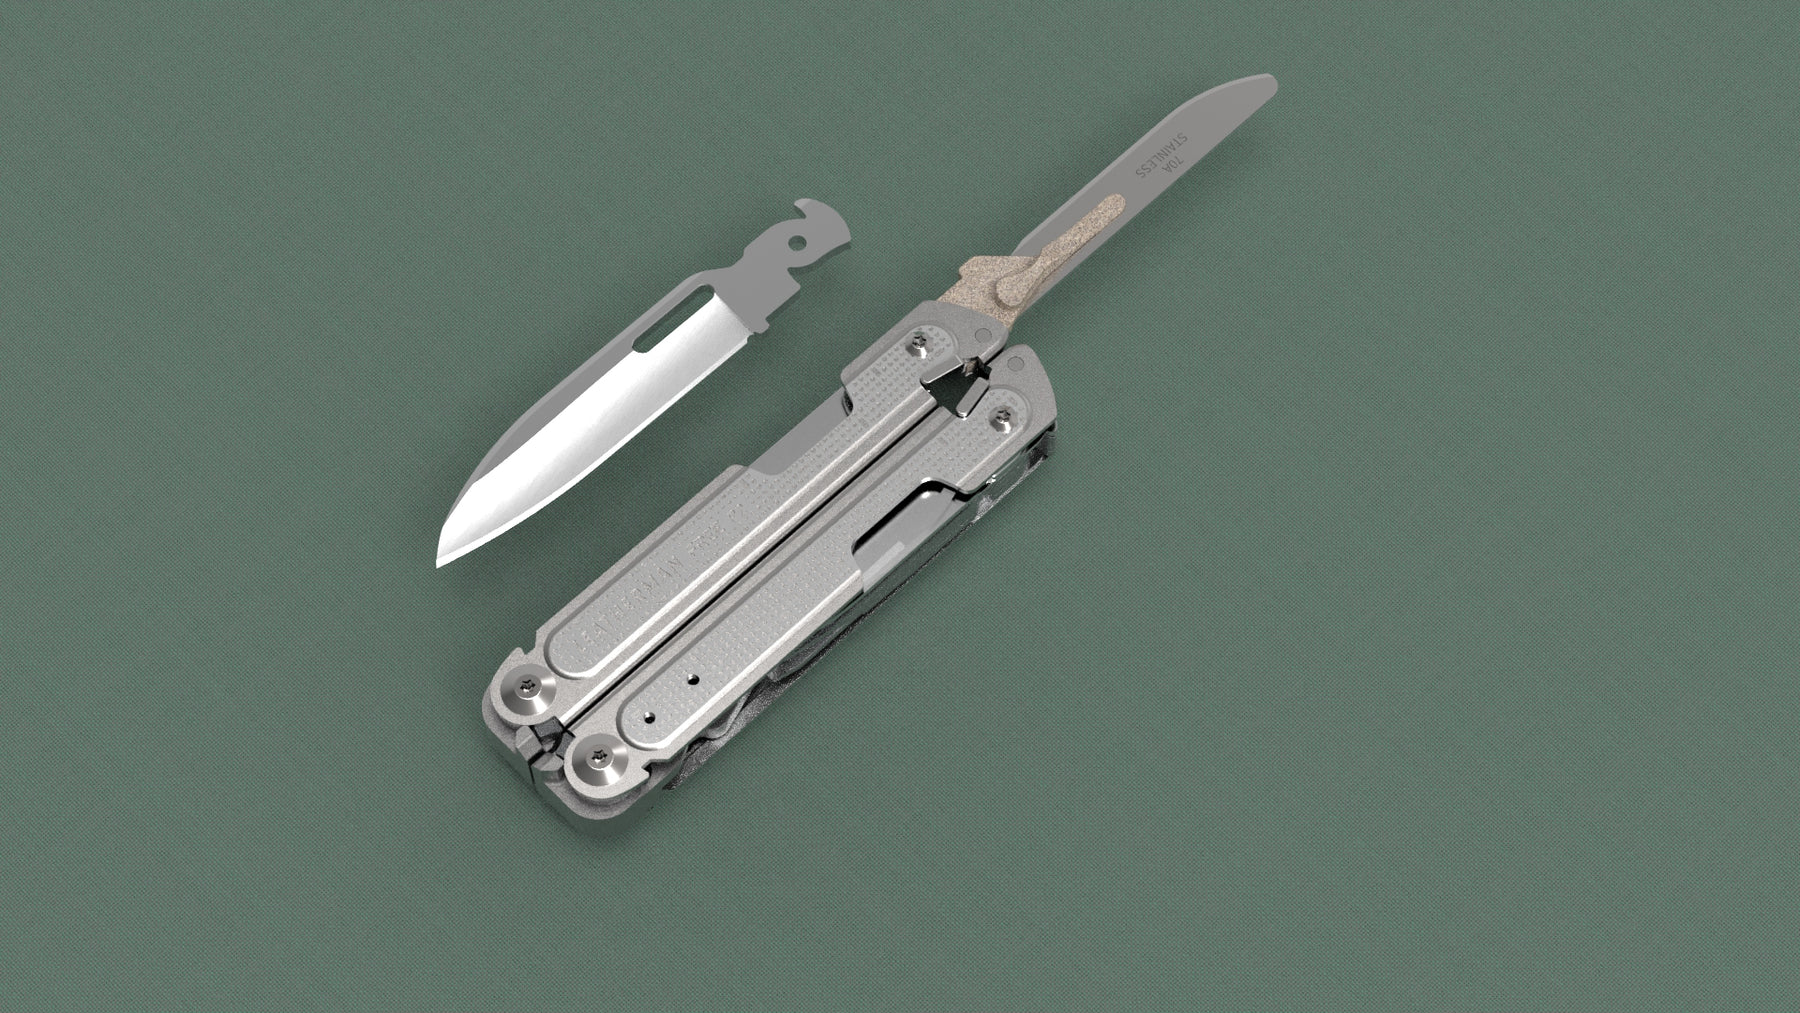

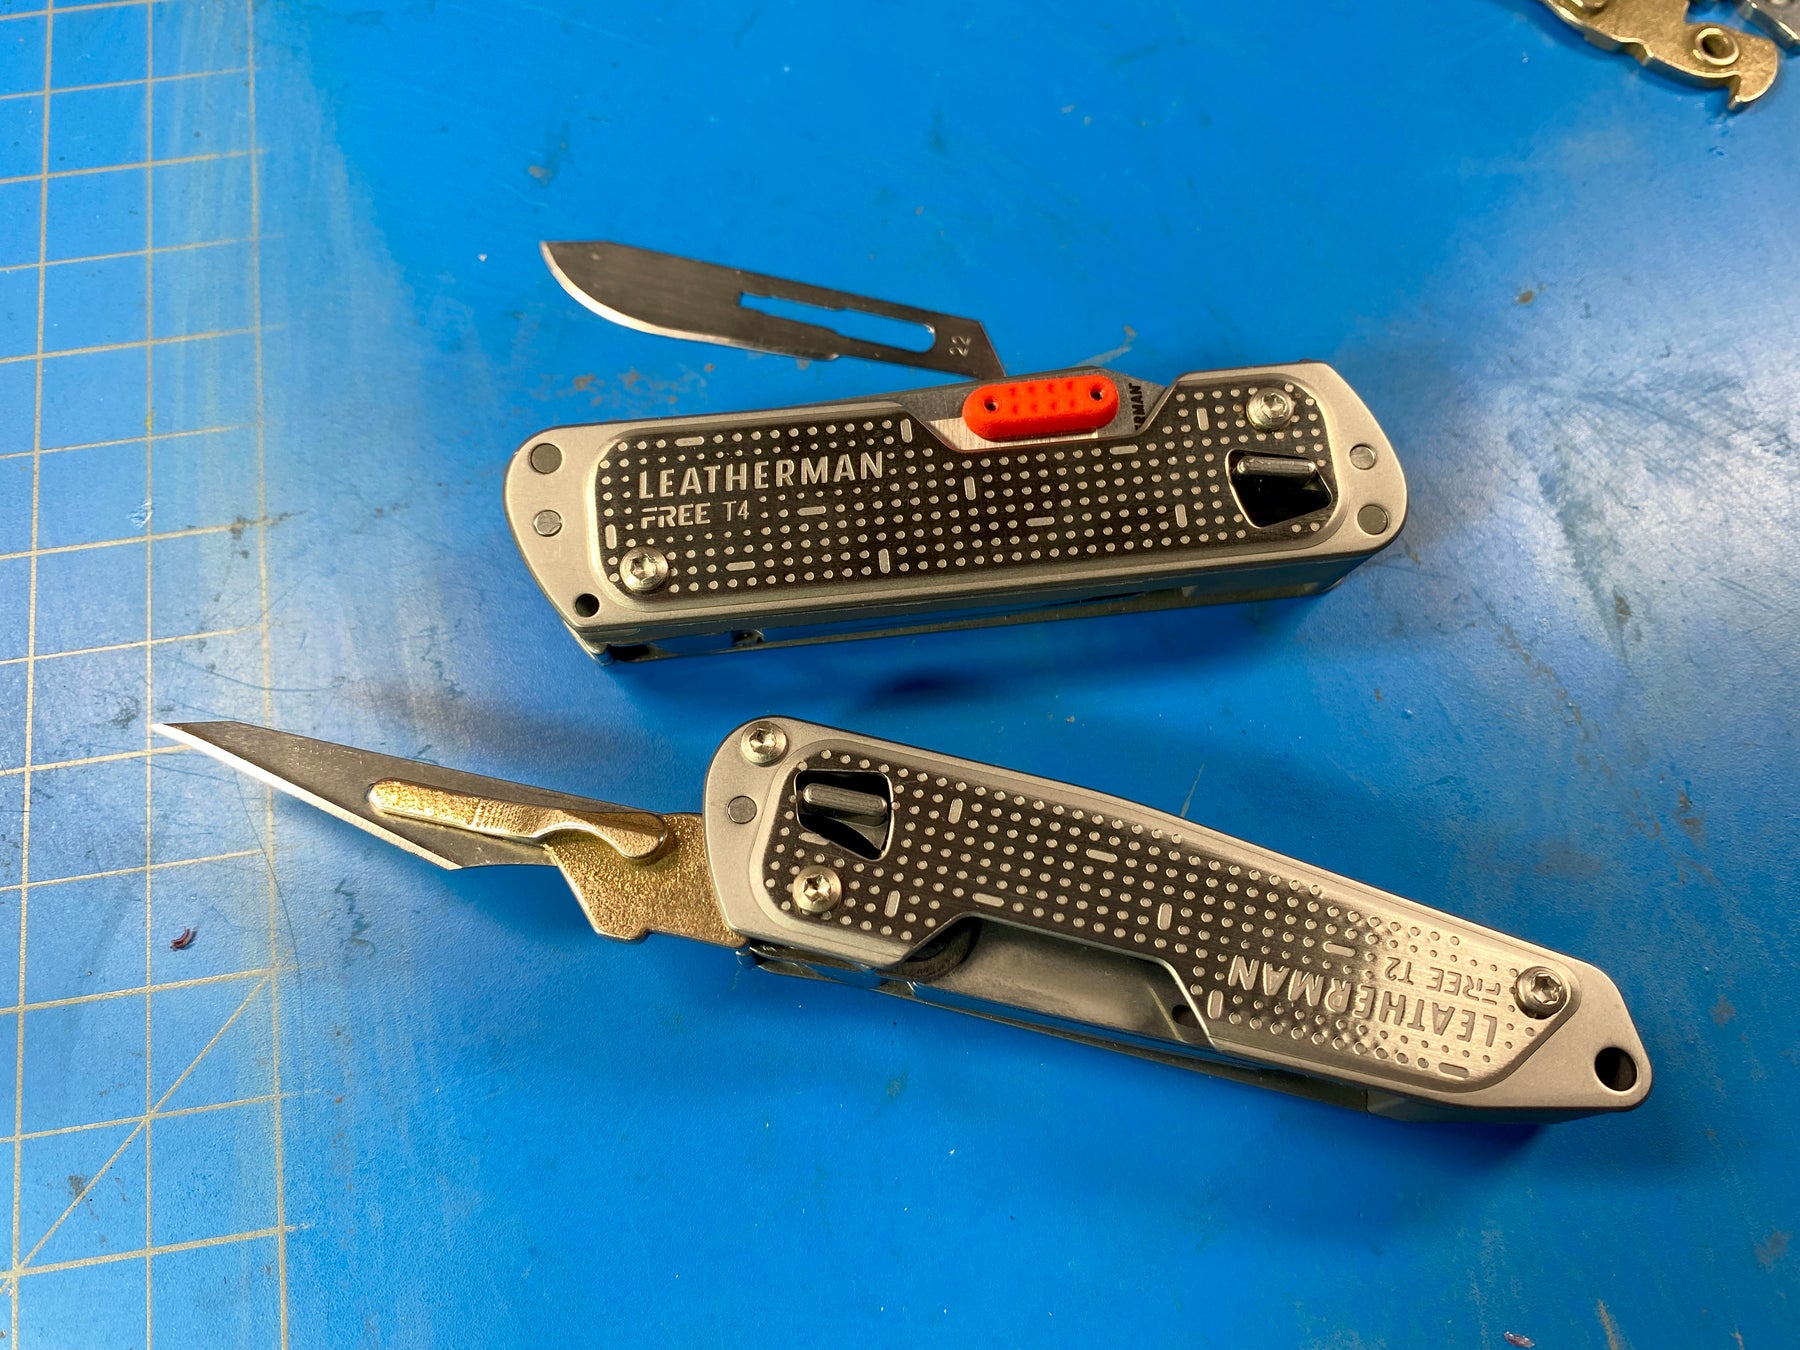
Scalpel holder for Leatherman FREE Series
Regular price $41.00Sorry no longer available, no ETA for coming back
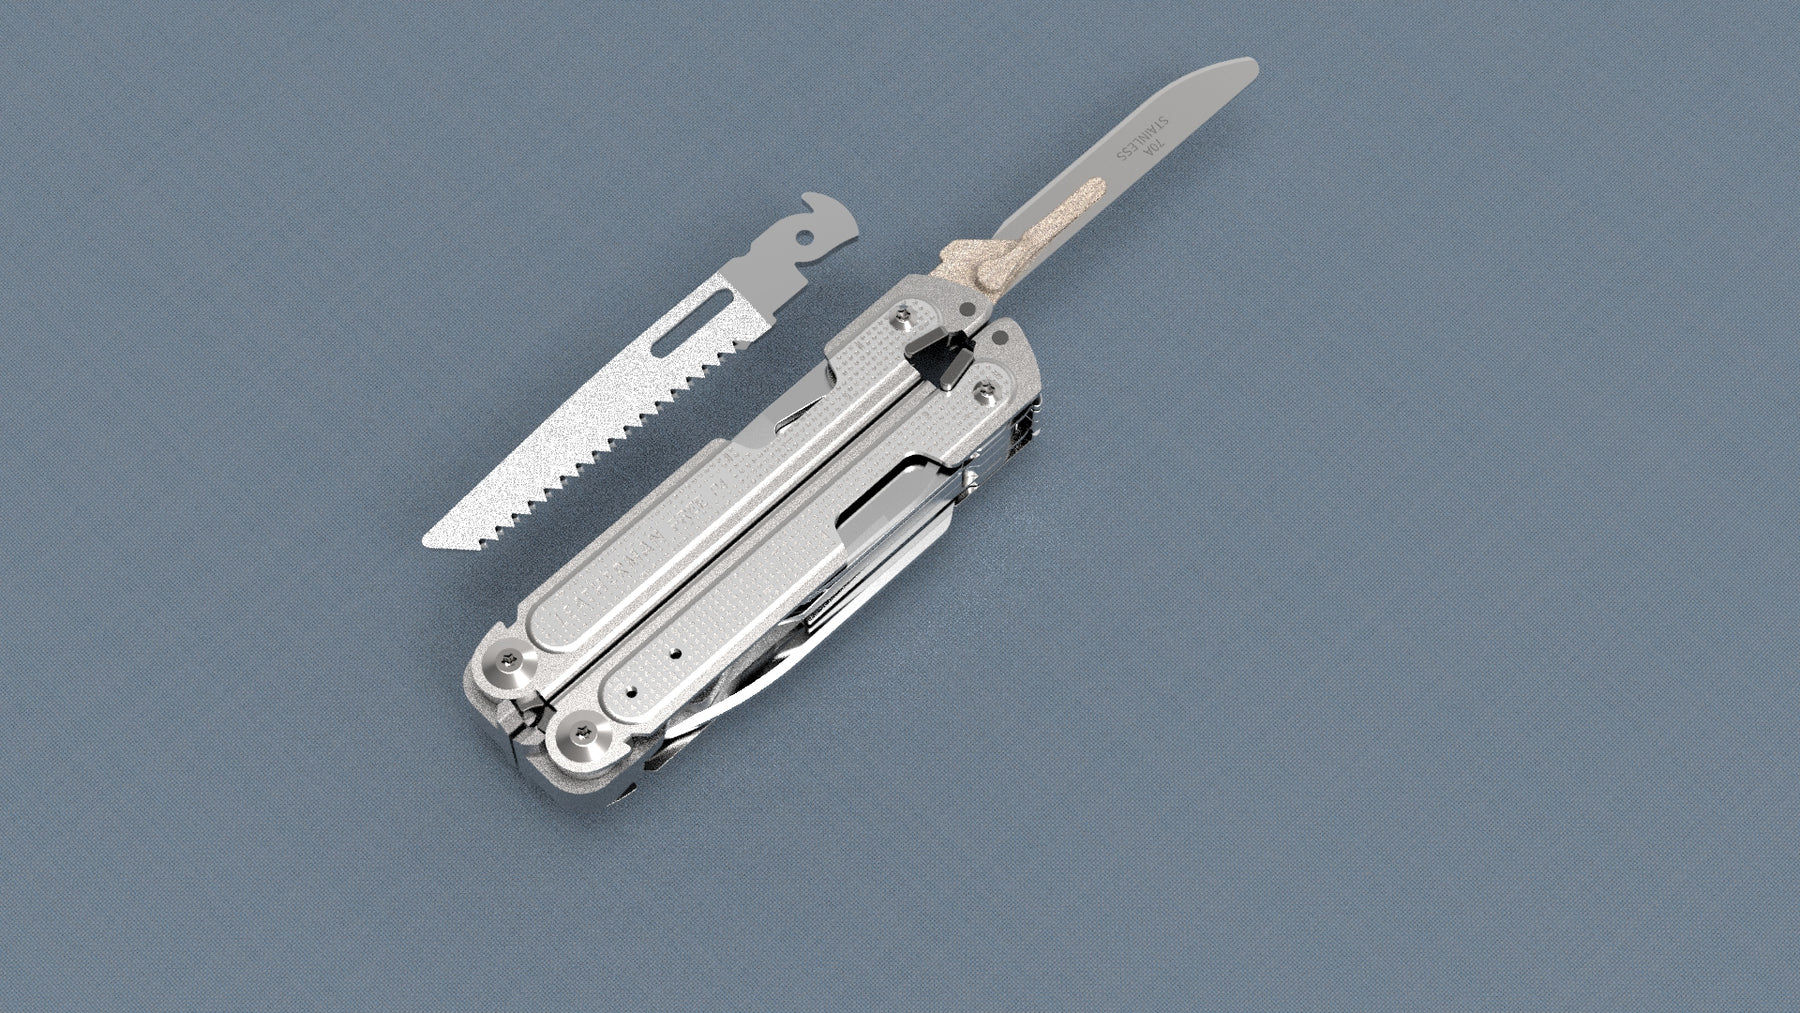
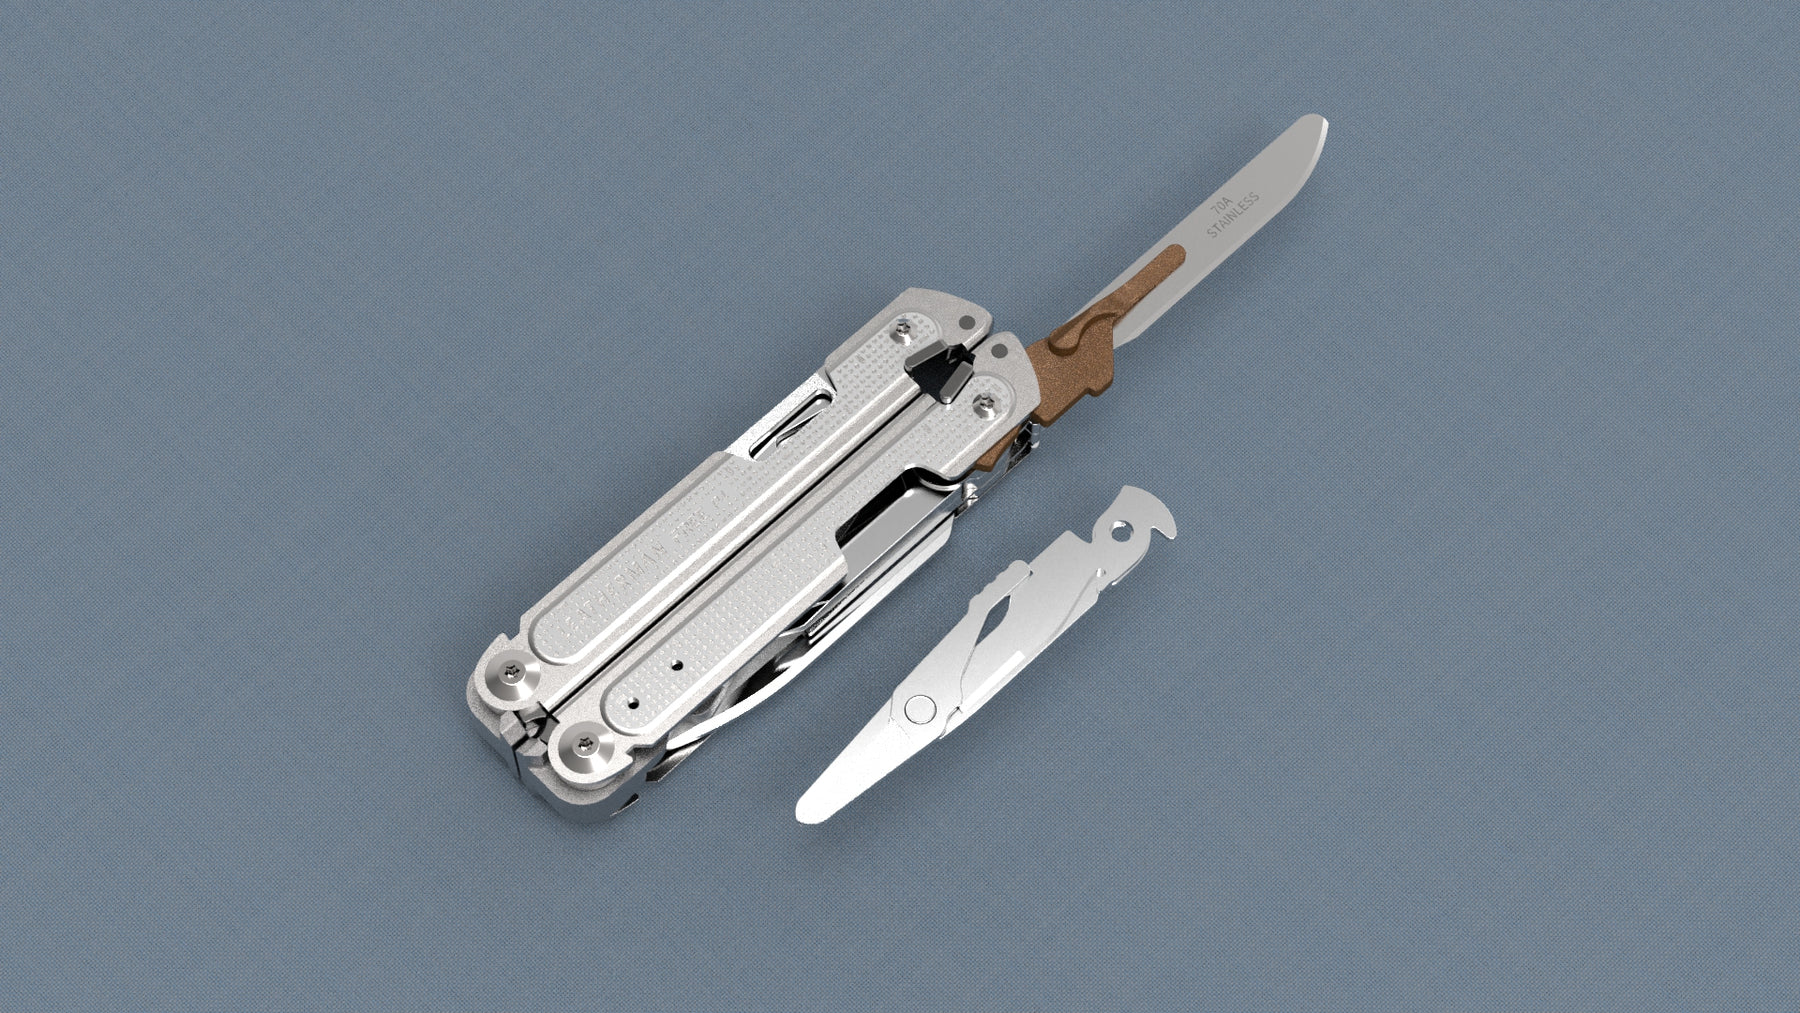
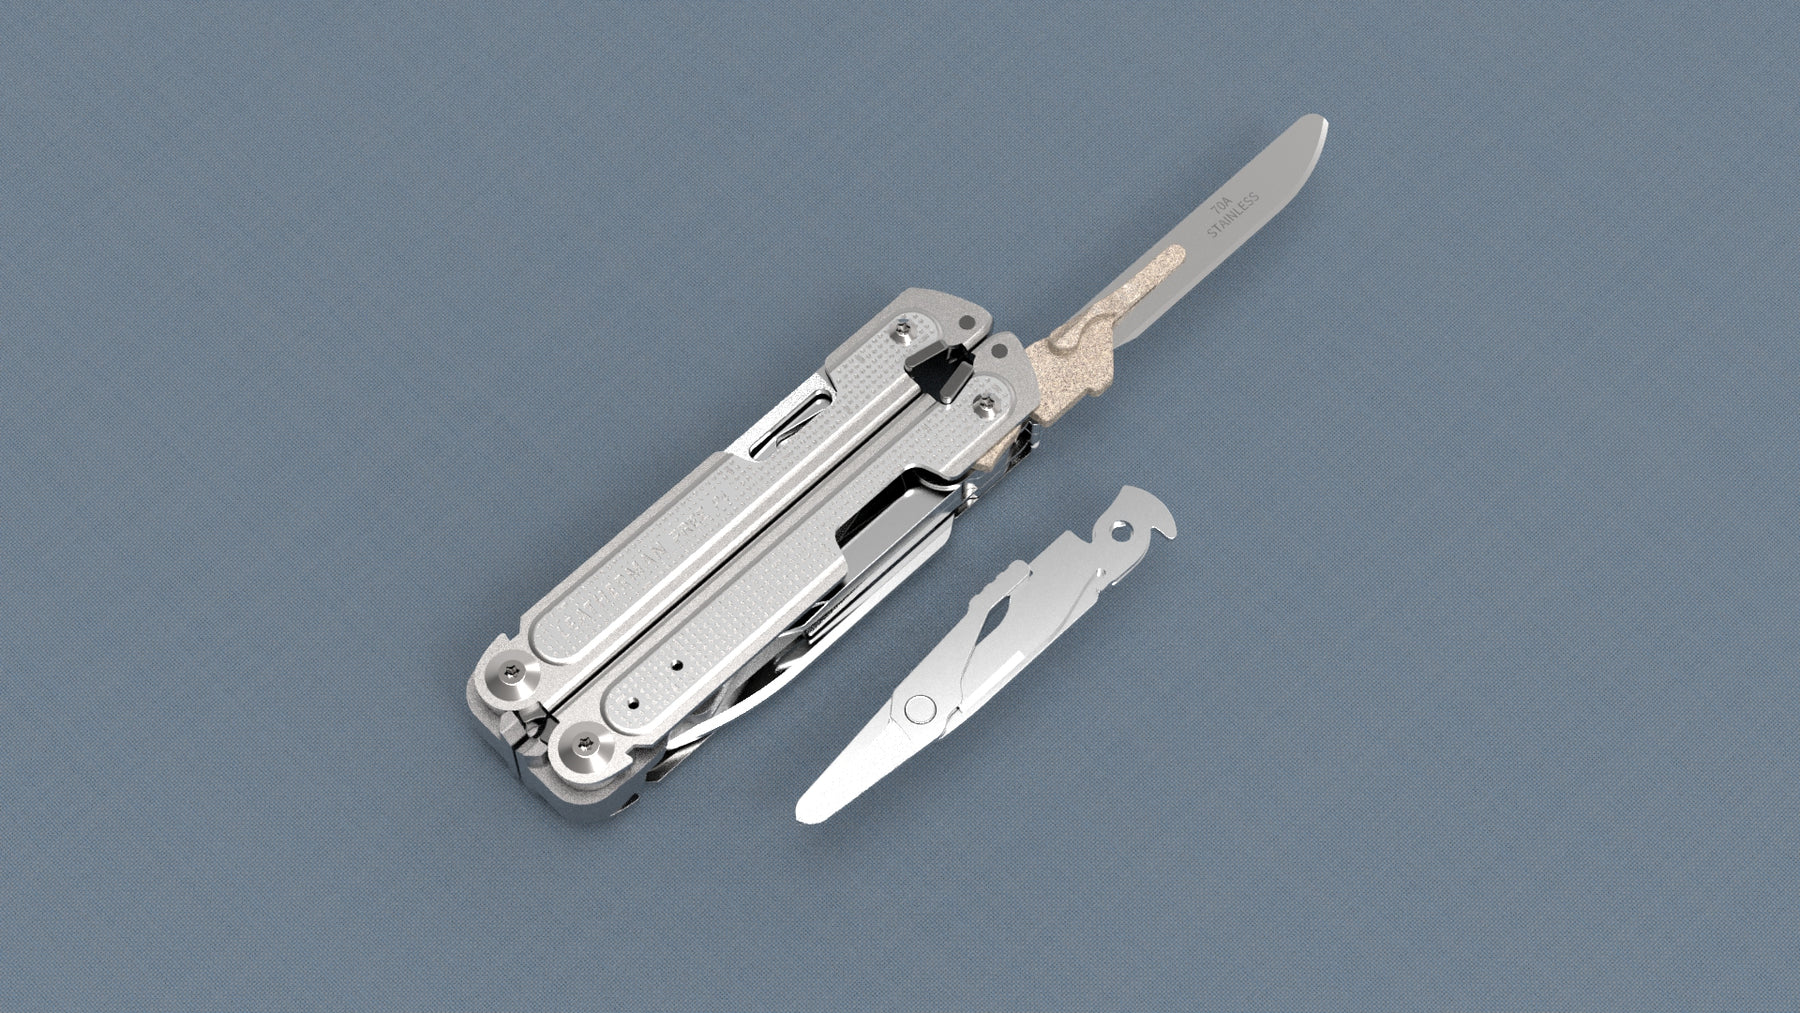
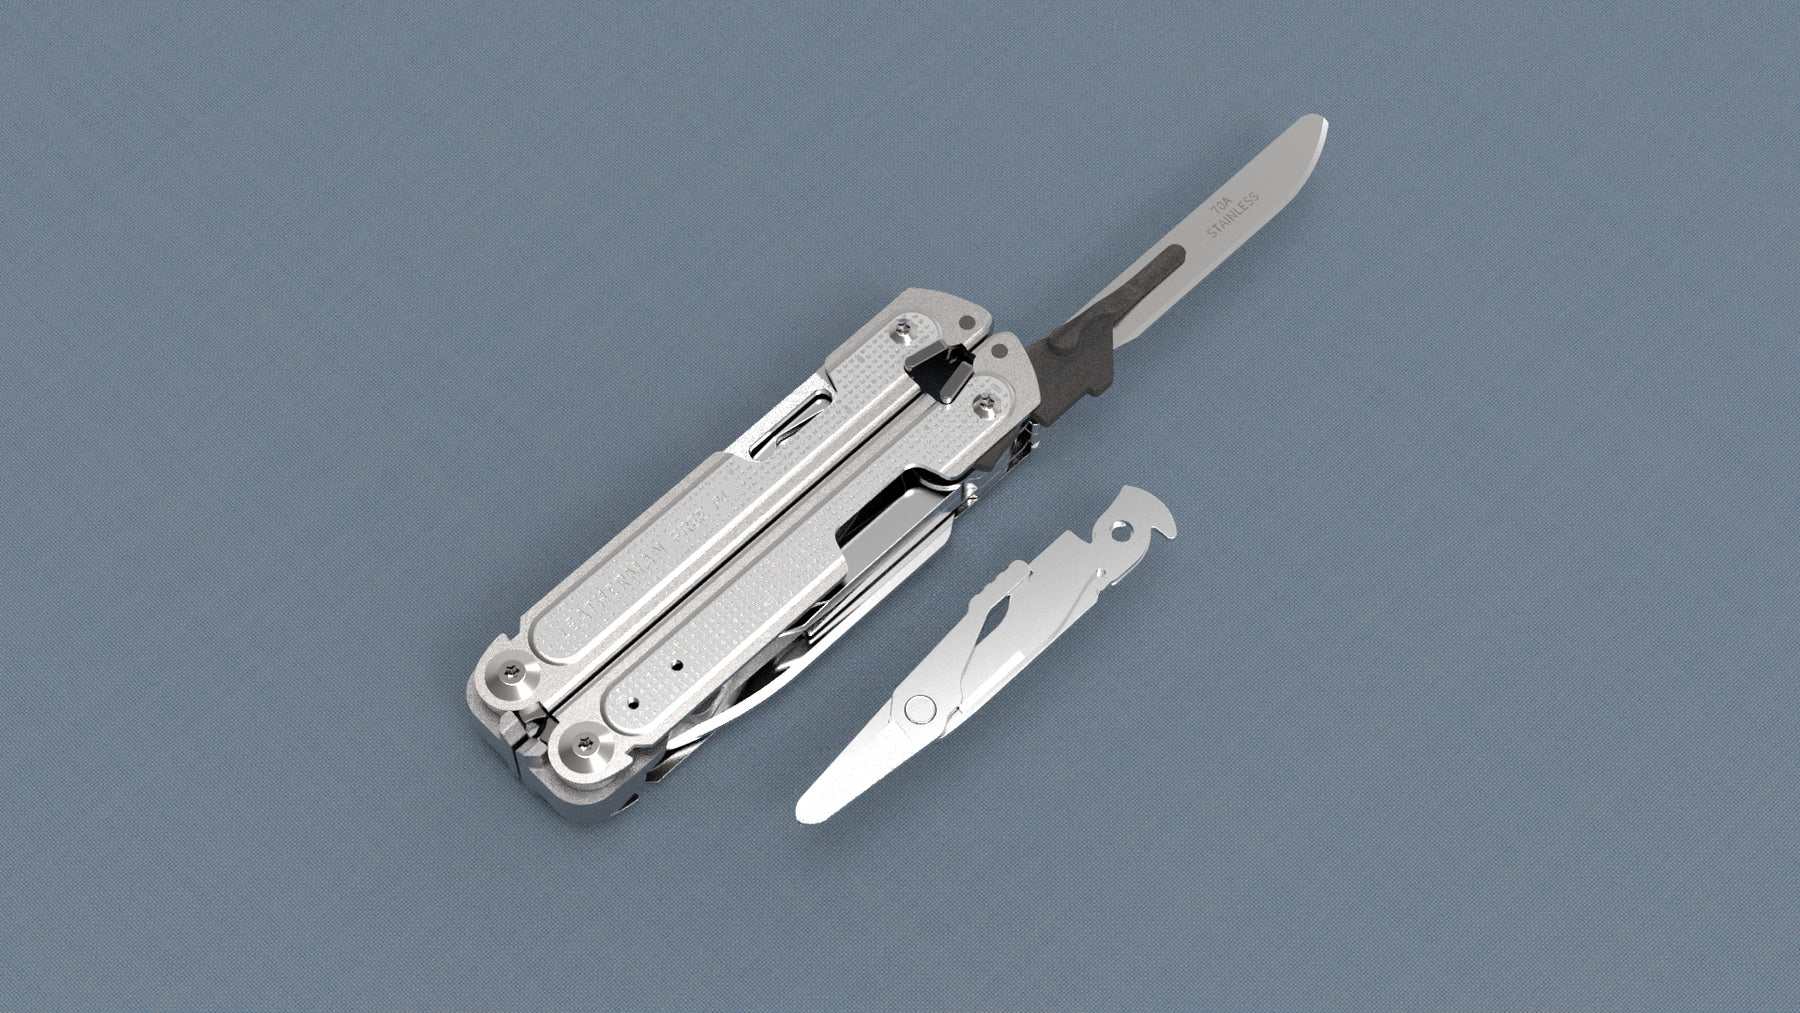
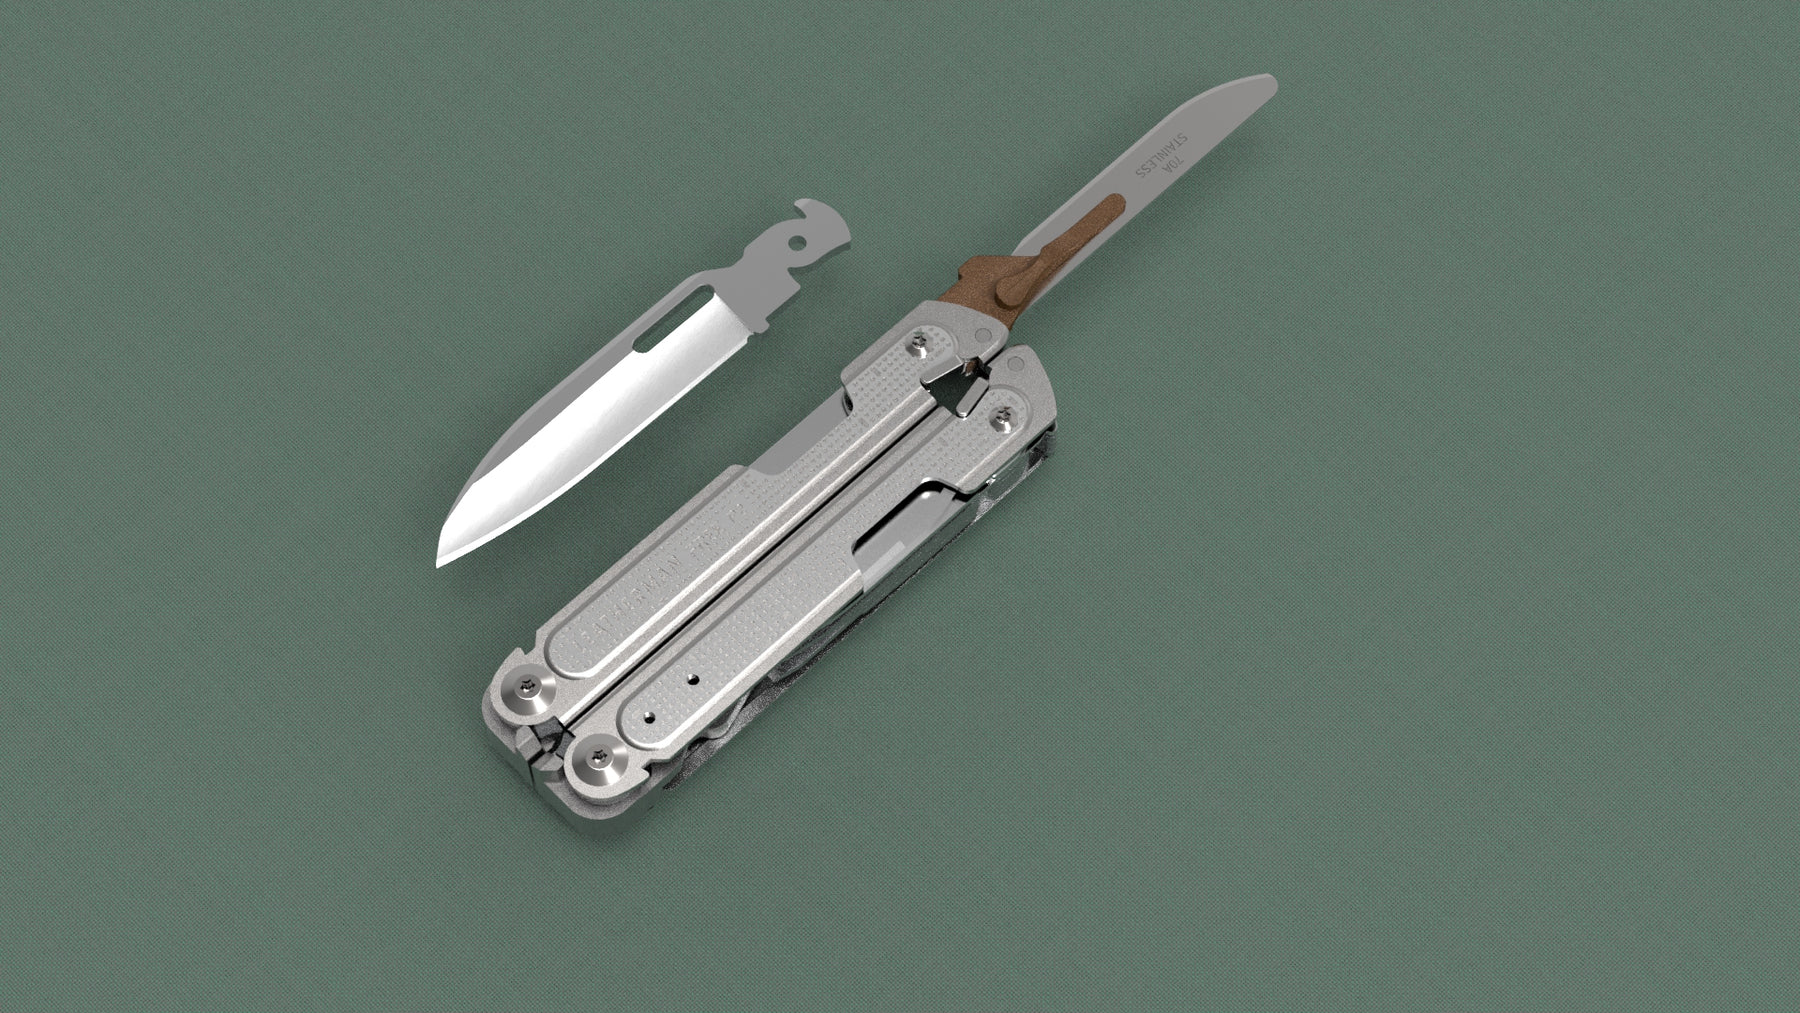
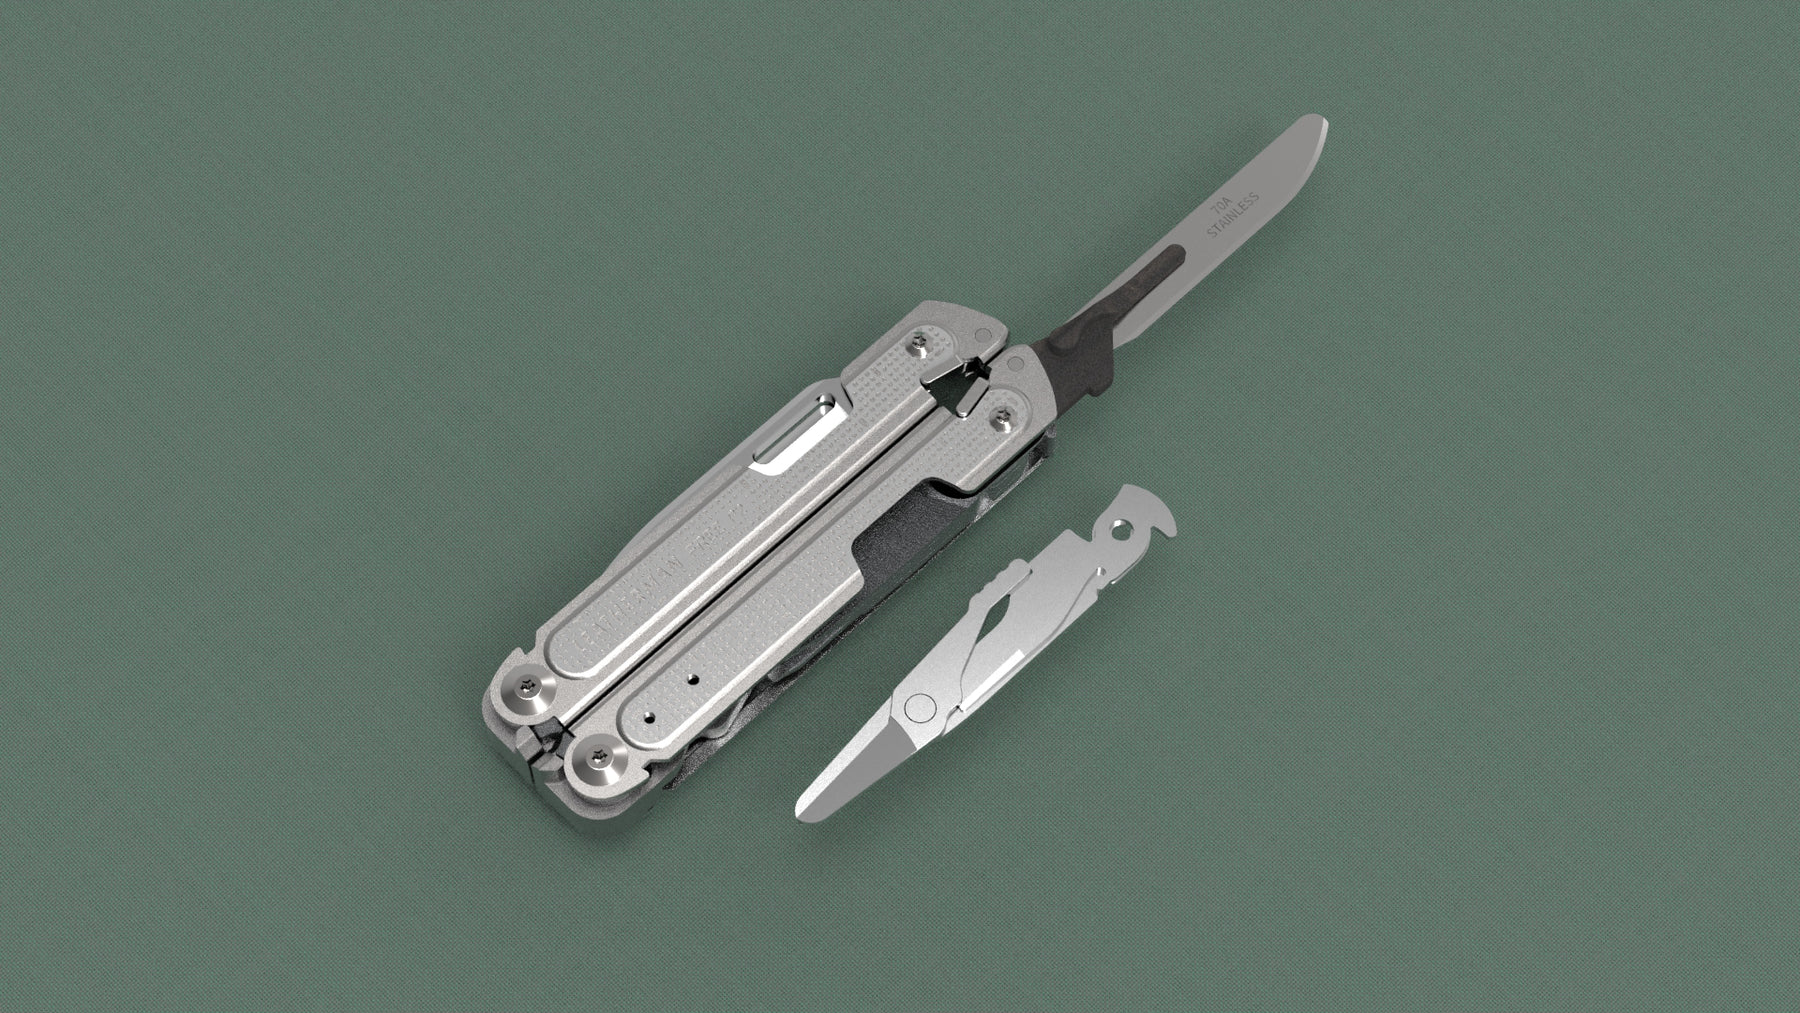
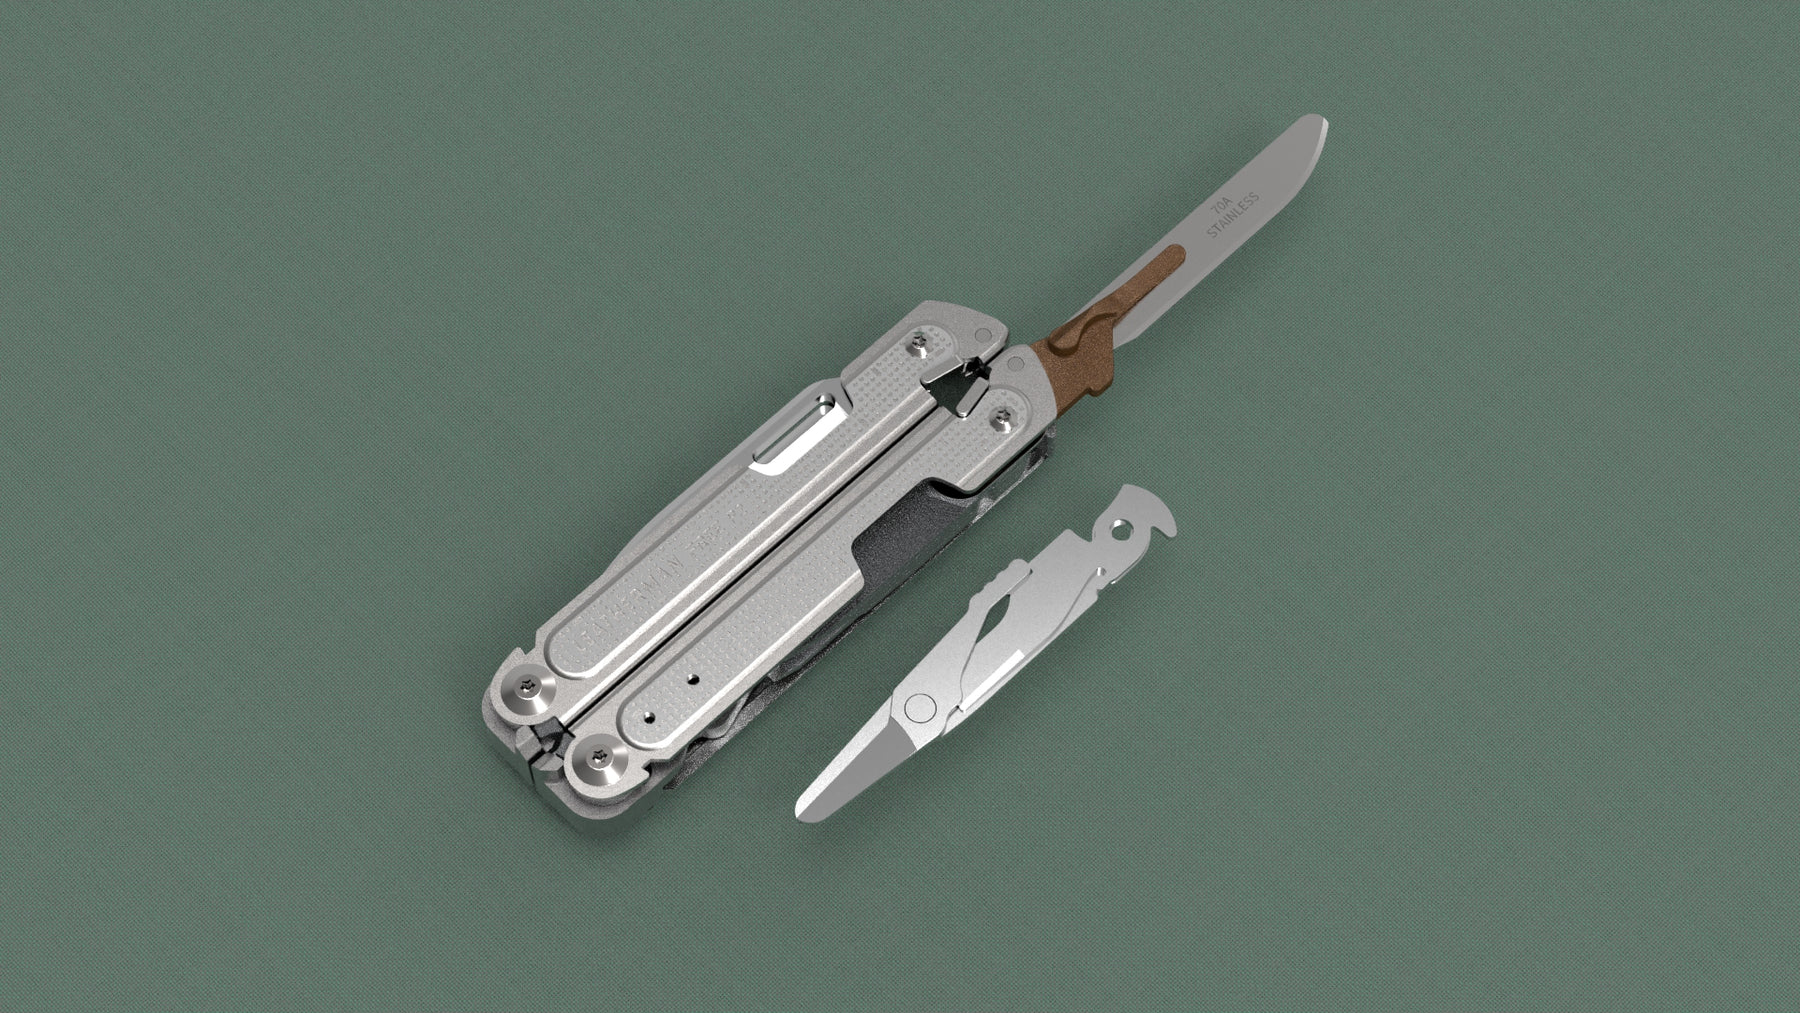
This modification adds a #4 Scalpel Holder to your Leatherman ARC, FREE P4, P2, T2, T4 or Garage #005
Select your tool, and then which implement you want to replace.
This is a DIY mod, please read all the information sections below.
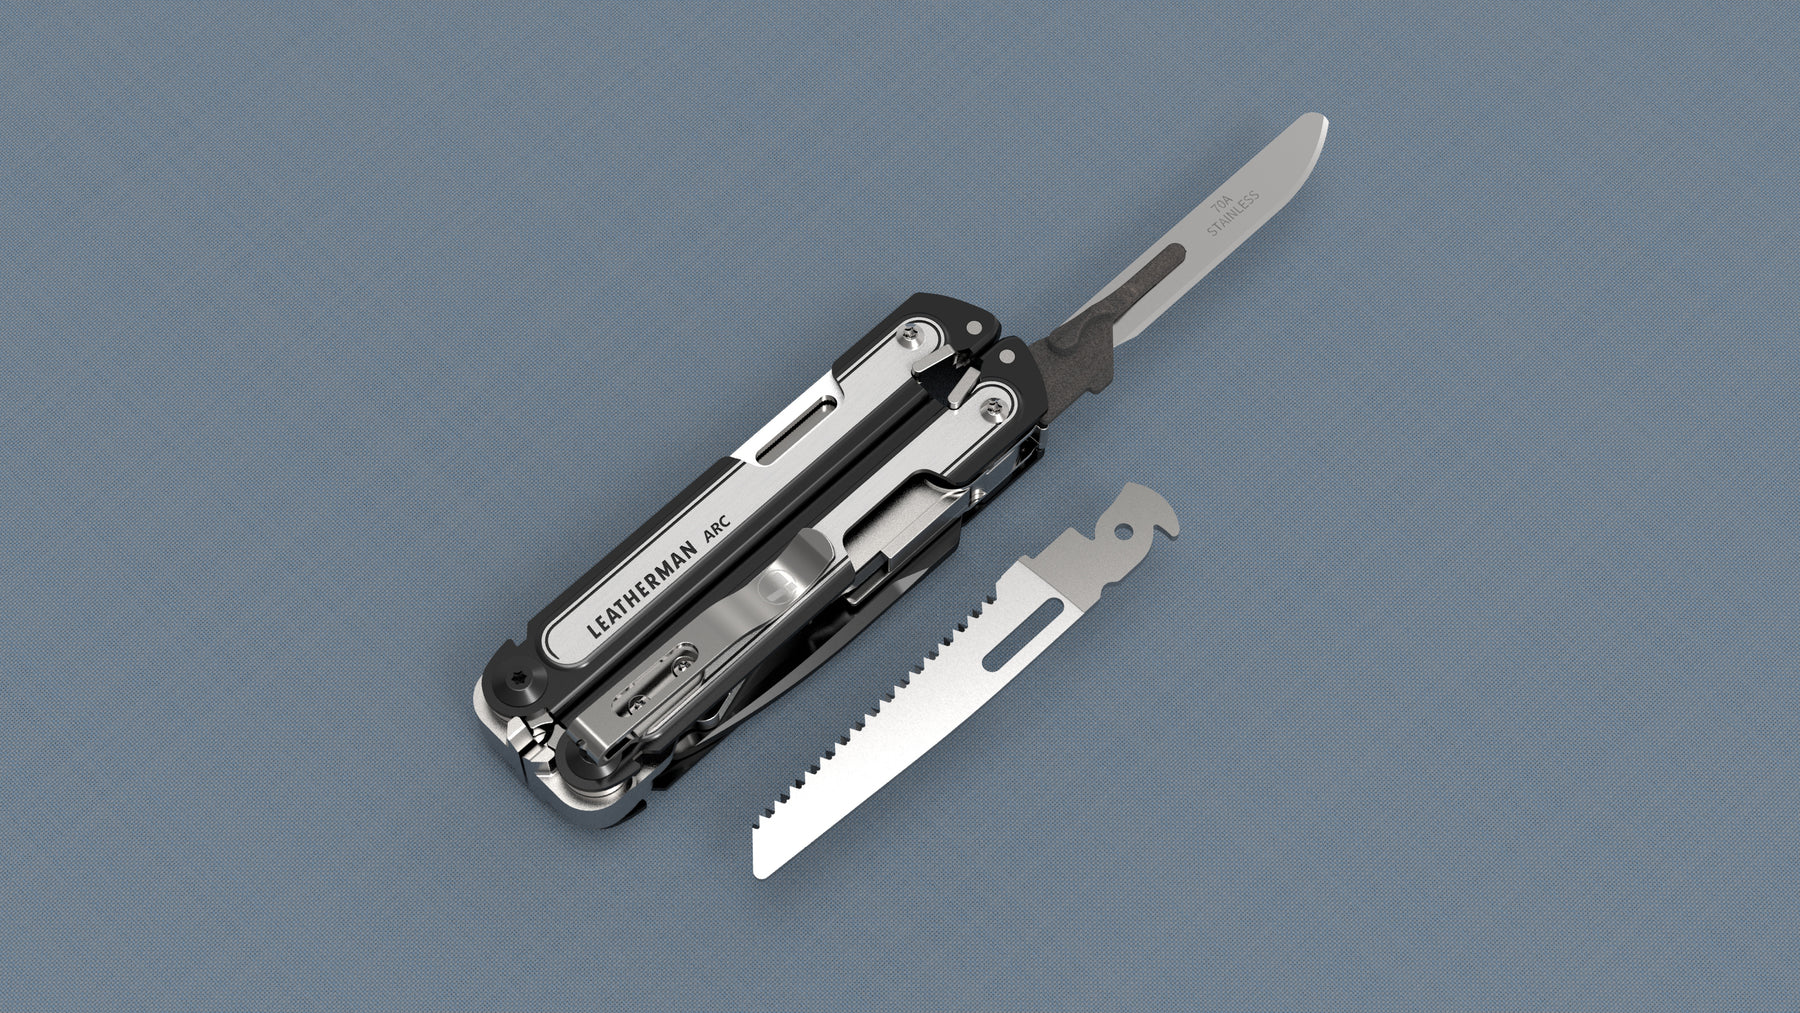
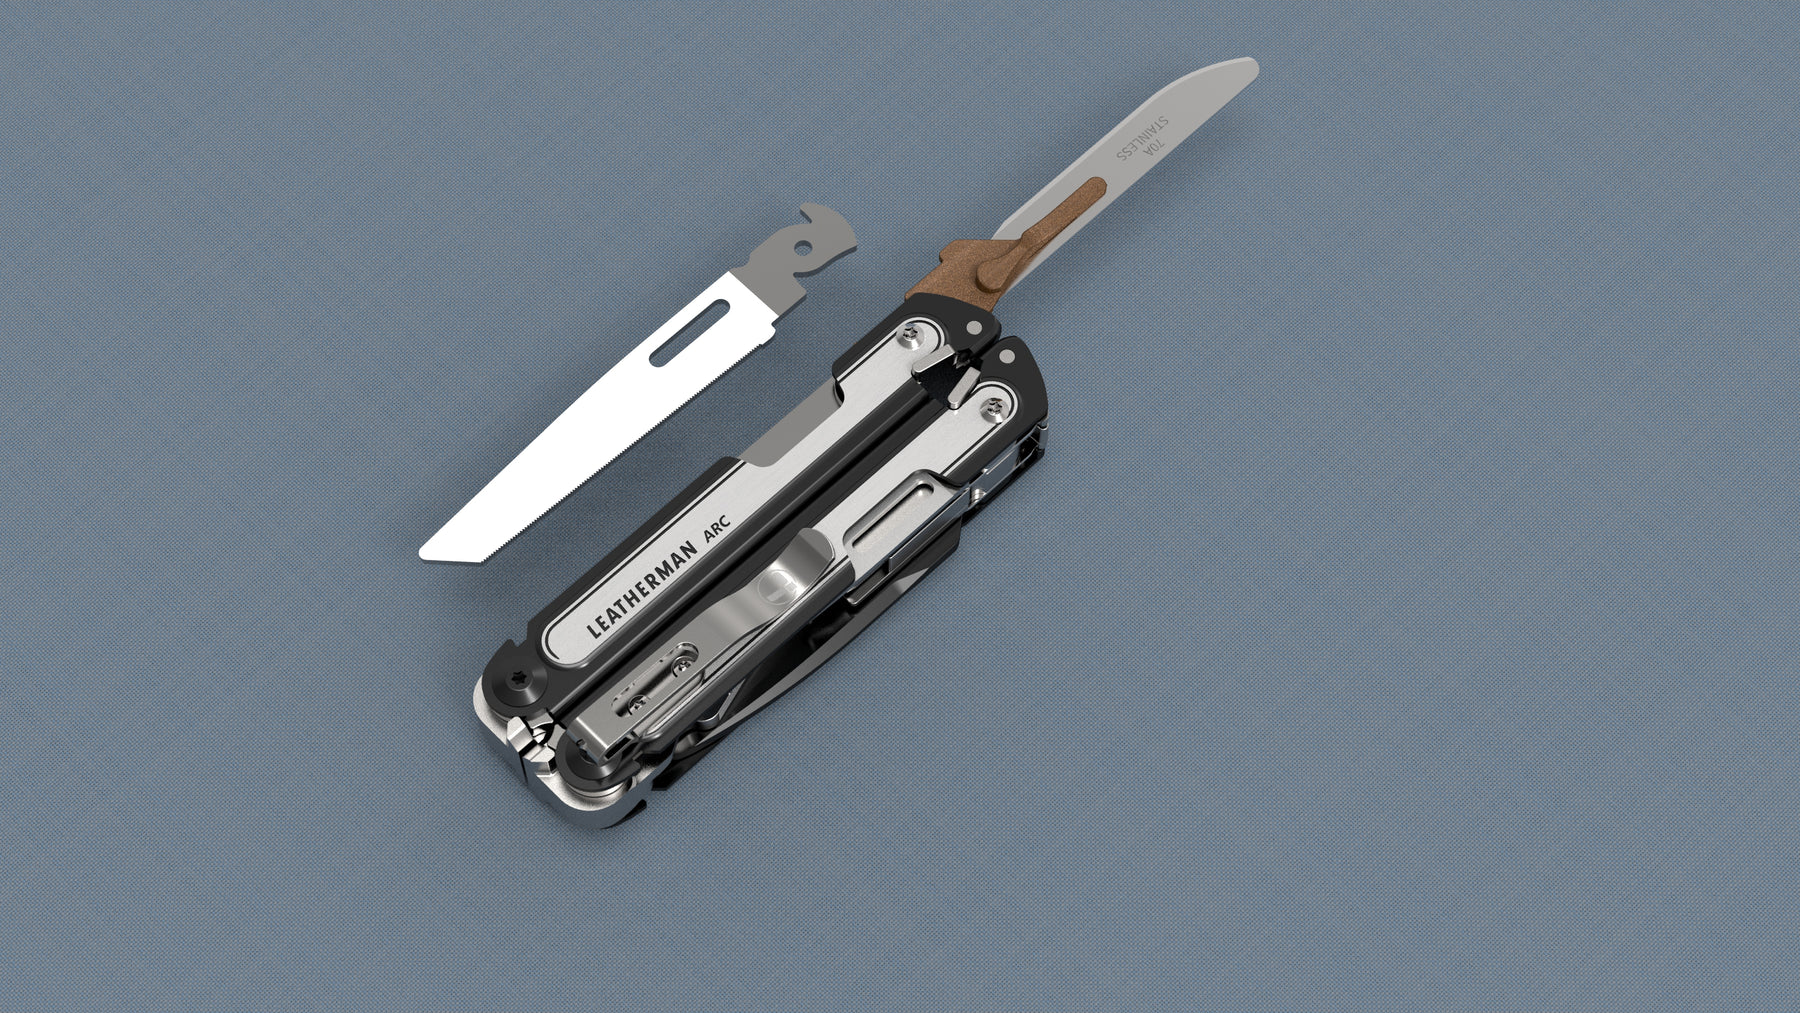
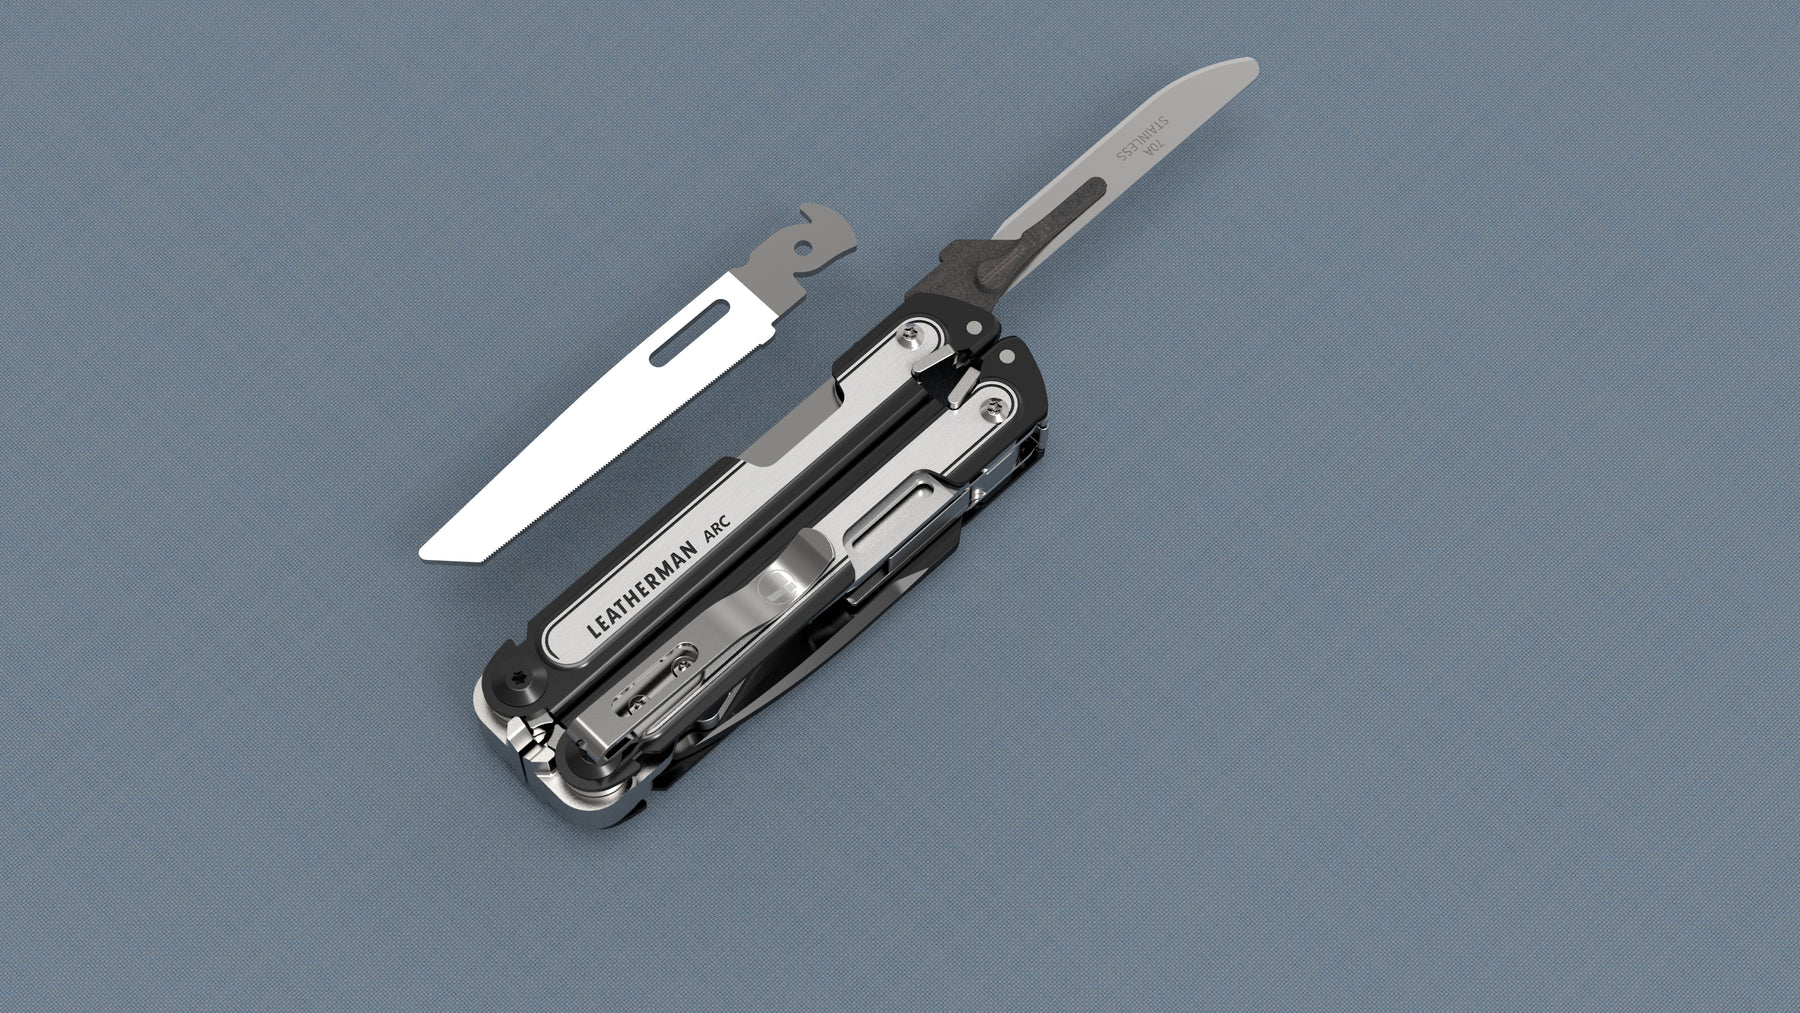
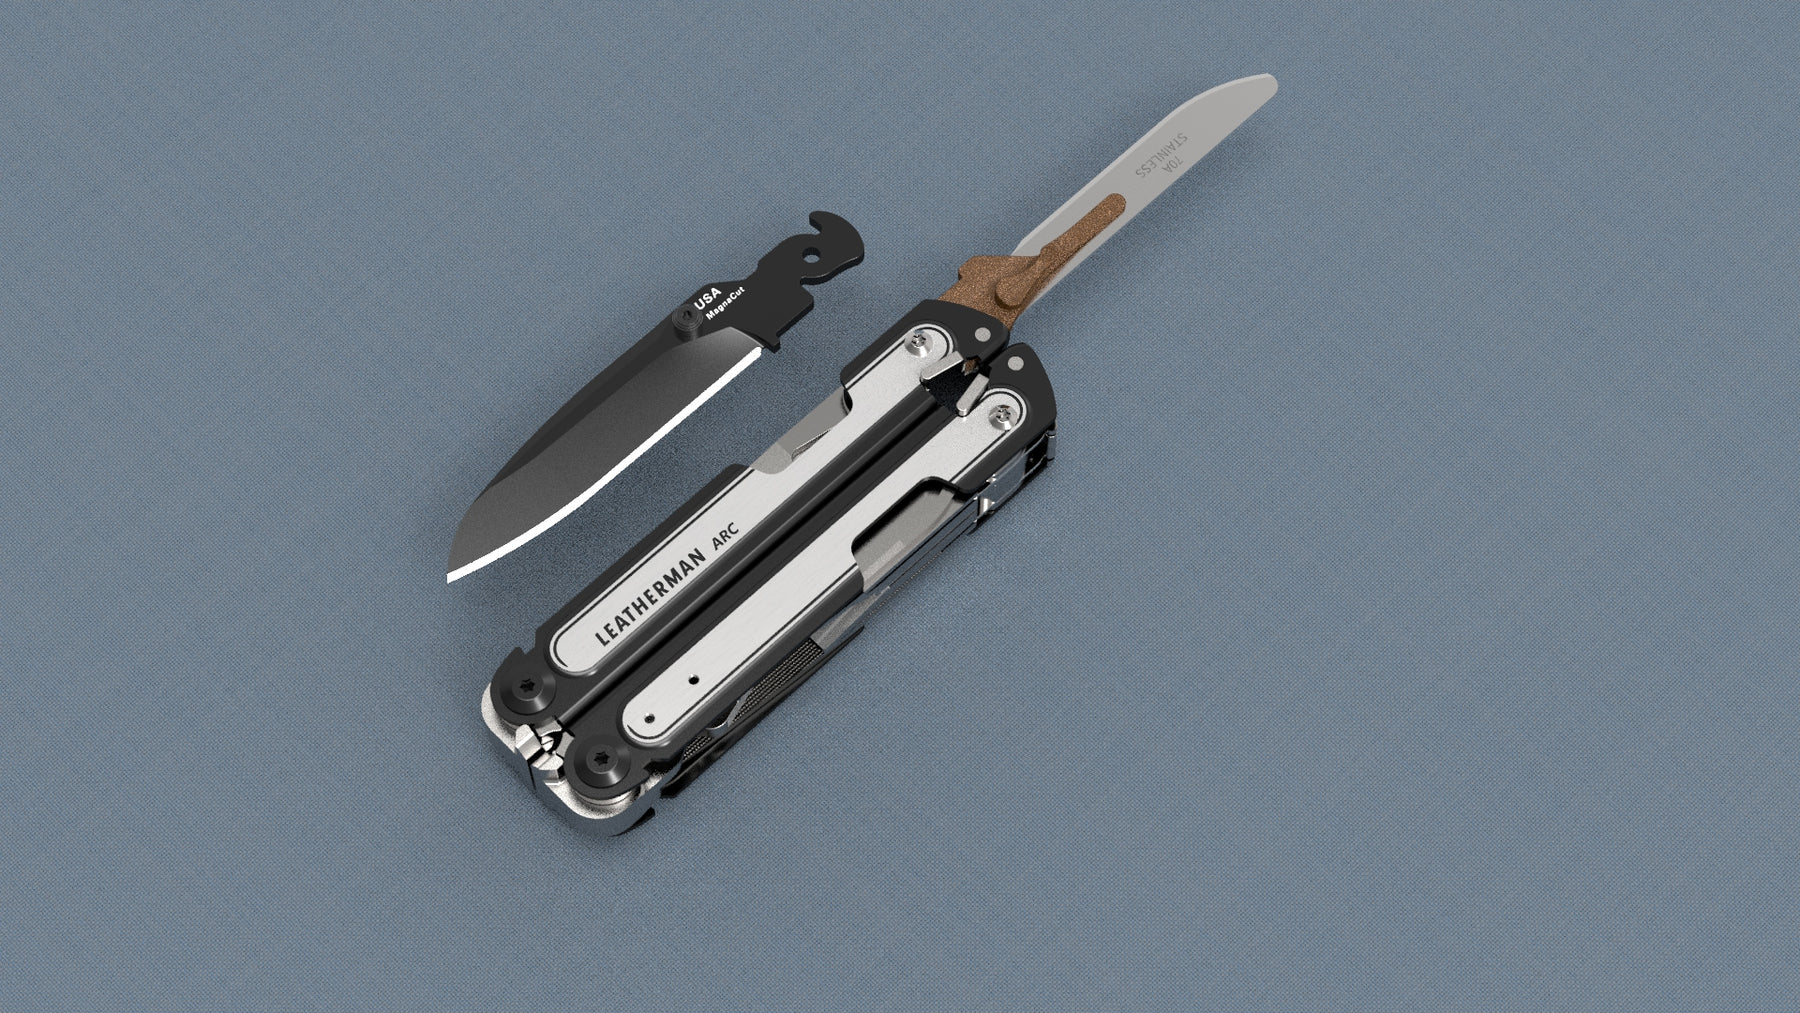
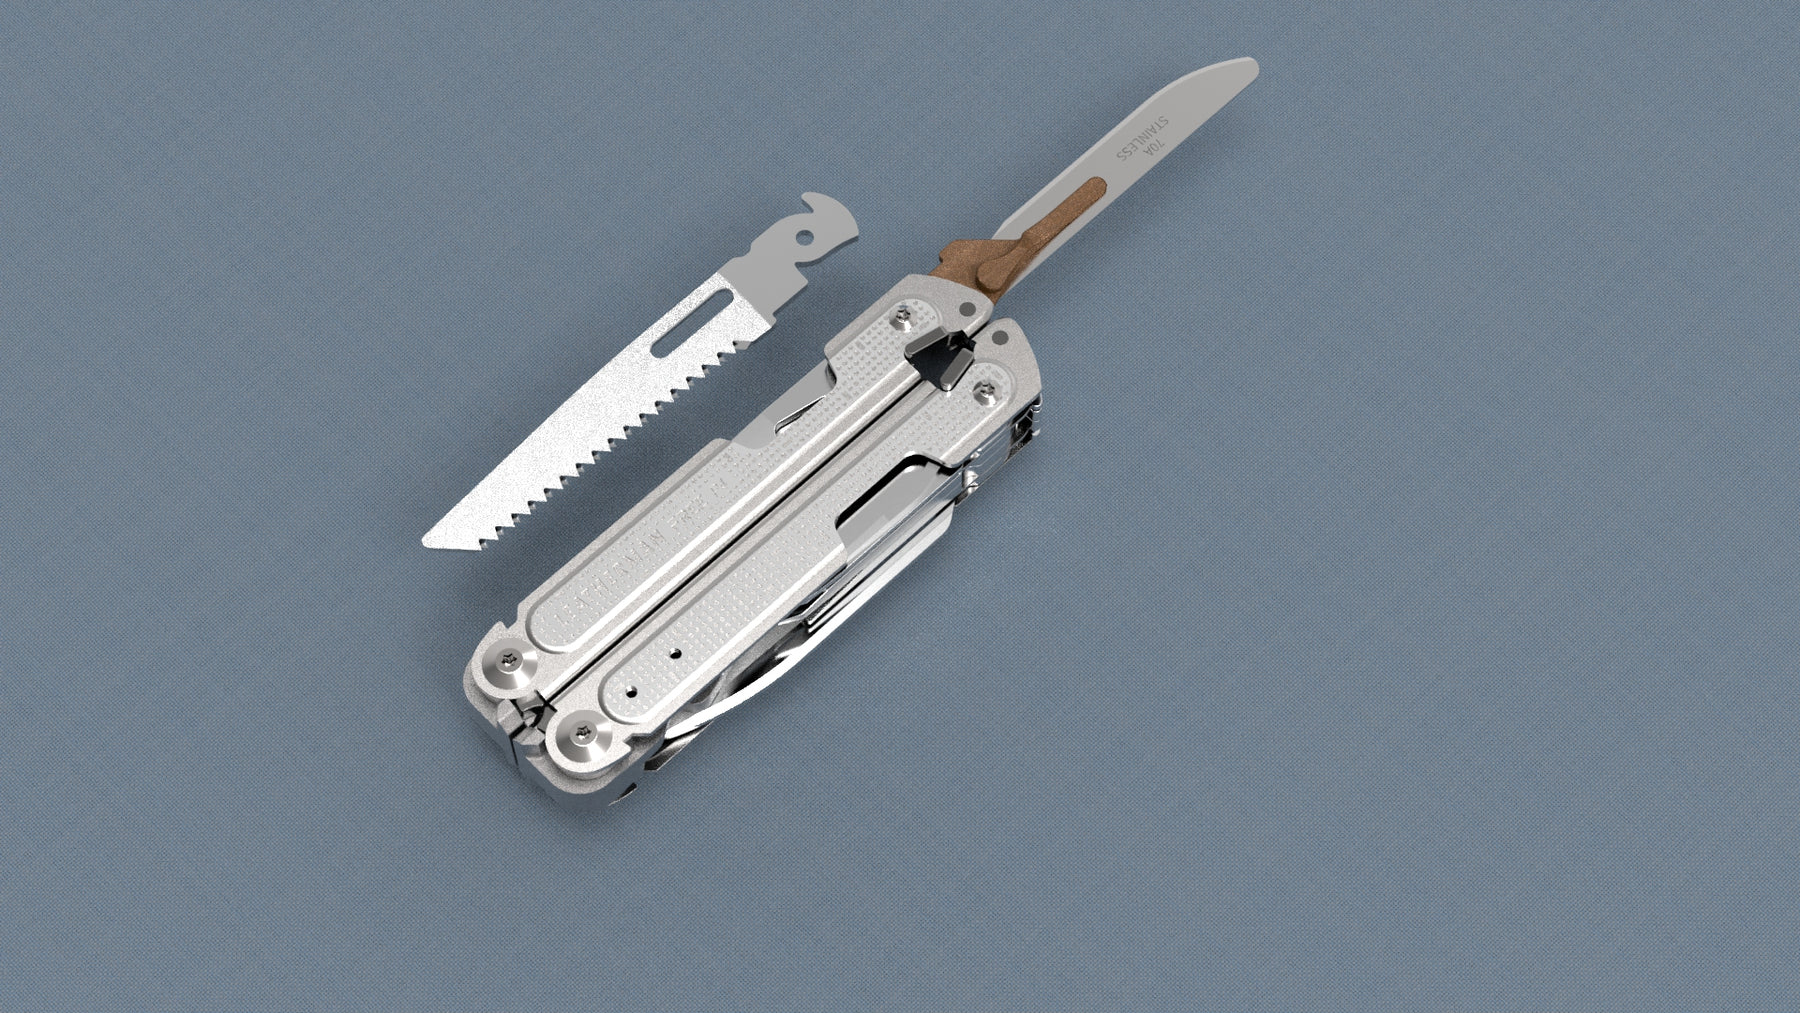
#ARC-Saw
- Your current selection: Replaces the Saw on a Leatherman ARC
- 0.07" Thick
#ARC-File
- Your current selection: Replaces the File on a Leatherman ARC
- 0.07" Thick
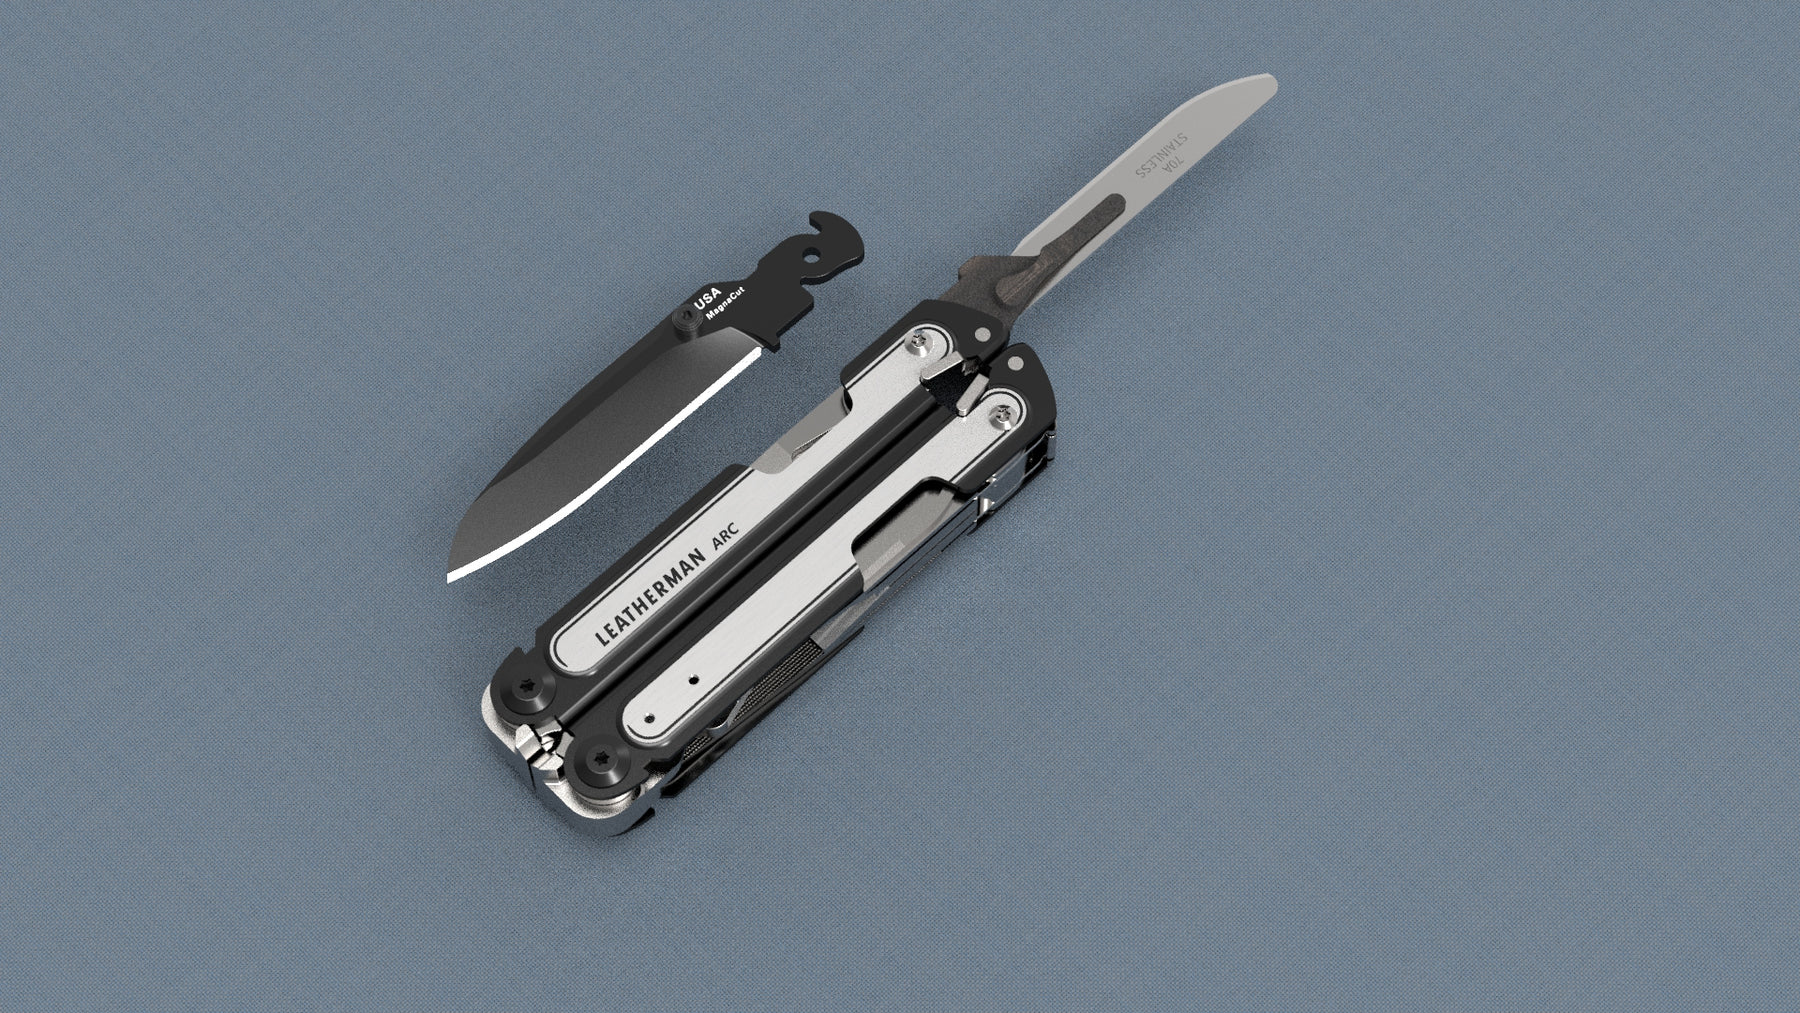
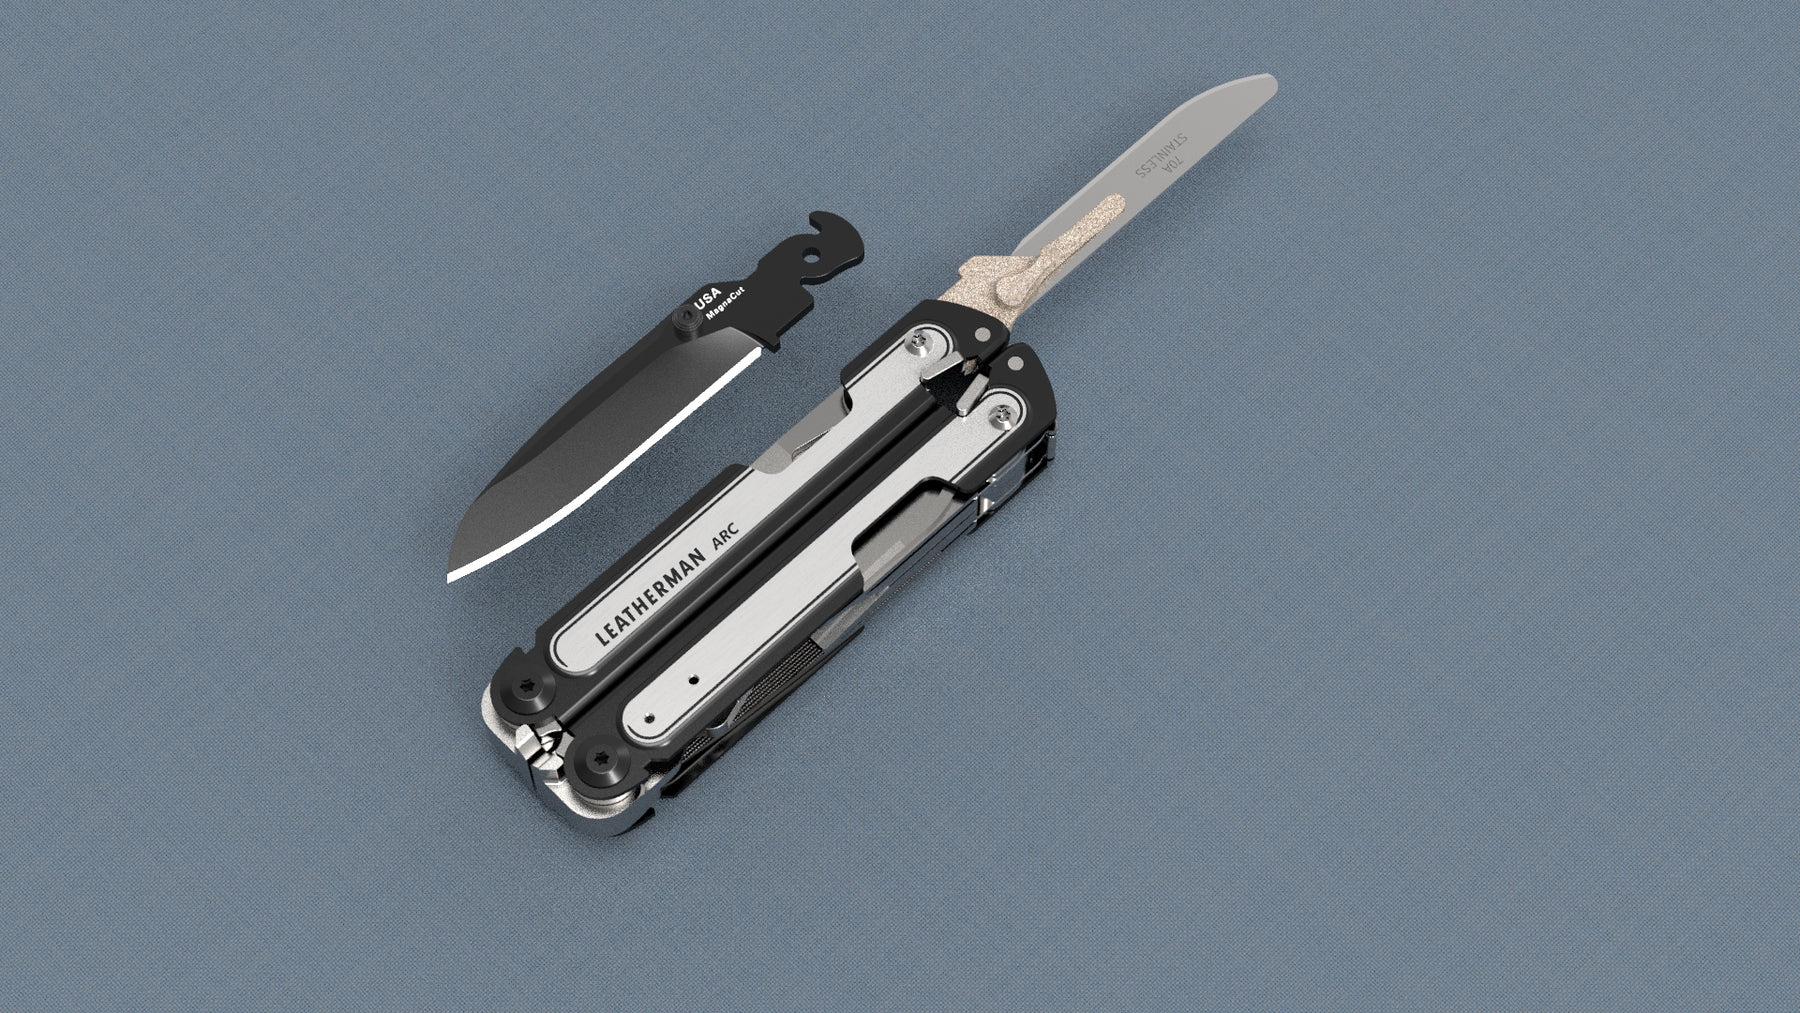
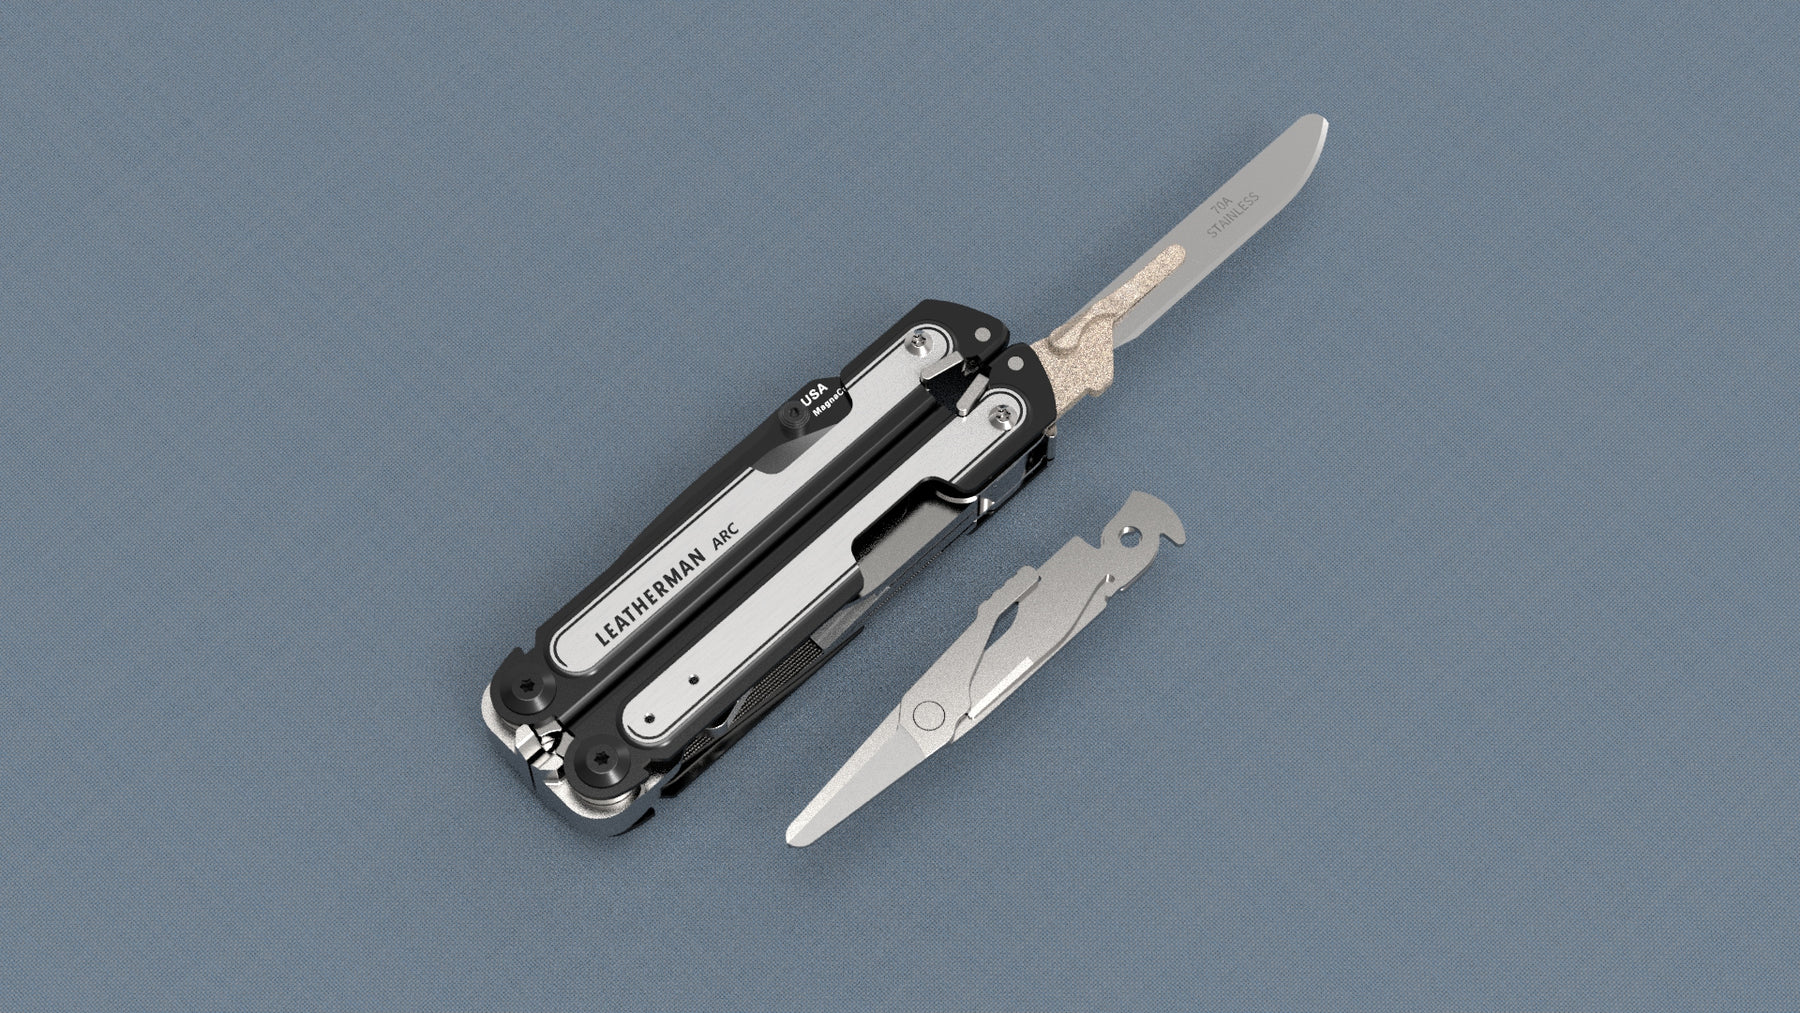
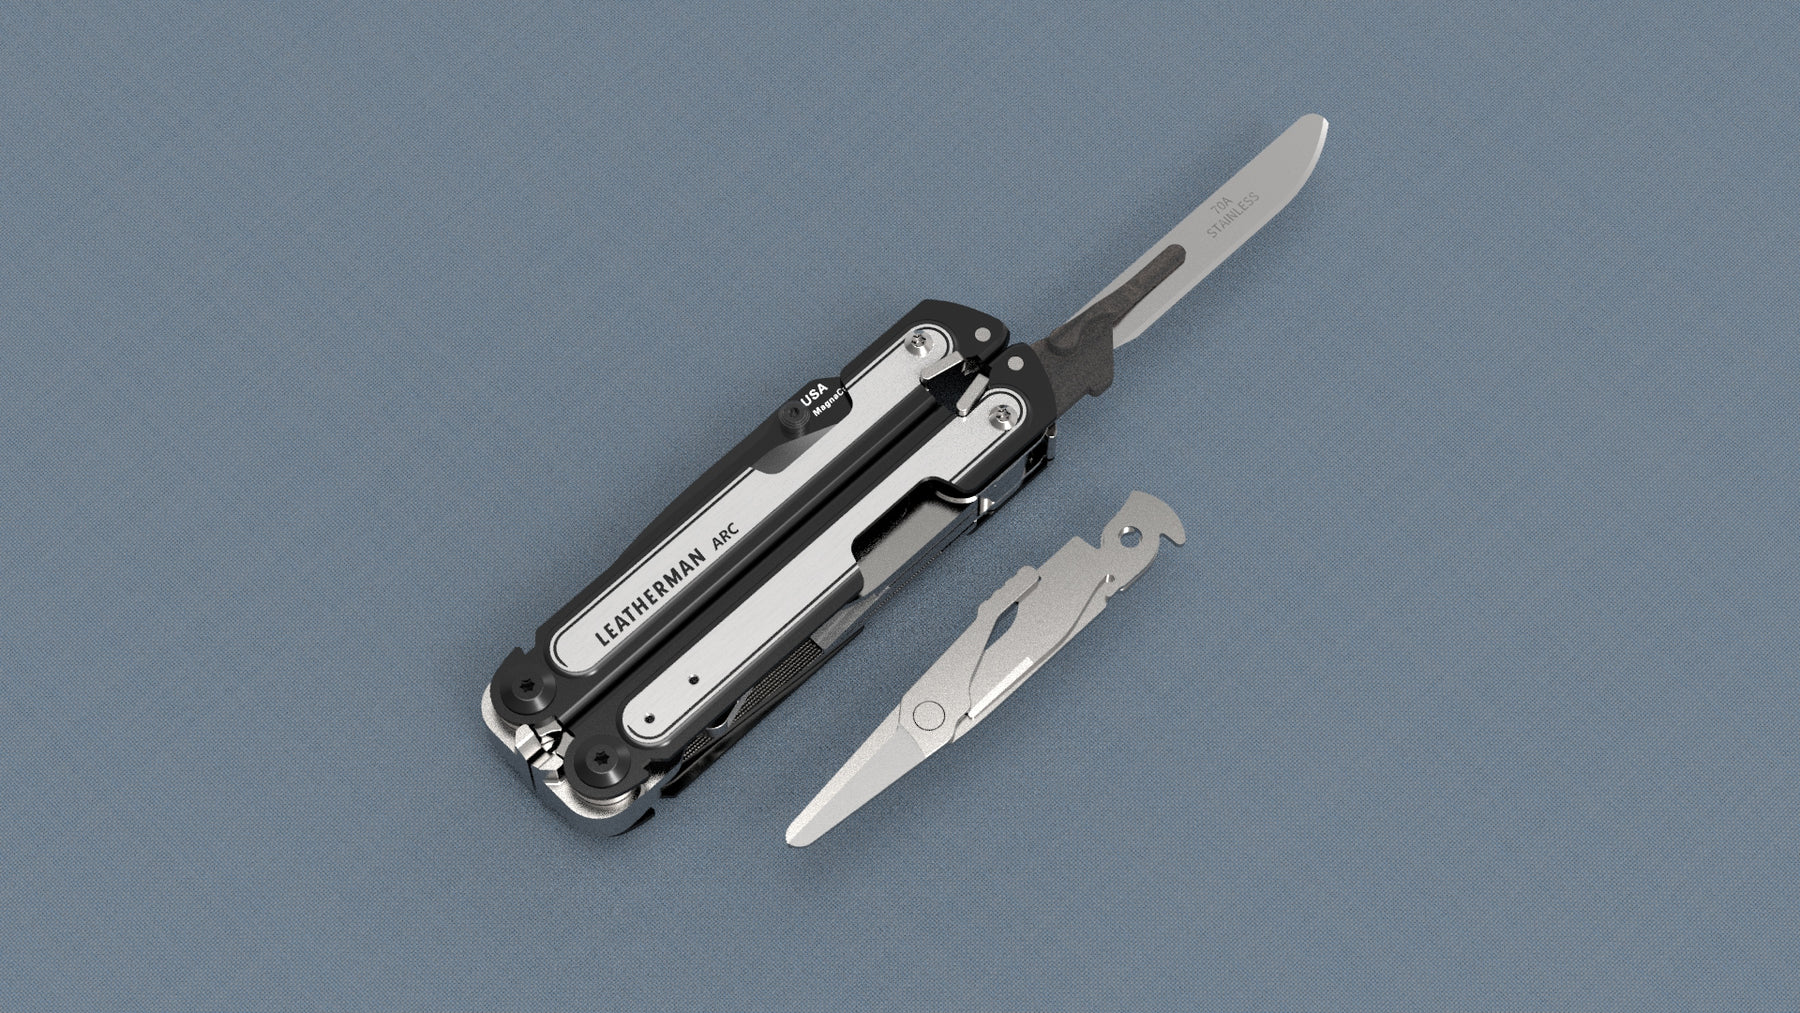
#ARC-MainBlade
- Your current selection: Replaces the Main Blade on a Leatherman ARC
- 0.1" Thick
#ARC-SerratedBlade
- Invalid selection, please select another.
#ARC-Scissors
- Your current selection: Replaces the Scissors on a Leatherman ARC
- 0.1" Thick
#FREEP4-Saw
- Your current selection: Replaces the Scissors on a Leatherman Free P4
- 0.07" Thick
#FREEP4-File
- Invalid selection
#FREEP4-MainBlade
- Your current selection: Replaces the Main Blade on a Leatherman FREE P4
- 0.1" Thick
#FREEP4-SerratedBlade
- Your current selection: Replaces the Serrated Blade on a Leatherman Free P4
- 0.1" Thick
#FREEP4-Scissors
- Your current selection: Replaces the Scissors on a Leatherman Free P4
- 0.1" Thick
#Garage005-Saw
- Your current selection: Replaces the Saw Blade on a Leatherman Garage #005
- 0.1" Thick
#Garage005-File
- Your current selection: Replaces the File on a Leatherman Garage #005
- 0.07" Thick
#Garage005-MainBlade
- Your current selection: Replaces the Main Blade on a Leatherman Garage #005
- 0.1" Thick
- Will require a washer due to the thicker blade. (not included)
#Garage005-SerratedBlade
- Invalid Selection
#Garage005-Scissors
- Your current selection: Replaces the Scissors on a Leatherman Garage #005
- 0.1" Thick
#FREET2orT4-MainBlade
- Your current selection: Replaces the Main Blade on the T2 or T4
#FREET2orT4-Saw
- Invalid Selection
#FREET2orT4-File
- Invalid Selection
#FREET2orT4-SerratedBlade
- Invalid Selection
#FREET2orT4-Scissors
- Invalid Selection
#FREEP2-Saw
- Invalid selection
#FREEP2orP4-File
- Invalid selection
#FREEP2-MainBlade
- Your current selection: Replaces the Main Blade on a Leatherman Free P2
- 0.1" Thick
#FREEP2-SerratedBlade
- Invalid Selection
#FREEP2-Scissors
- Your current selection: Replaces the Scissors on a Leatherman Free P2
- 0.1" Thick
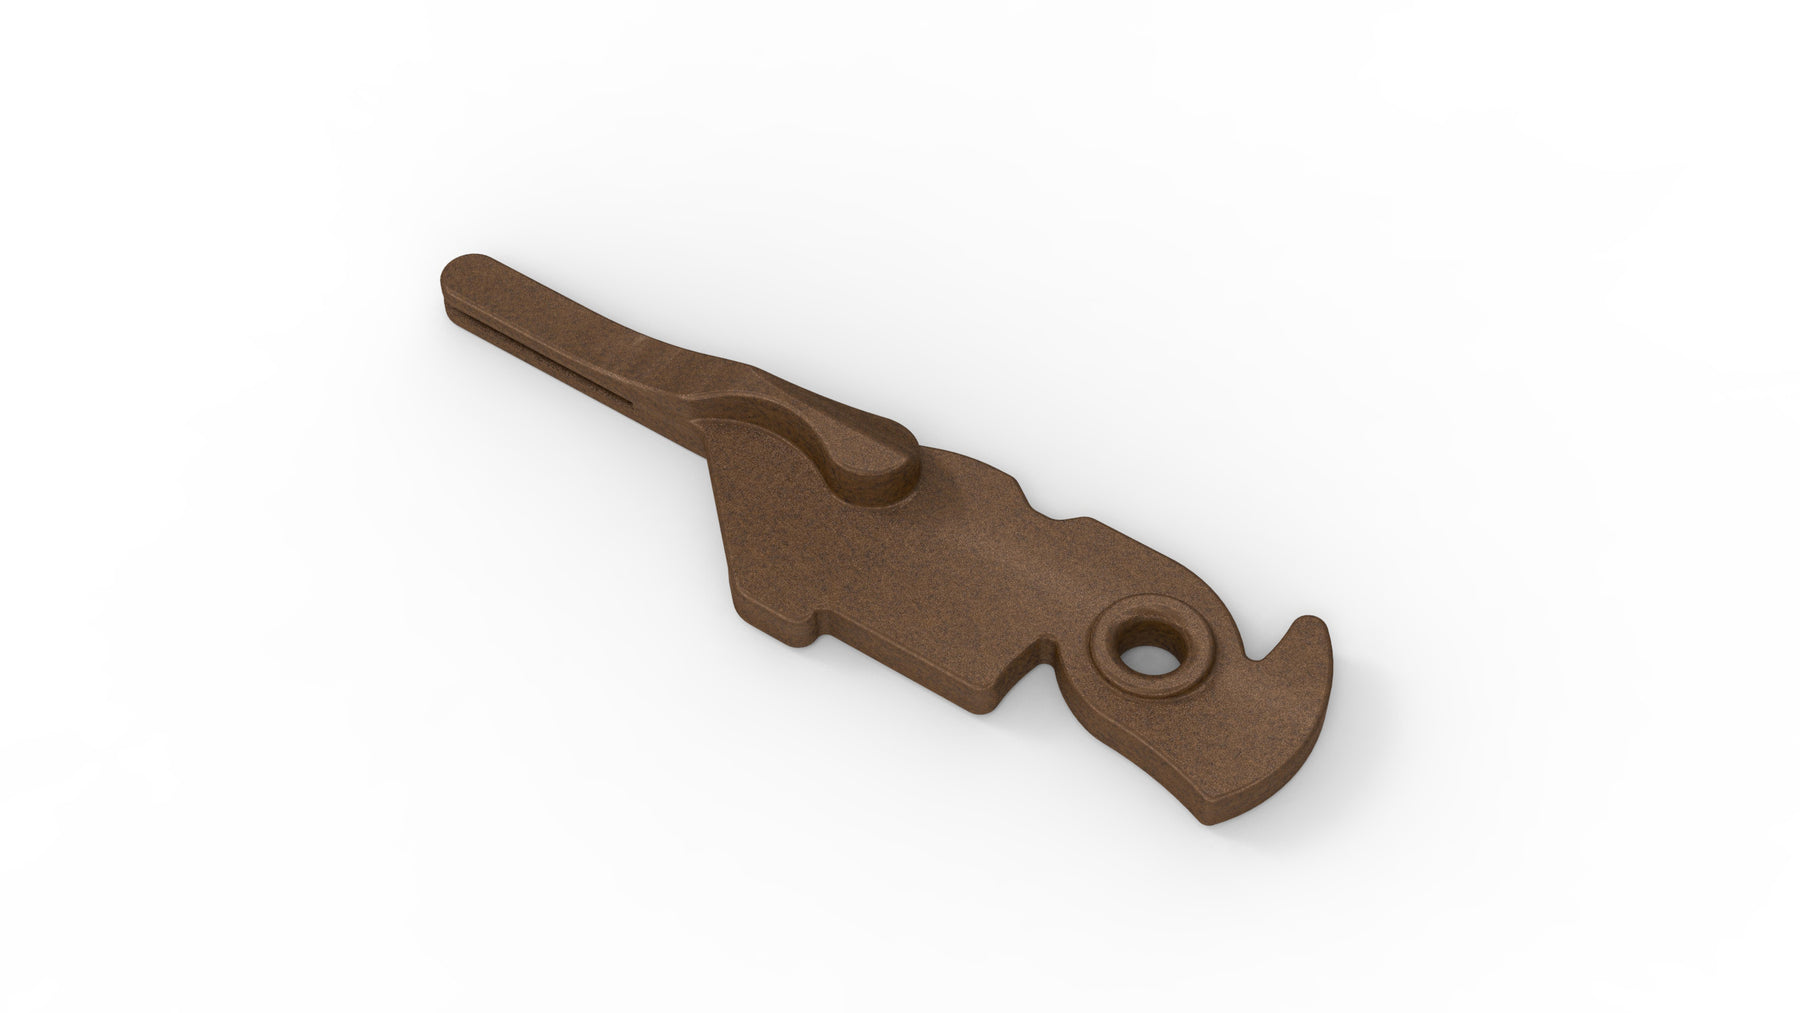
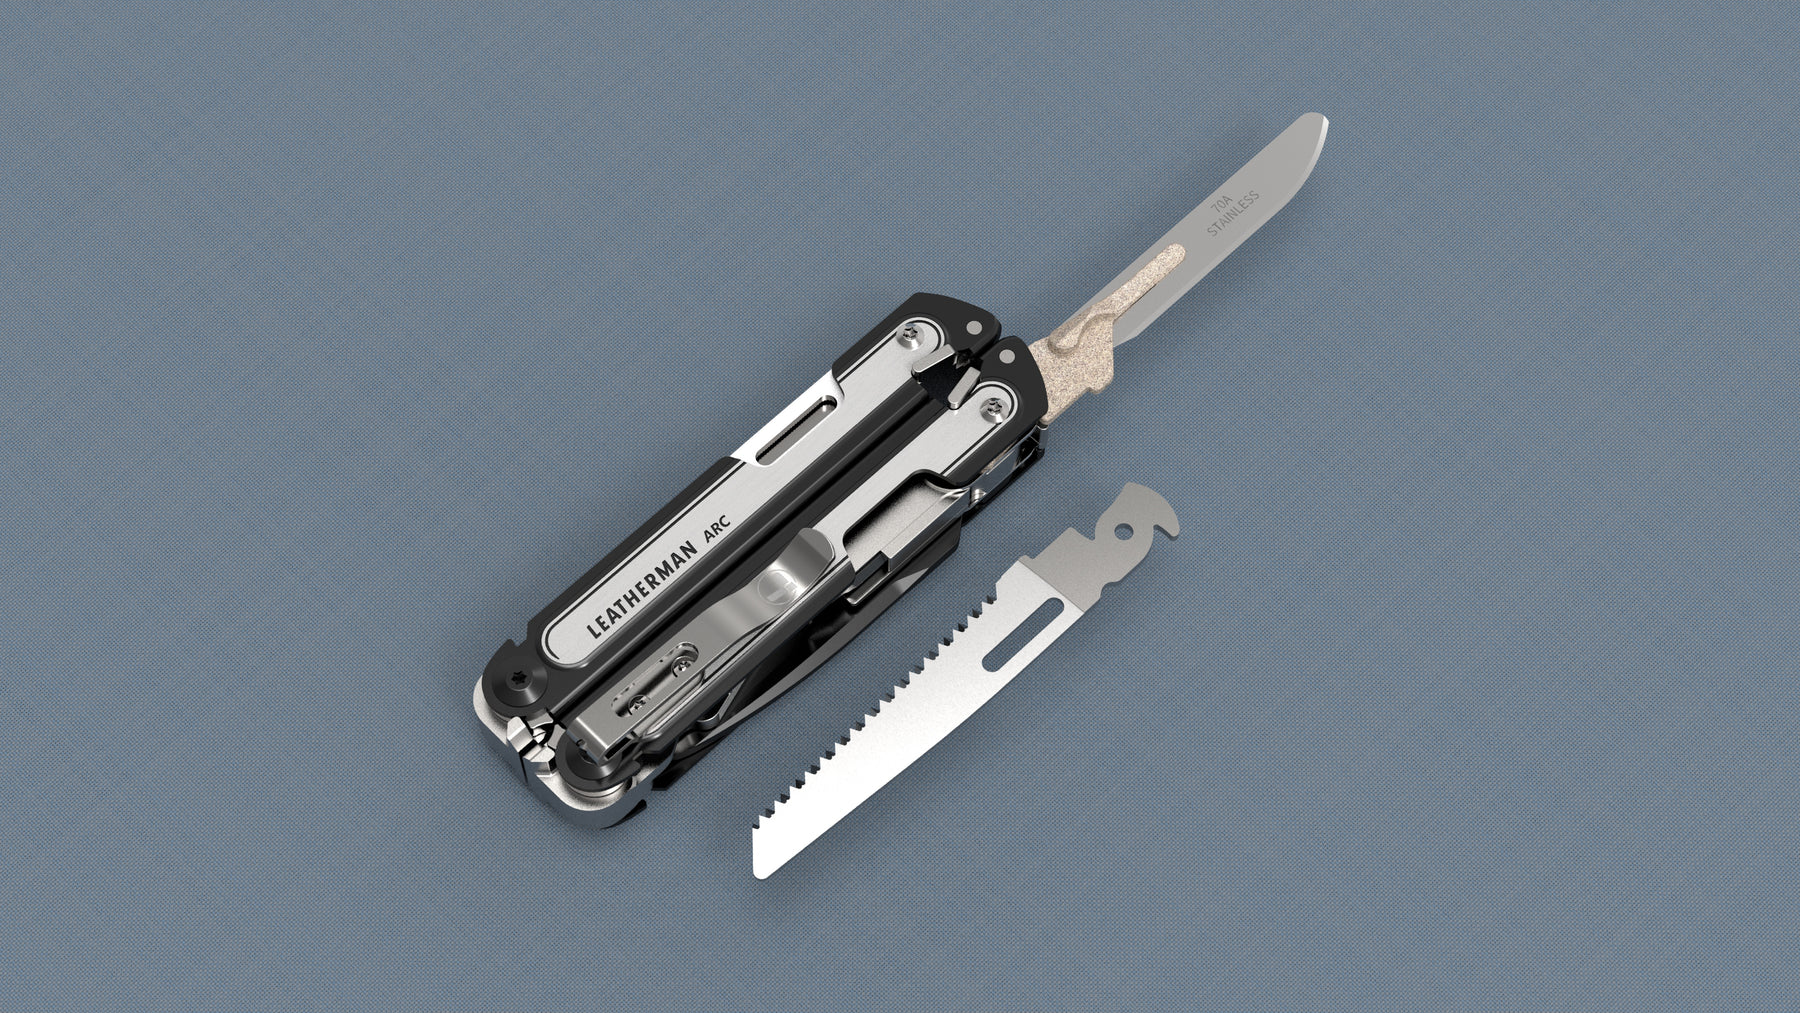
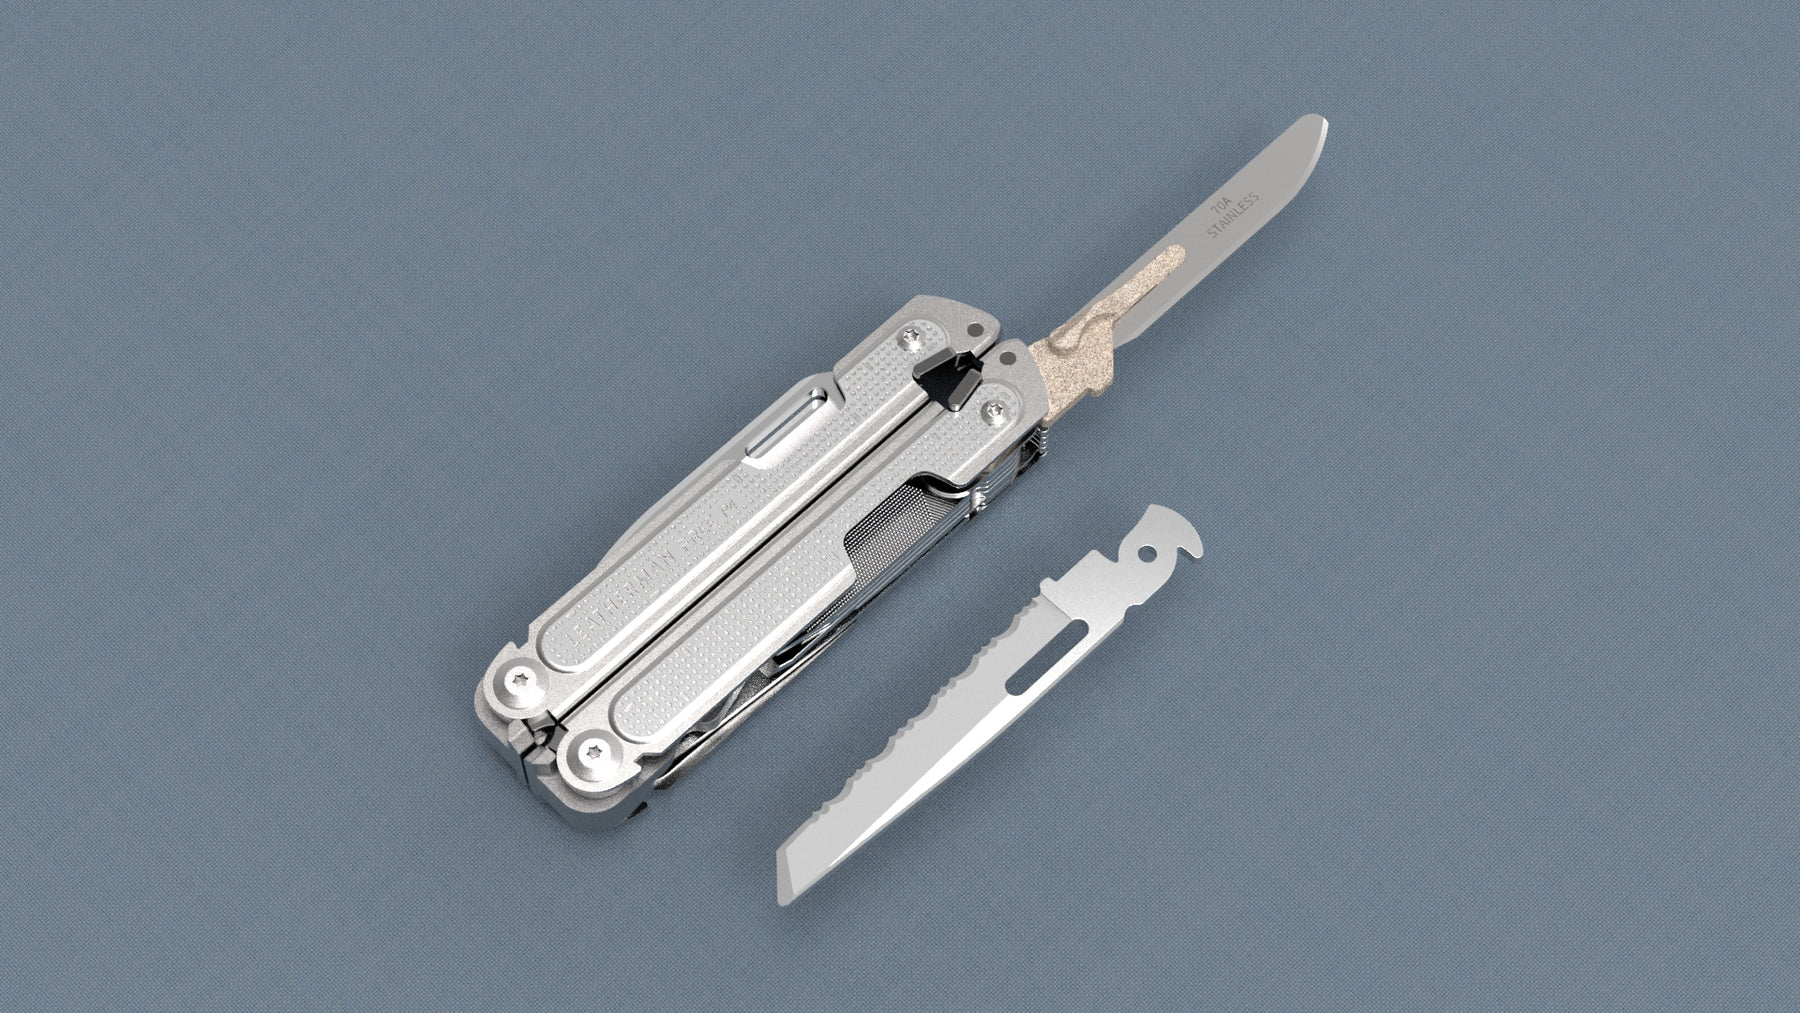
#SilveredBronze
- A silver finish with a slightly bronze tinge.
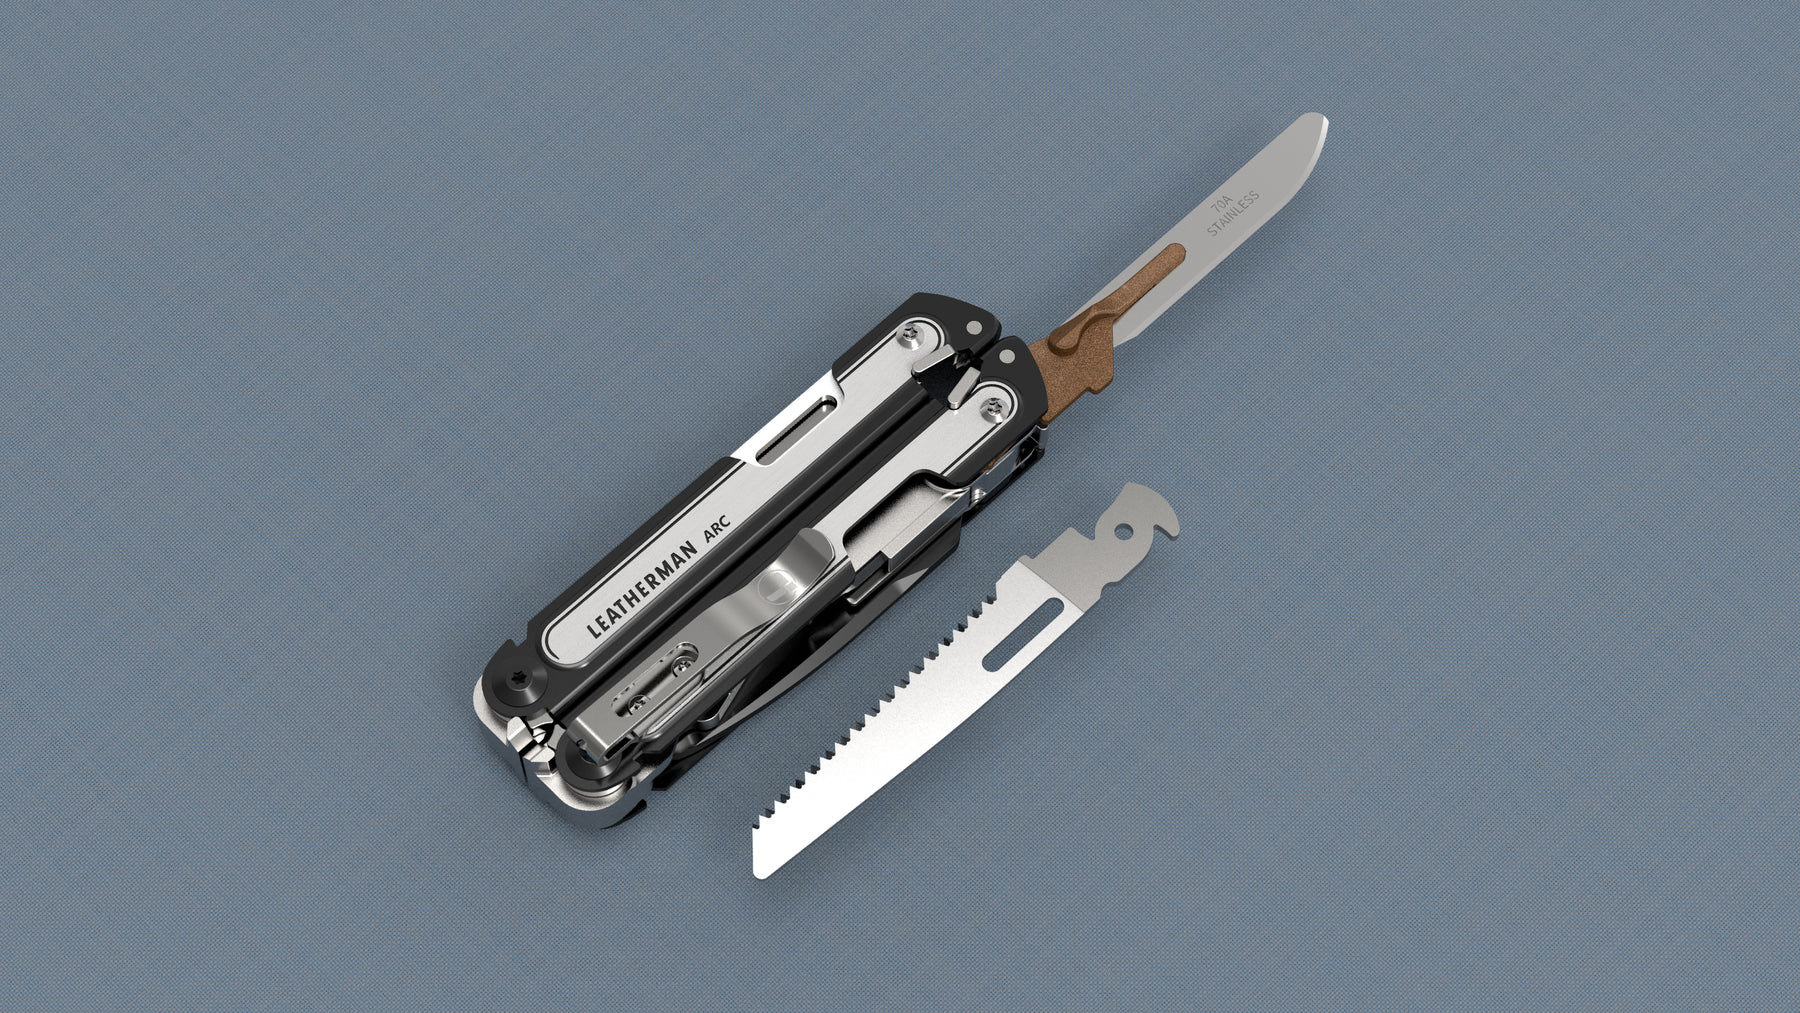
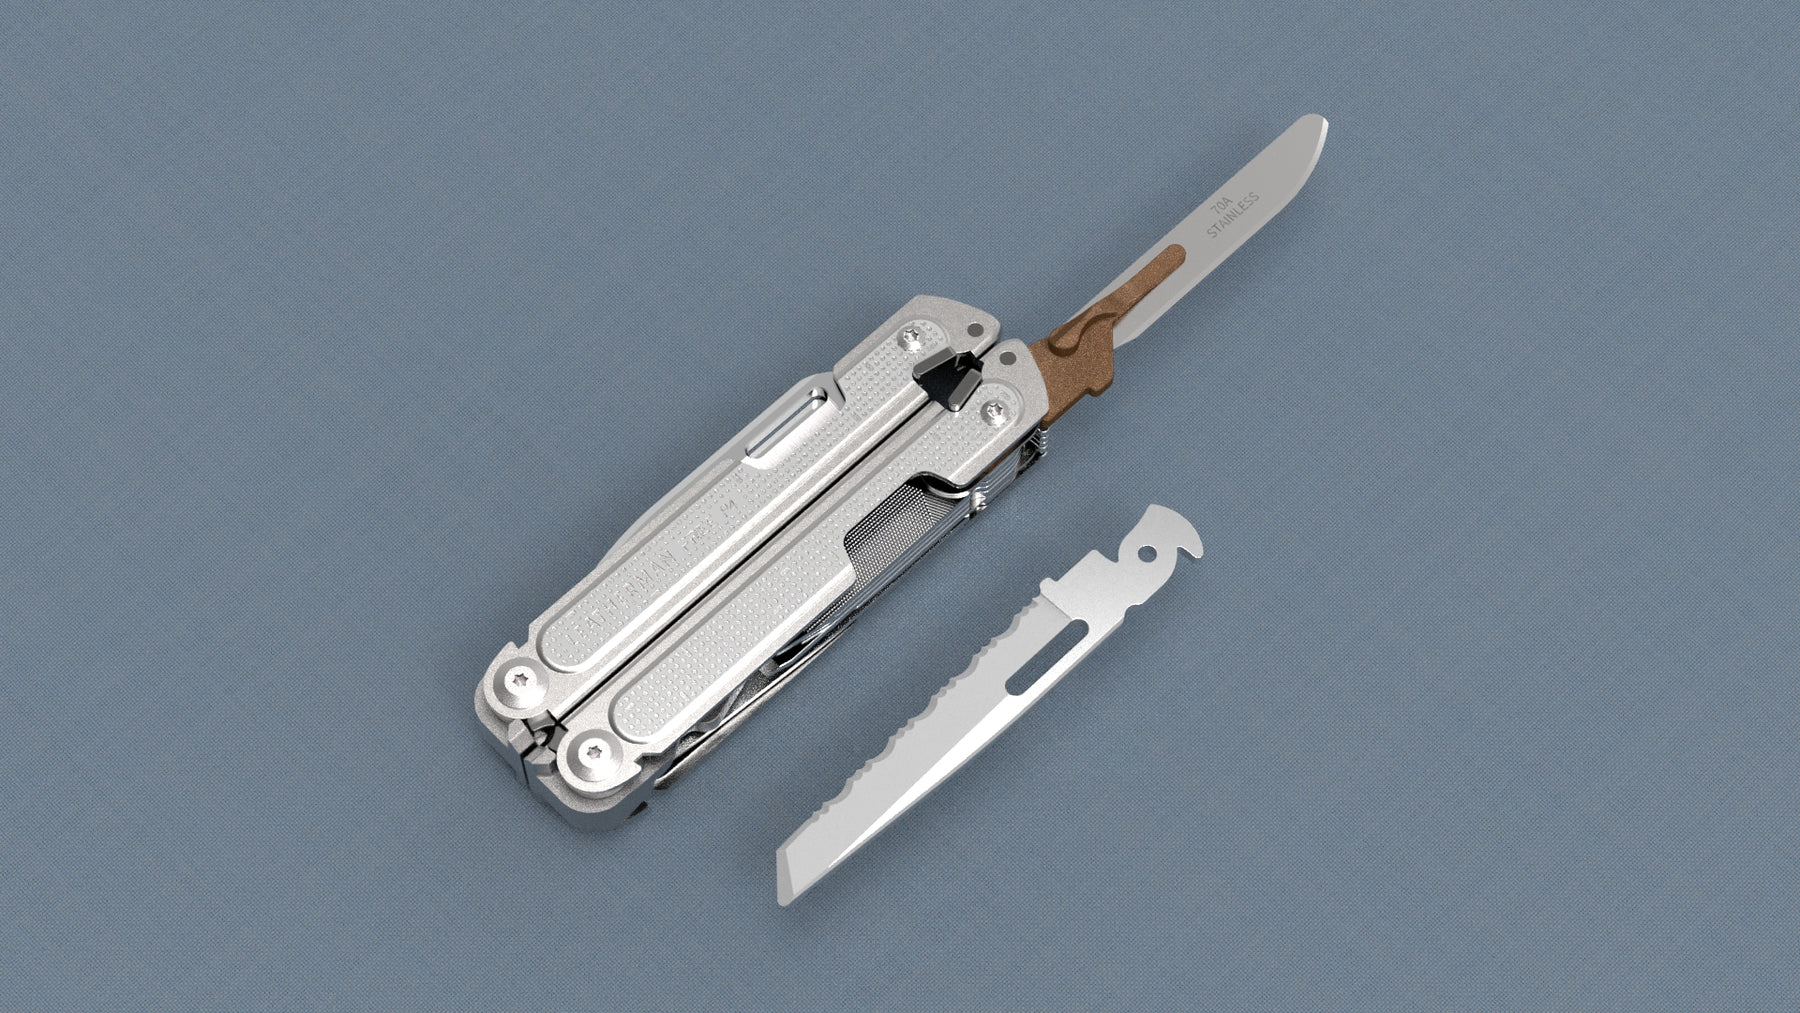
#Bronze
- The natural bronze finish
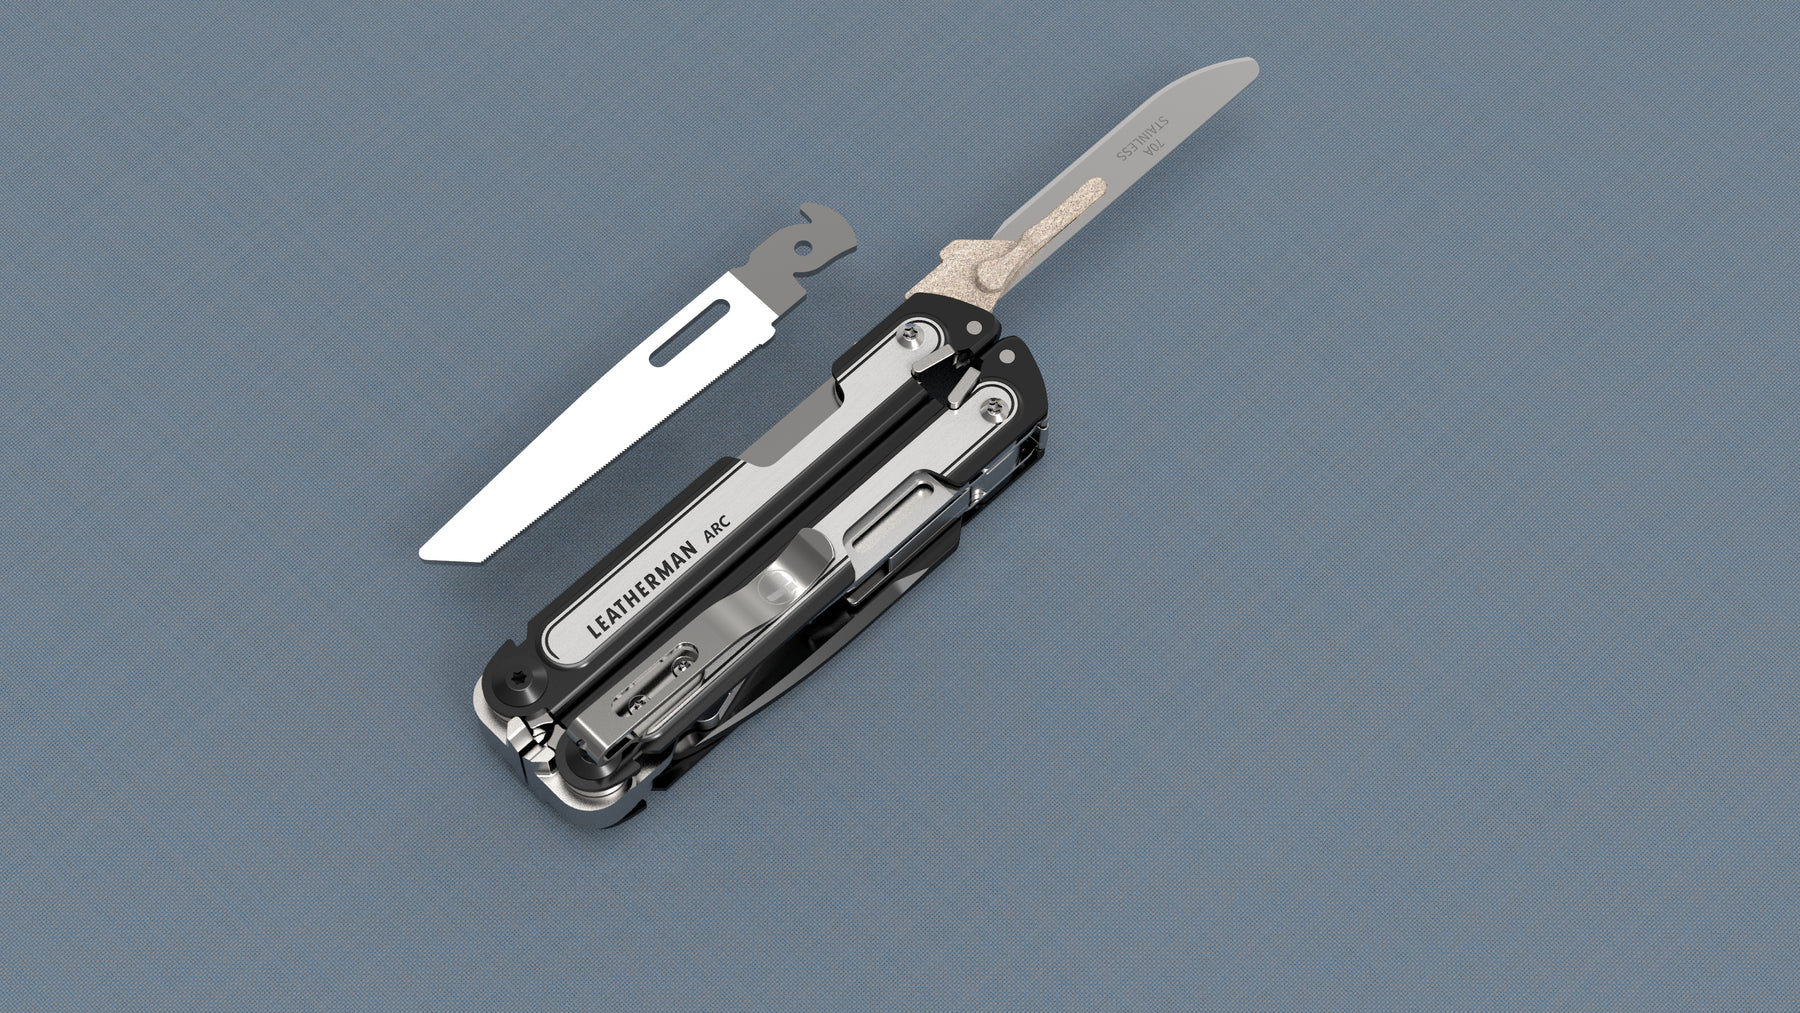
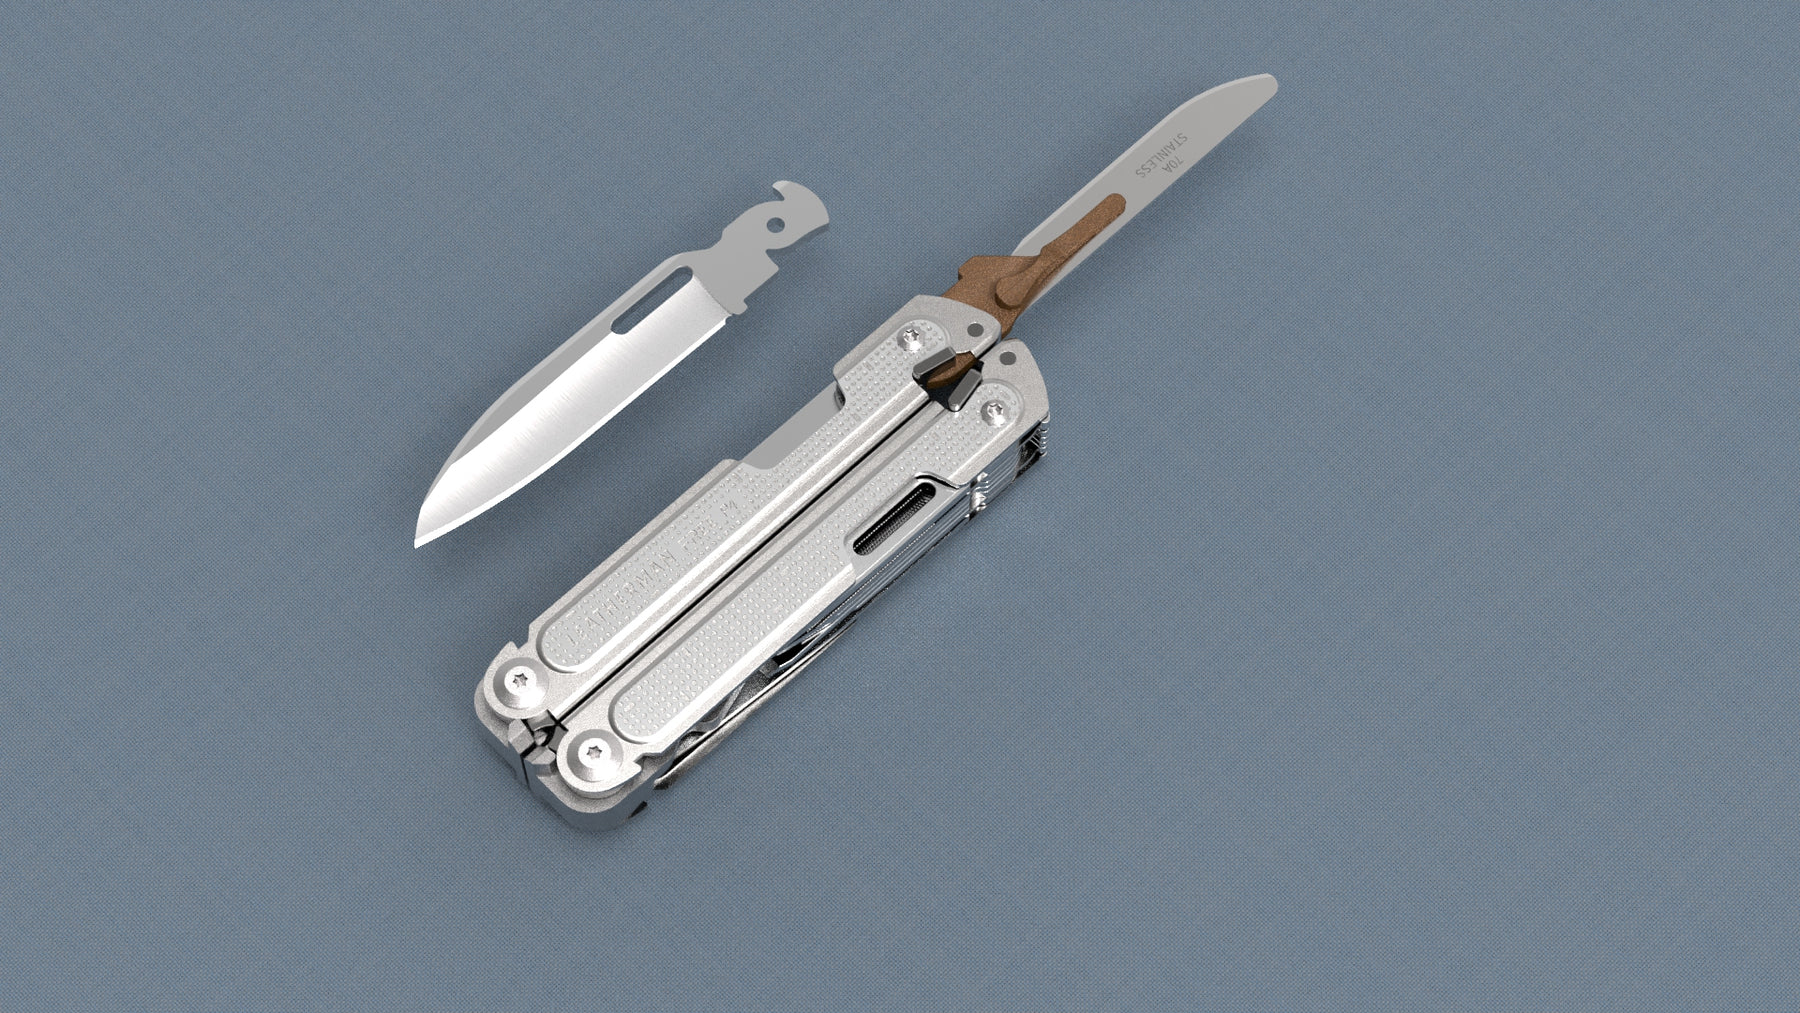
#BlackenedBronze
- A near black finish
- Worn areas will patina to a bronze finish with use.
Common Features:
- Holds large scalpel blades which fit to a #4 handle profile.
- The blade can be folded into the tool just like the regular blades.
- Replaceable blades allows to exchange a dull blade for a fresh sharp blade anytime. (Blades are not included.)
- Built-in thumb tab.
- Available in three finishes:
- Select "Silvered Bronze" for the closest fit to the silver tools.
- Select "Bronze" for a fully bronze color.
- Select "Blackened Bronze" for a black finish with a bronze patina.
- See this page for an image of all three side by side
Design:
This is another customer requested product. Designed in collaboration with fellow Multitool.org user: Metro Grade Goods. Please visit his shop if you would like a Scalpel holder or other tools such as the Leatherman Charge. Details on the Multitool.org design thread.
Compatible Scalpel Blades:
ARC, FREE P4, Garage 005, FREE P2
Scalpel blades are ultra sharp and inexpensive in quantity. You can simply replace the blade when dull. Please dispose of used blades responsibly. Take great care when installing or removing scalpel blades. Use pliers or another tool to grip the blades. Do not use your bare fingers.
I recommend using Havalon 70A replacement blades. These are the longest blades that will fit into the FREE series. The 70A blade is the safest to use as it won't have the sharp tip that can tilt out when the tool is in your pocket.
Other blades that fit the #4 handle profile can also work, but are not long enough to lock in place while using the pliers. For an example of what I am talking about: Try tilting the scissors on your tool while the pliers are deployed, and then the main blade. The main blade is blocked by a hard stop built into the pliers.
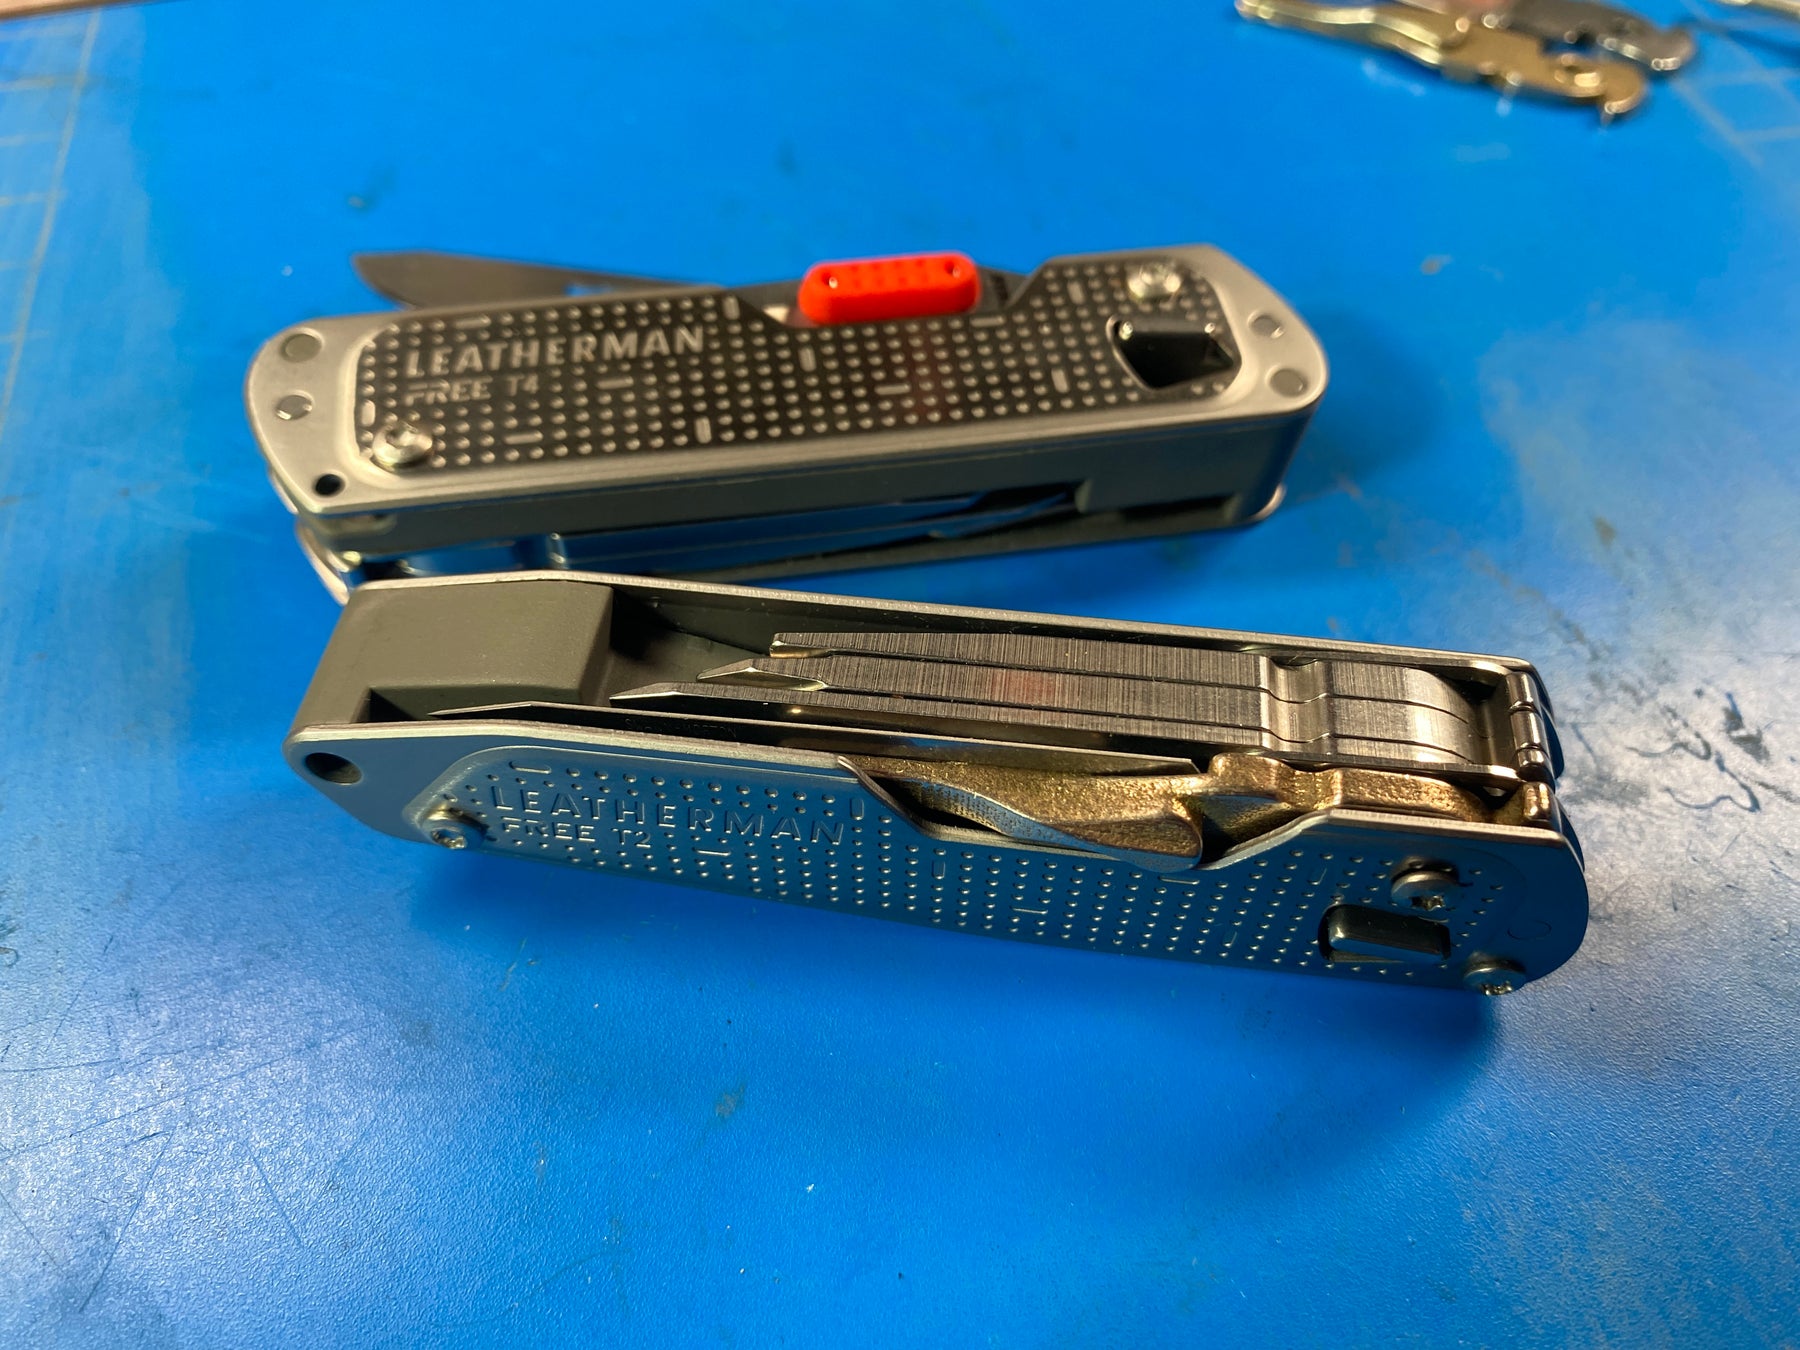
FREE T2:
#26 blades fit the FREE T2 perfectly.
FREE T4:
Either #22, and #26 blades have been tested to fit. Will fit any short scalpel blade that fits a #4 handle profile.
Warnings:
Compare to a standard knife: Scalpel blades are ultra-sharp. They dull quickly and are designed to be disposable.
Post Processing:
The part may arrive with some polishing compound in the slot. To clear the slot of debris: Use a thin metal implement to scrape away any debris. I use the back edge of a scalpel to do this. Hold the the blade with pliers not bare fingers!.
You can also gently use a rotary tool with a very thin cutting wheel. (Dremel 0.025" thick wheel recommended). Take care not to remove too much Color as that will effect the fit of the blade.
The mounting hole may require reaming using a drill bit capable of handling stainless steel. A 1/8" or 3.2mm drill bit may be used for this task.
Installation:
The tool must be taken apart to install this modification. Any warranty concerns are entirely up to the user.
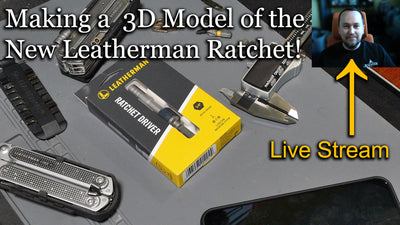
For a live demonstration see the video at the top of this page. The tool must be taken apart to install this modification.
- You will need two Torx T9 bits to remove the screws holding the tool together.
- The screws need to be loosened by holding one side with a bit, and turning the other side.
- The screws are secured using thread-locking compound, and gentle heat may be required to loosen the compound on some tools.
- Care should be taken to open the tool on a clean surface.
- Remove the blade you plan on replacing.
- Also remove the spacer washer that sits between the blade and the outer scale.
- Install the Scalpel holder. (Without a blade pre-attached)
- Silicone based lubricant may be added during assembly.
- Re-install the post and screws. The tightness of the tool will depend on the amount of torque you apply during reassembly.
- Before installing a blade: Ensure the scalpel holder fully locks in the open position, if for some reason it doesn't fully lock, you may need to file away a small amount from the knee that catches on the latch mechanism.
- Take great care when installing or removing scalpel blades. Use pliers or another tool to grip the blades. Do not use your bare fingers.
What am I getting / not getting?:
Included:
● One (1x) 3D printed Scalpel Holder
Not included:
● Scalpel Blades Tools or other accessories.
● Accessories are shown in the images only as example use case only.
About the material:
- 60% 420 Stainless Steel
- 40% Bronze
- 90% Copper
- 10% Tin
Printed by binding stainless steel powder into the shape of the object. The part is then placed in a 1100°C over and infused with bronze. The part is then sintered into a solid metal part.
The part is then polished. Some burrs may escape polishing, especially on internal areas. Holes may require reaming with a drill bit.
If your part has an excessive amount of stuck powder, or filled holes, please contact Shapeways customer service with a photo of your part for a replacement.
The bronze steel amalgam comes in three finishes:
- Silver Bronze
- It can vary a bit from part to part. Sometimes is it a lighter silvery color, sometimes a slightly brass looking color
- The finish does remain and won't wear off
- Bronze
- This is a more solid looking brown/bronze finish
- The finish does remain and won't wear off
- Blackened Bronze
- This is a matte black surface finish
- It will rub off in wear areas leaving a patina like finish over time